WordPress templates make it easier for developers to create dynamic content and apply a consistent style across multiple posts or pages. While this is a very useful feature, it’s been skipped over by many users due to the required degree of coding.
However, this is no longer the case. The new Elementor Theme Builder includes the ability to create custom single post templates without doing any coding whatsoever. This opens up for new possibilities for every user, regardless of their coding expertise.
In this article, we’ll introduce you to single post templates and show you how you can create one yourself. We’ll cover both the standard, code-based method, and then demonstrate how you can use the Elementor Theme Builder to create a custom single post template without any coding at all. Let’s get started!
An Introduction to Single Post Templates
In a nutshell, you can use WordPress templates to apply a set of styles and content to a post or page. Post templates, in particular, enable you to create different designs you can apply to certain posts, without having to recreate the styling and format every time. It’s similar to how a stencil enables you to draw a certain shape over and over by giving you an outline you can fill with new content each time.
Depending on your site, this could be used in a variety of ways. You could use different templates for varying types of post content that require a specific layout. For example, a music site might use different templates for review posts and news articles. You could also use it to create a different template for each post author, or for featured content, to give just two more examples.
If this sounds like an amazingly useful feature, you’re not wrong! However, it’s one that’s been somewhat neglected by most WordPress users. This is because there’s not been an easy way to create your own custom single post templates without the need to do some coding, which can turn off many users with limited experience.
However, this is no longer a necessity, as there’s now a way to accomplish the same goal with no coding whatsoever. The rest of this article will be dedicated to showing you the different ways you can create a custom single post template.
How to Create a Custom Single Post Template Manually
The old school way of creating a post template is by cracking open your favorite text editor and doing it from scratch. However, this method will require you to be familiar with WordPress development. Naturally, this is a barrier for many, but having the expertise gives you more or less complete freedom to tailor the template to your satisfaction.
Before you proceed, you should make sure you’re using a child theme. This will enable you to edit your current theme without potentially losing those changes when you carry out an update to it.
Next, you’ll need to create a new file, which will form the basis of your template. For now, name it new-template.php and paste in the following code:
This defines your file as a post template, and fetch the header content using a hook. Of course, you should change the Template Name to anything you’d prefer. While you could upload the template to your site as-is, there’s no other content yet, so let’s add some.
If you don’t want to start from scratch, you can copy the contents of your theme’s existing single.php template file. You can do this by accessing your WordPress site using Secure Shell (SSH) or Secure File Transfer Protocol (SFTP) – we prefer using an open-source client such as FileZilla. The file you’re looking for will be in your child theme’s folder:
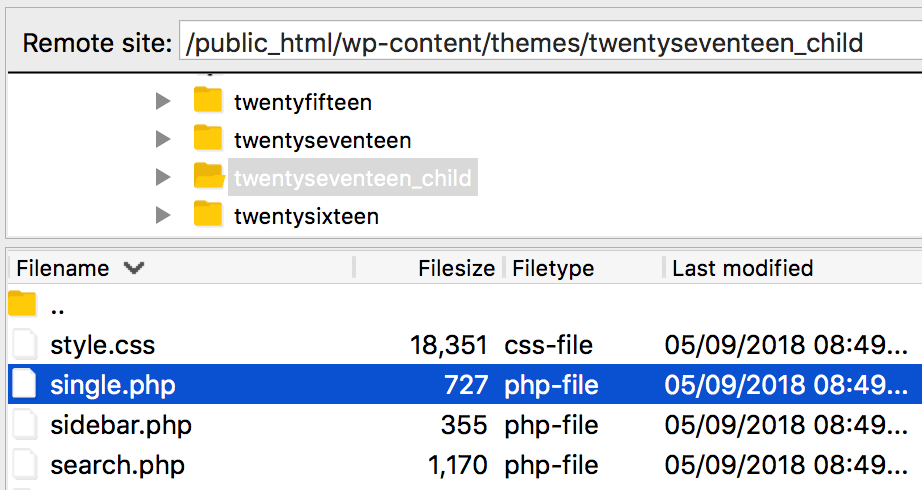
Open single.php and copy all of the contents below get_header(); ?>. This code determines how single posts appear in your current theme, so copy and paste it into new-template.php, after get_header(); ?>:
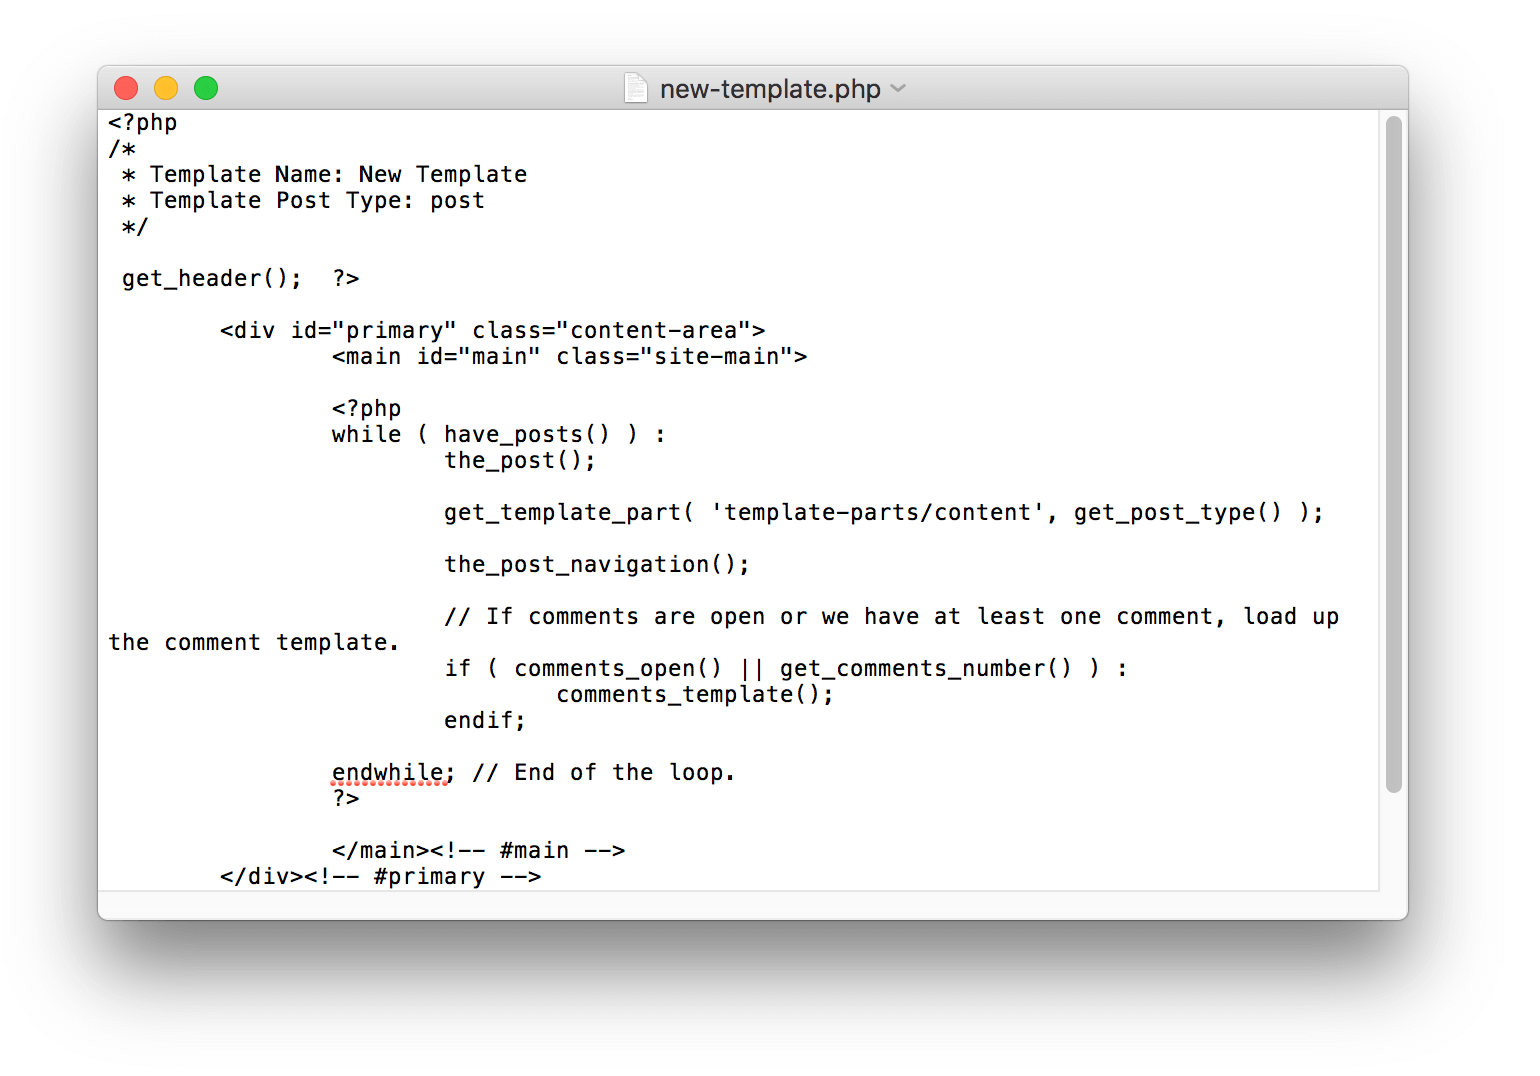
At this point, you’re free to add any styling or other functionality to the template. This is where you’ll need to rely on your own development skills, but you can also refer to the WordPress Theme Handbook and this guide by WPBeginner for more information.
When you’ve finished your template, it’s time to upload it. Once again, you’ll need to connect via SSH or SFTP. Return to your child theme’s folder and add your new-template.php file within:
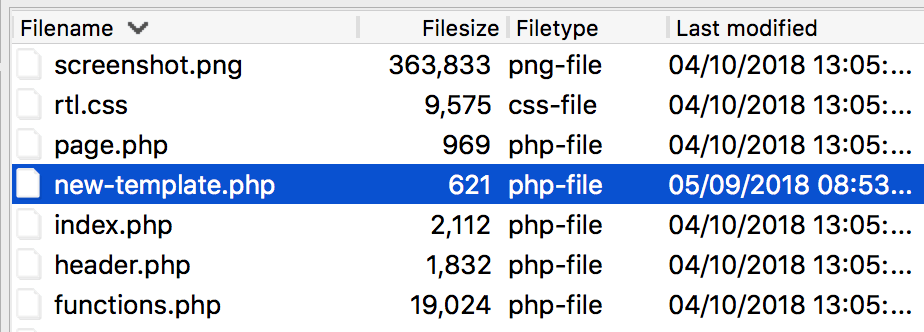
This will add your post template to the theme, which you can test by navigating to a post or page within WordPress and looking for a new option within the Post Attributes metabox:
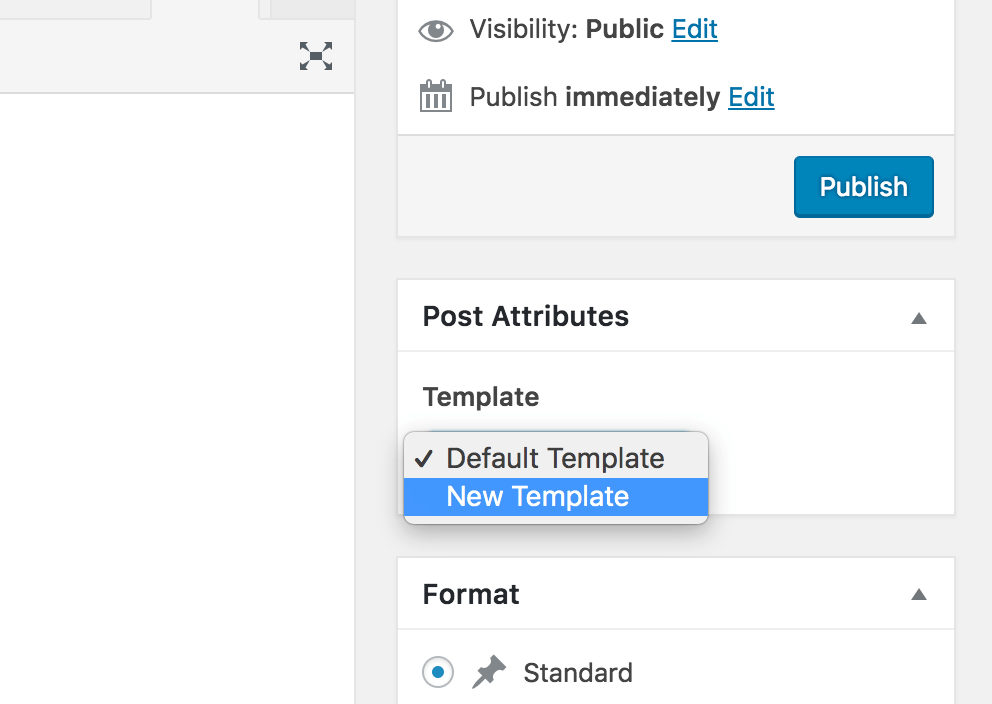
With that, you’ve successfully created a post template manually!
Introducing the Elementor Pro Plugin
Next up, we’re going to look at how you can create a custom single post template yourself without coding. To do this, we’ll be using the very popular Elementor Pro. This is a premium version of the free Elementor page builder plugin for WordPress and is a drag-and-drop builder that enables you to update your theme using a live editor. Using it is a super easy way to quickly create a unique, professional look for your WordPress website.
The Pro edition ramps this up with additional features, one of which is the recently added Theme Builder. You can use this to create your own footers, headers, and also templates. We’ll be looking much closer at this later.
Key Features
- Easy to use for beginners, with extensive options for advanced designers.
- Uses an instant drag-and-drop interface that updates immediately when you make a change.
- Enables you to create a responsive website for mobile devices.
- Includes a large number of assets and templates to use.
Price: While the standard plugin is free, Elementor Pro (which features the Theme Builder) starts at $49.
How to Create a Single Post Template With Elementor Pro

We’re now going to create a custom template for single posts using Elementor Pro. You’ll, therefore, need to ensure you have both the Elementor plugin and the Elementor Pro extension installed and activated on your site.
First, you need to access Elementor > My Templates within WordPress. This is where you’ll find your custom templates, but will be empty initially:

Click Add New Template to get started, where you’ll first be asked what type of template you want to create. Since ours will be a single post template, select Single. You can also give your template a name here, but this is optional:
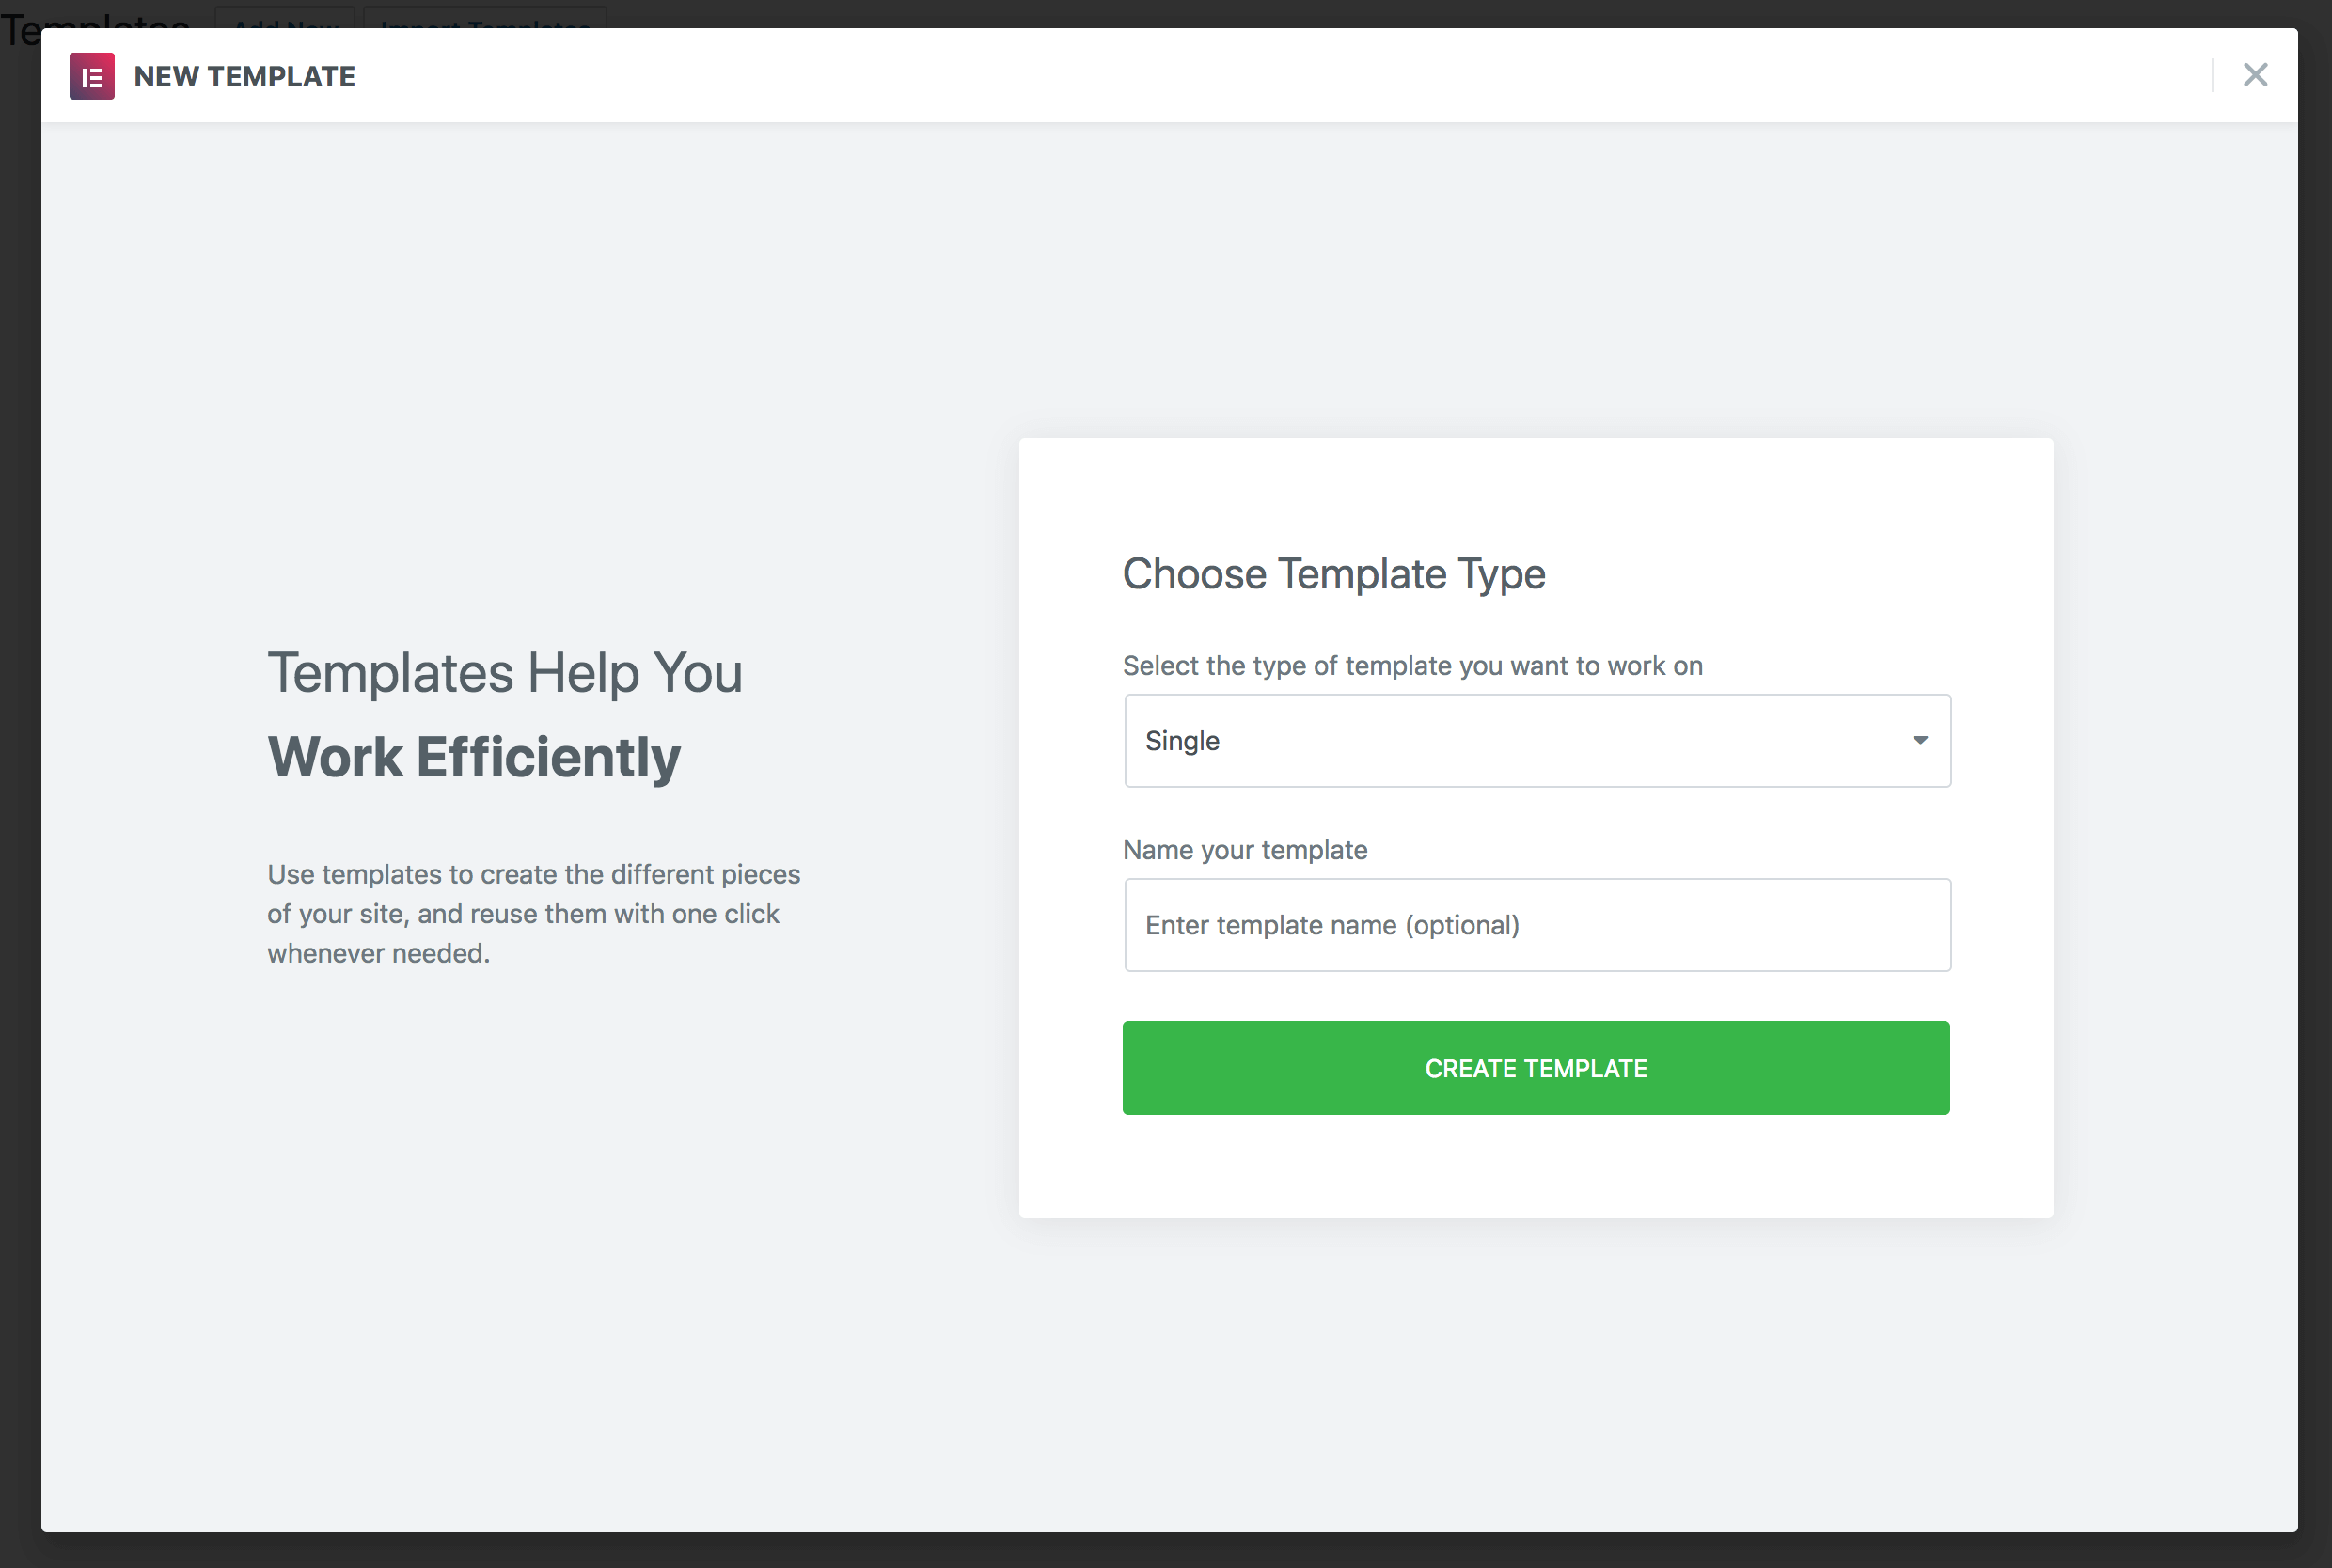
Click Create Template and the Elementor Theme Builder will open, giving you the option to working with an existing template:
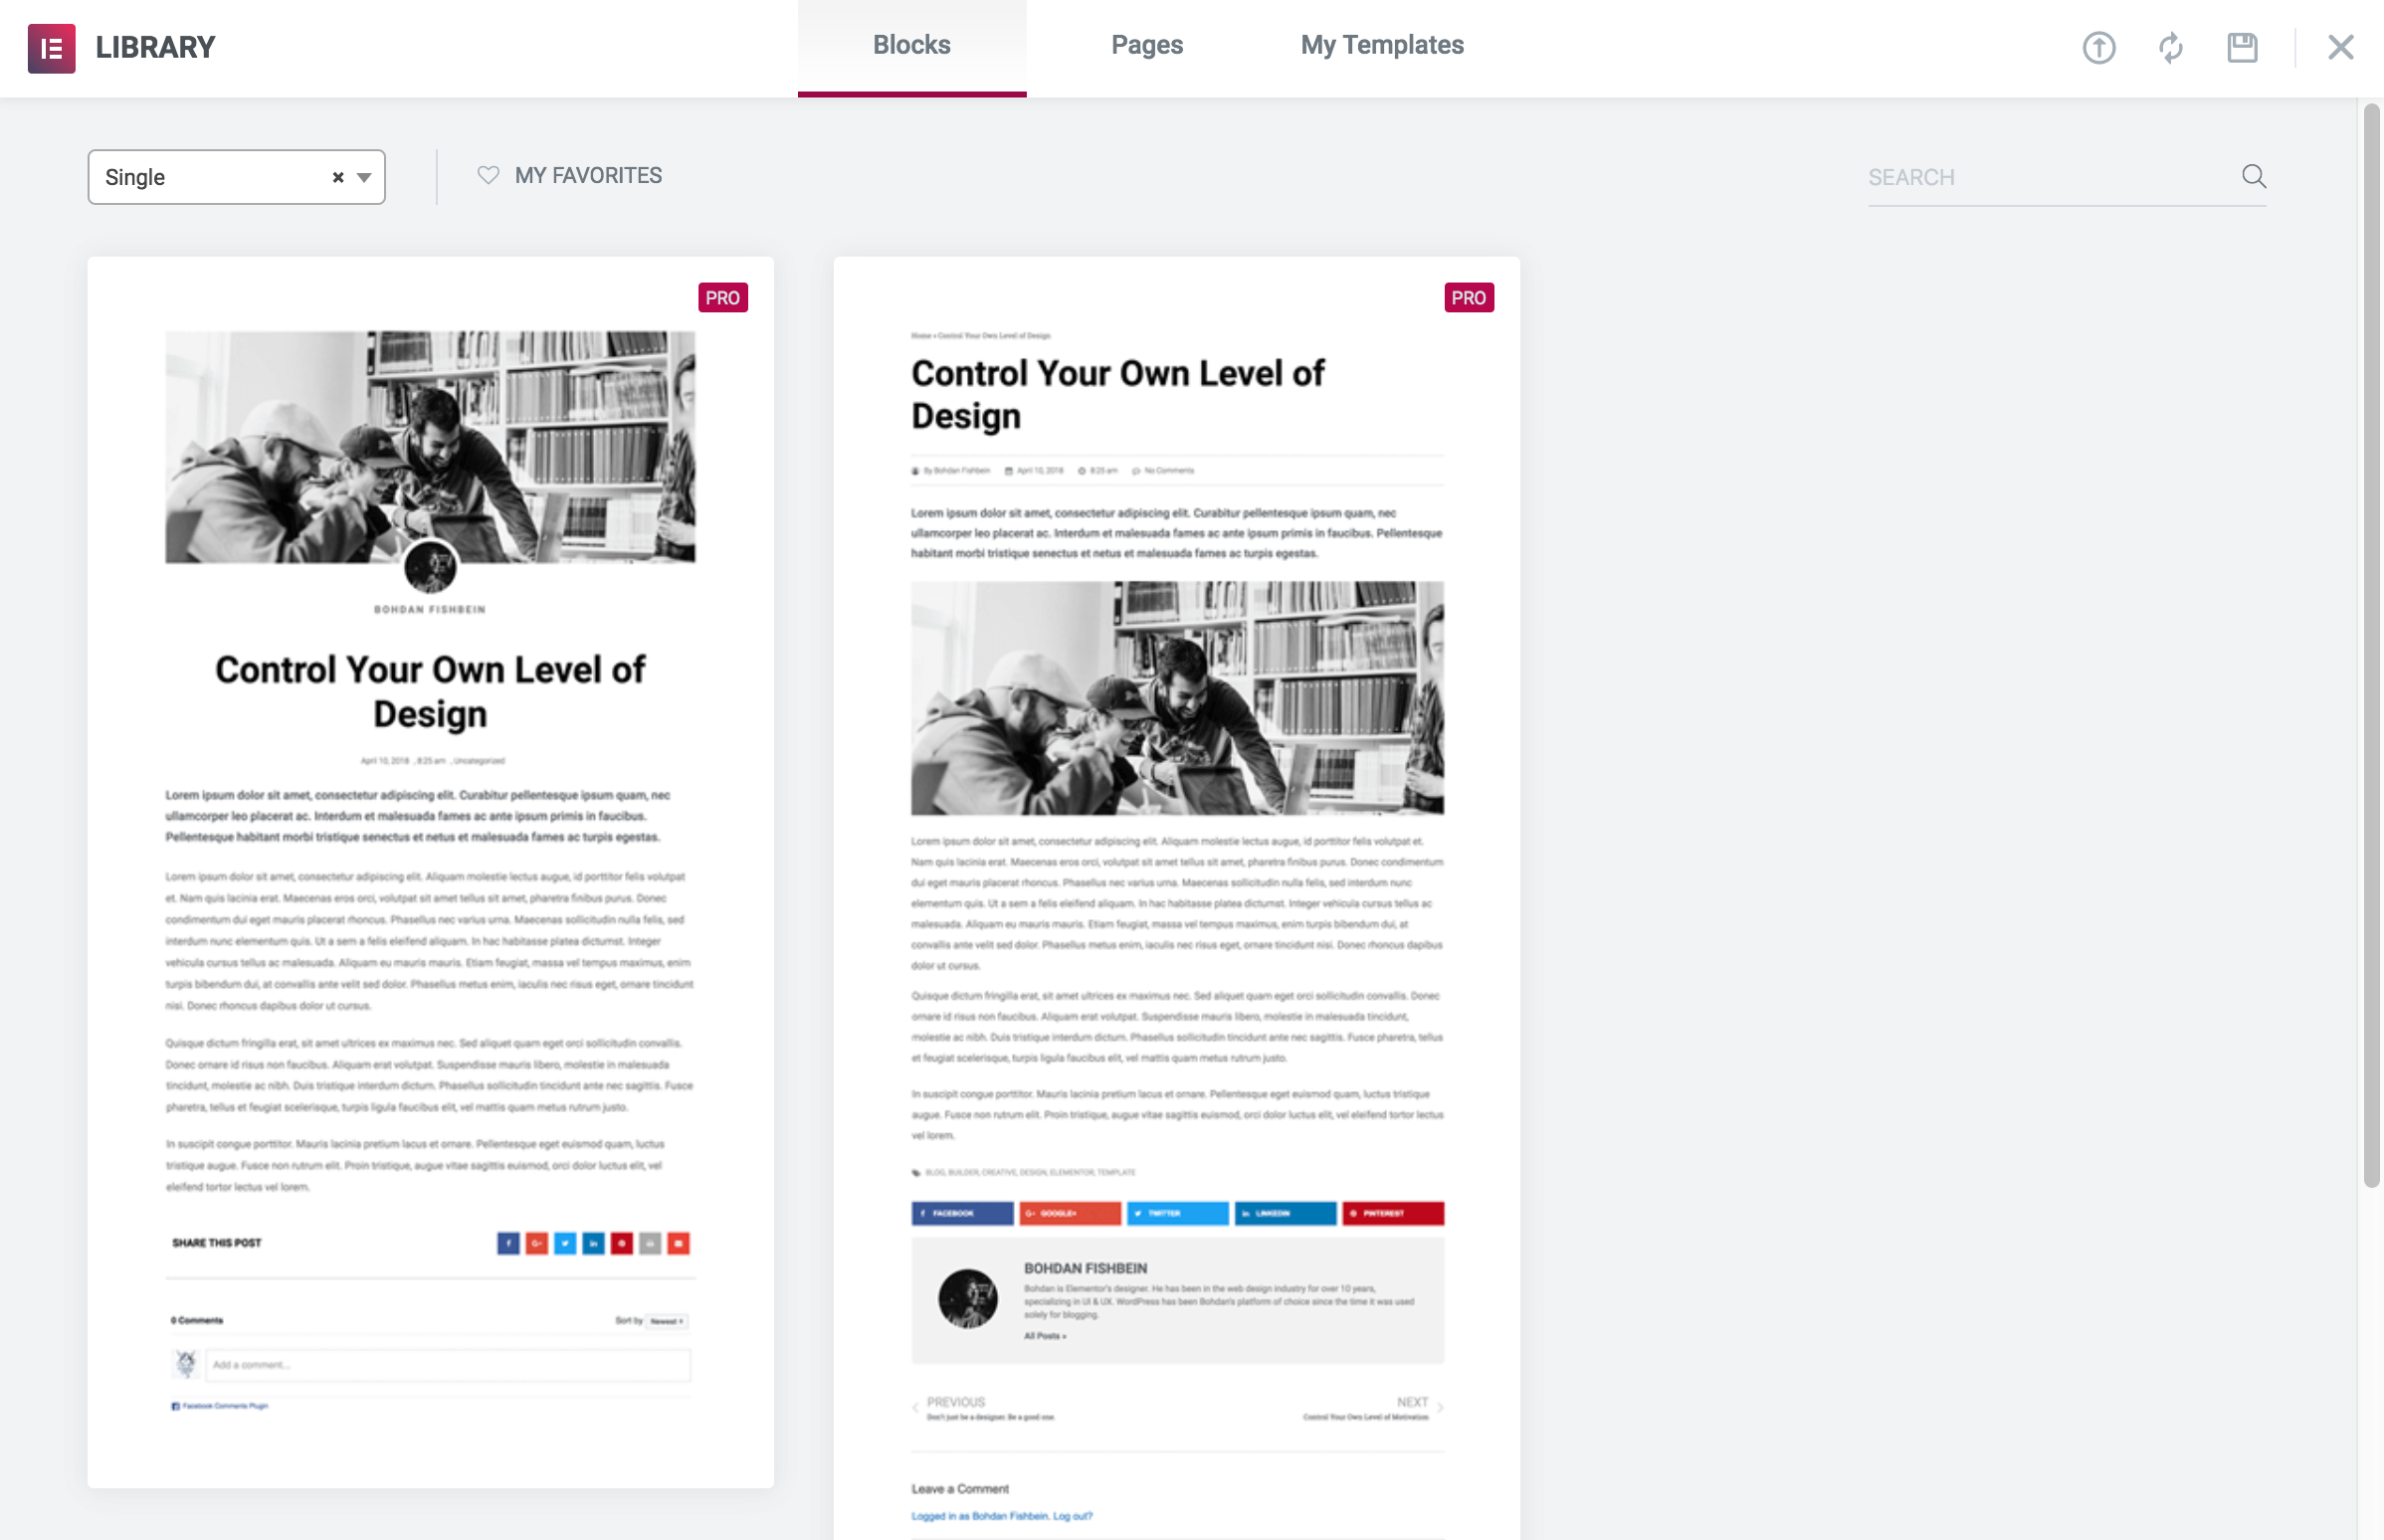
You can choose to use one of these as a base for your own, or close this pop-up to create something from scratch. For this example, we’ll use one of the post templates, which we’ll add by clicking the Insert link that appears underneath its thumbnail when we hover over it. This opens the theme builder with the selected template:
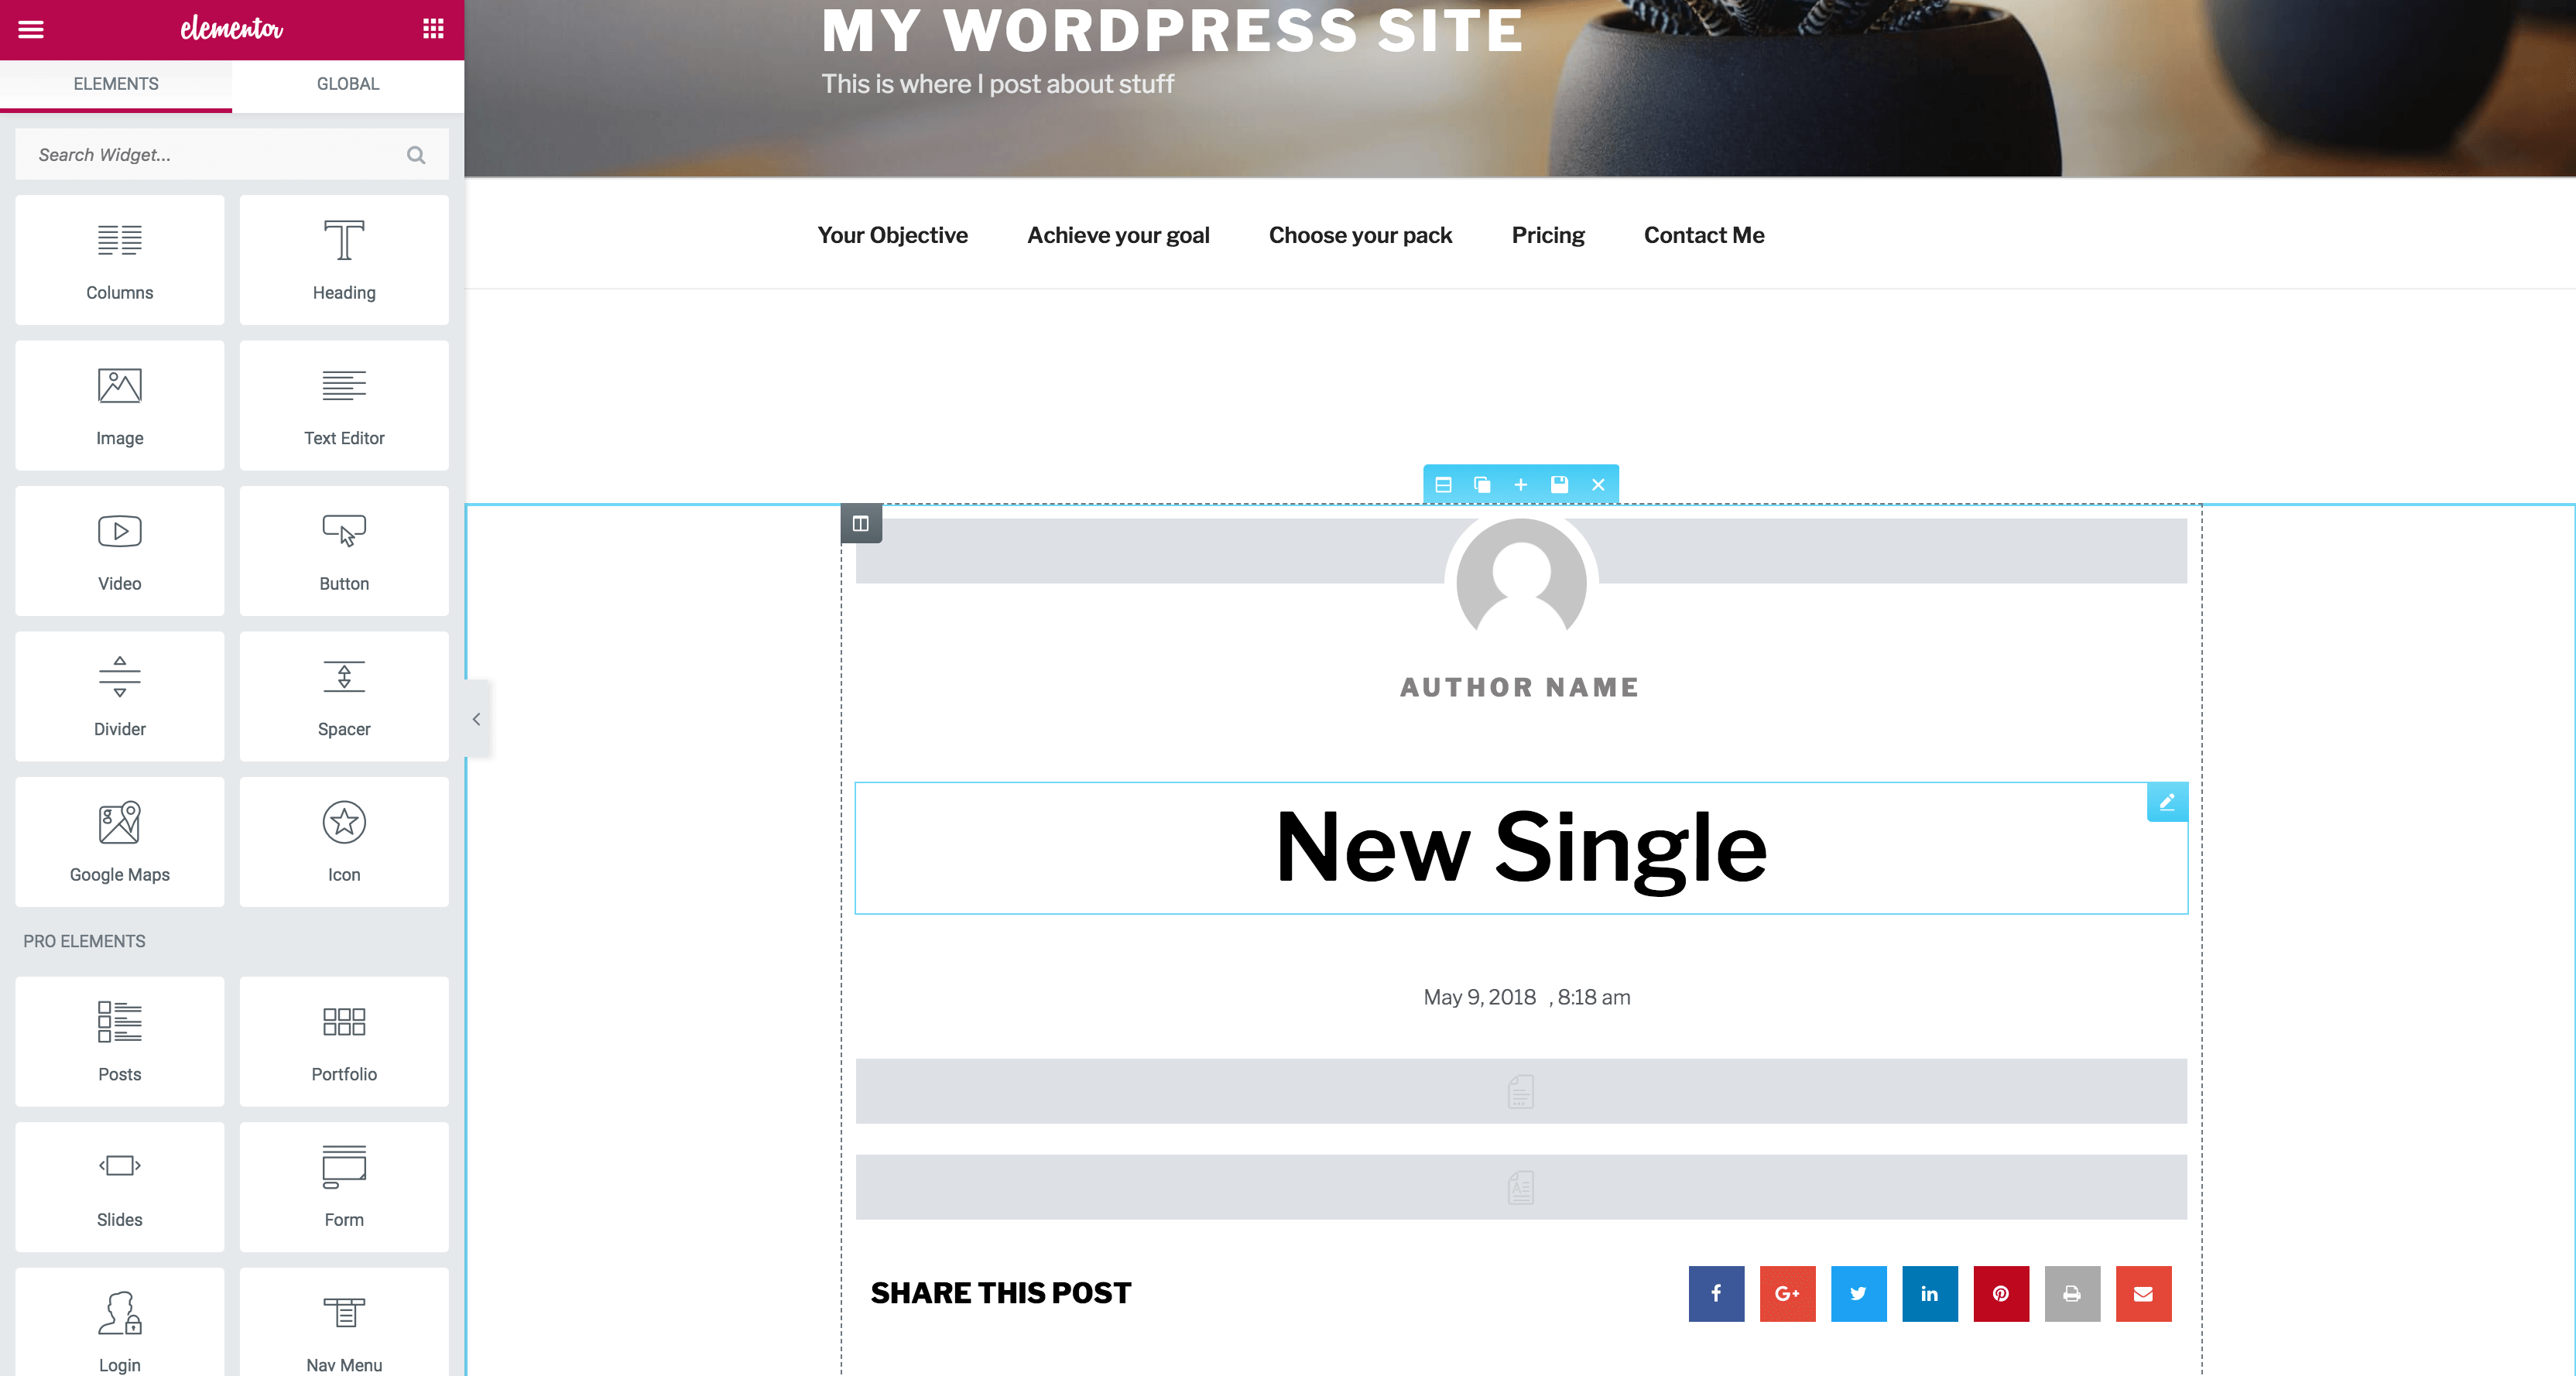
Once here, you have total freedom to edit your template. If you’ve not previously worked with Elementor, we recommend taking a moment to familiarize yourself with the basics. However, this is a very intuitive plugin so it shouldn’t take you long to get up to speed. You’ll find widgets and content in the left-hand menu, which you can drag-and-drop into the template:
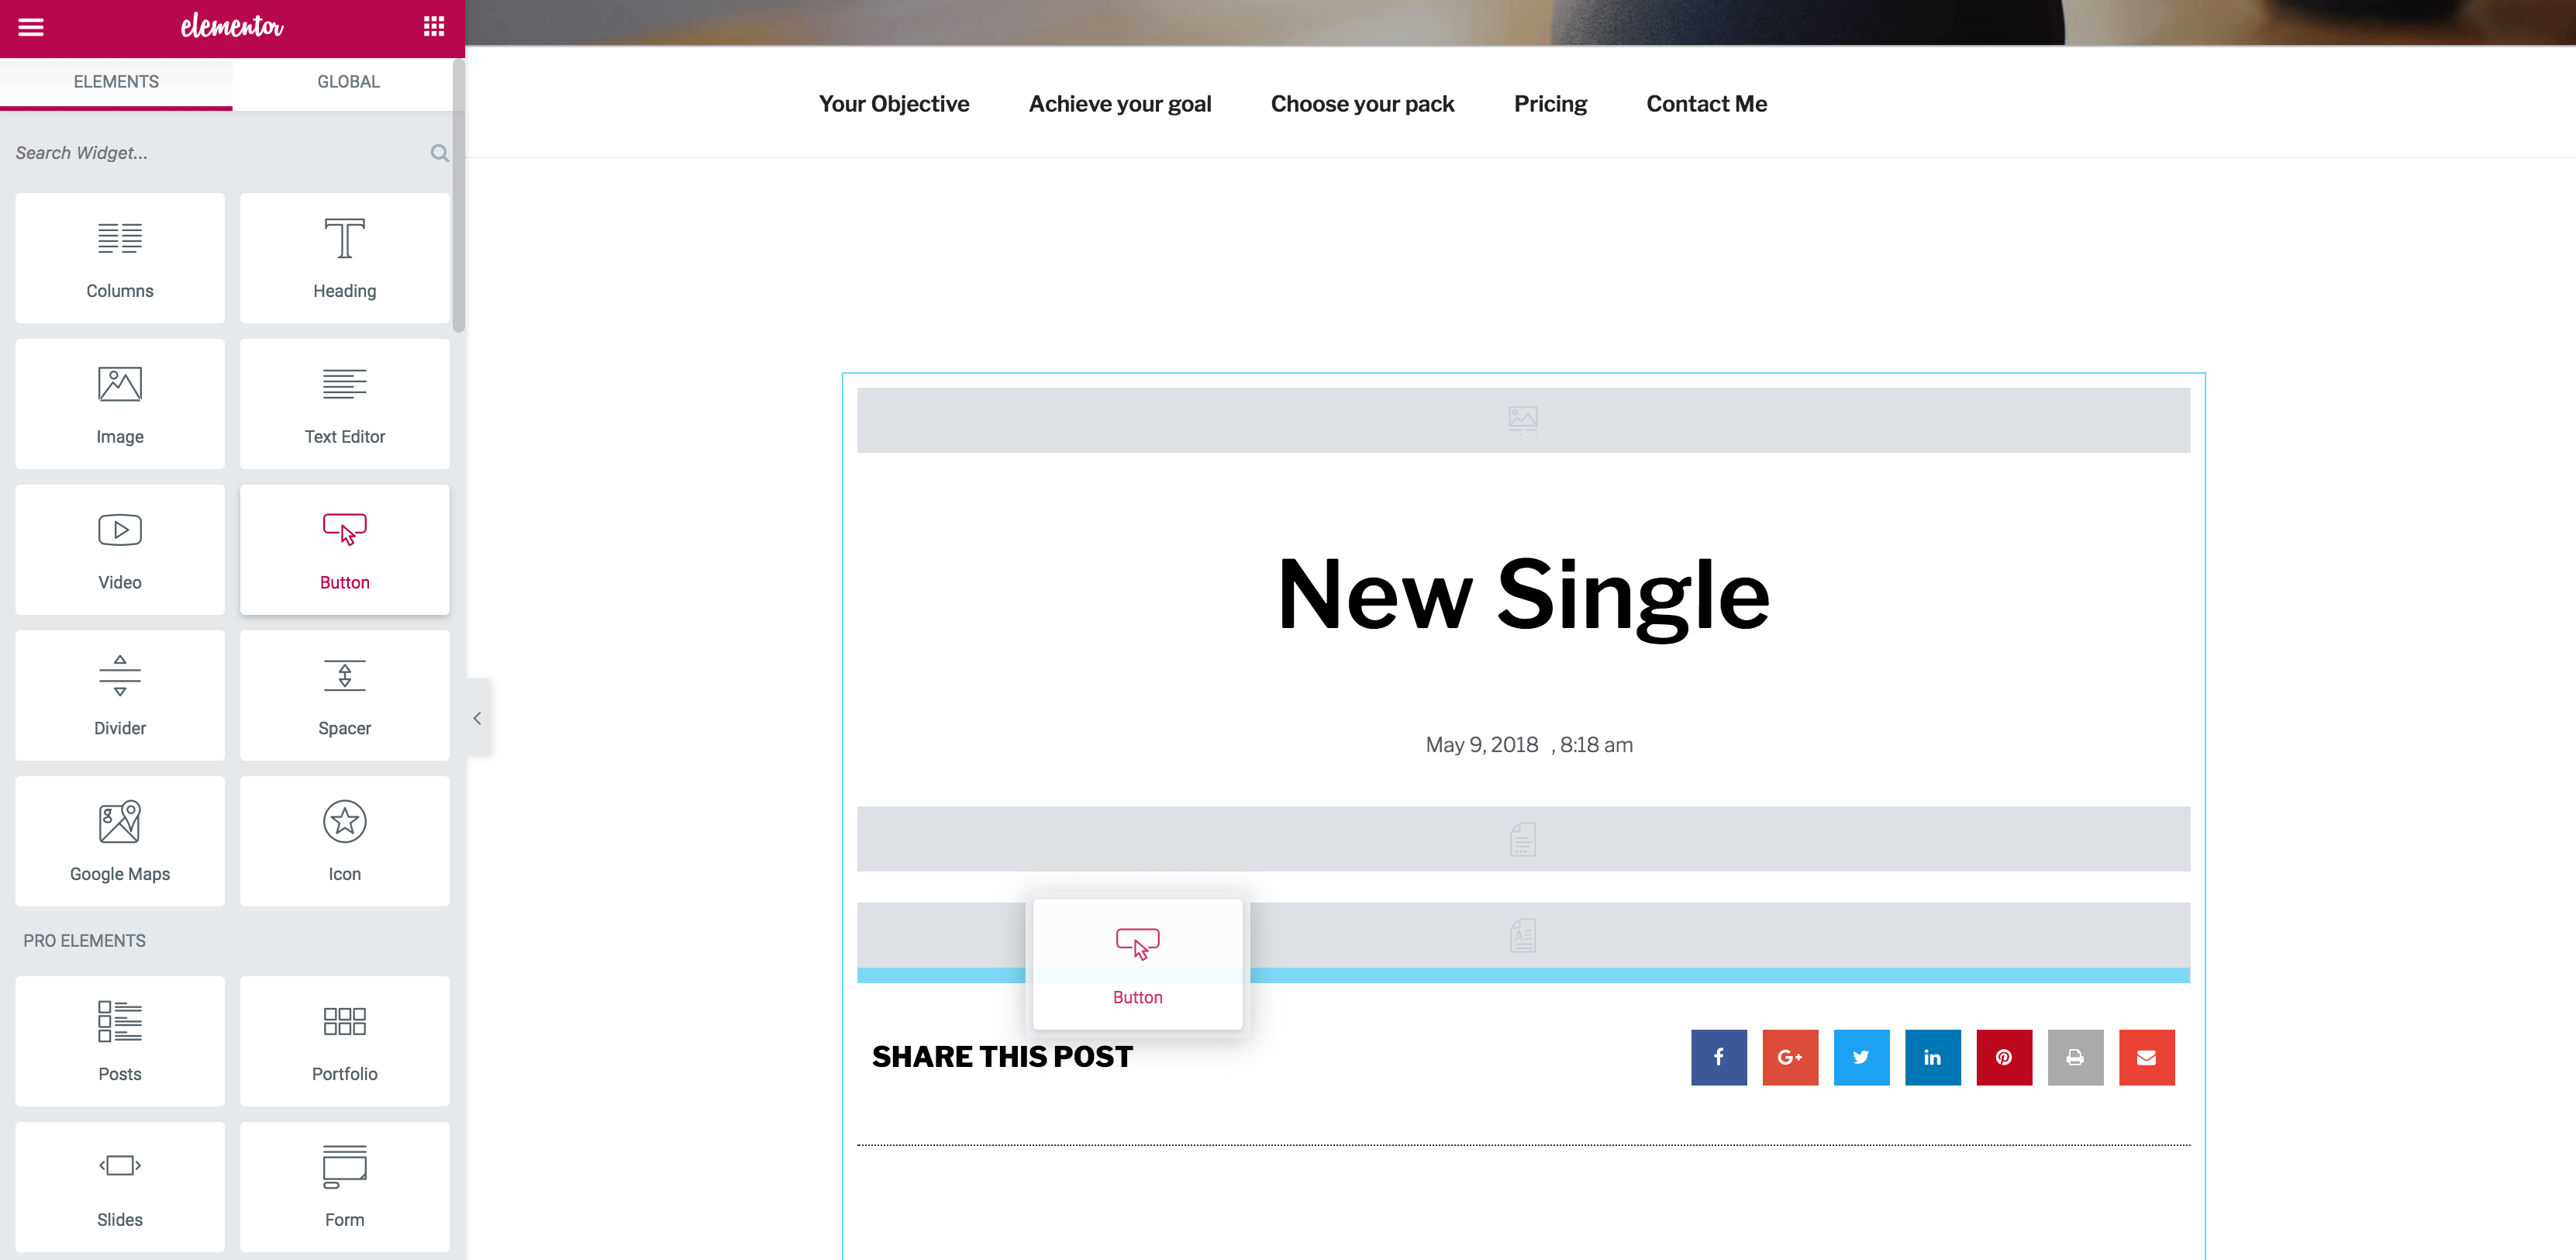
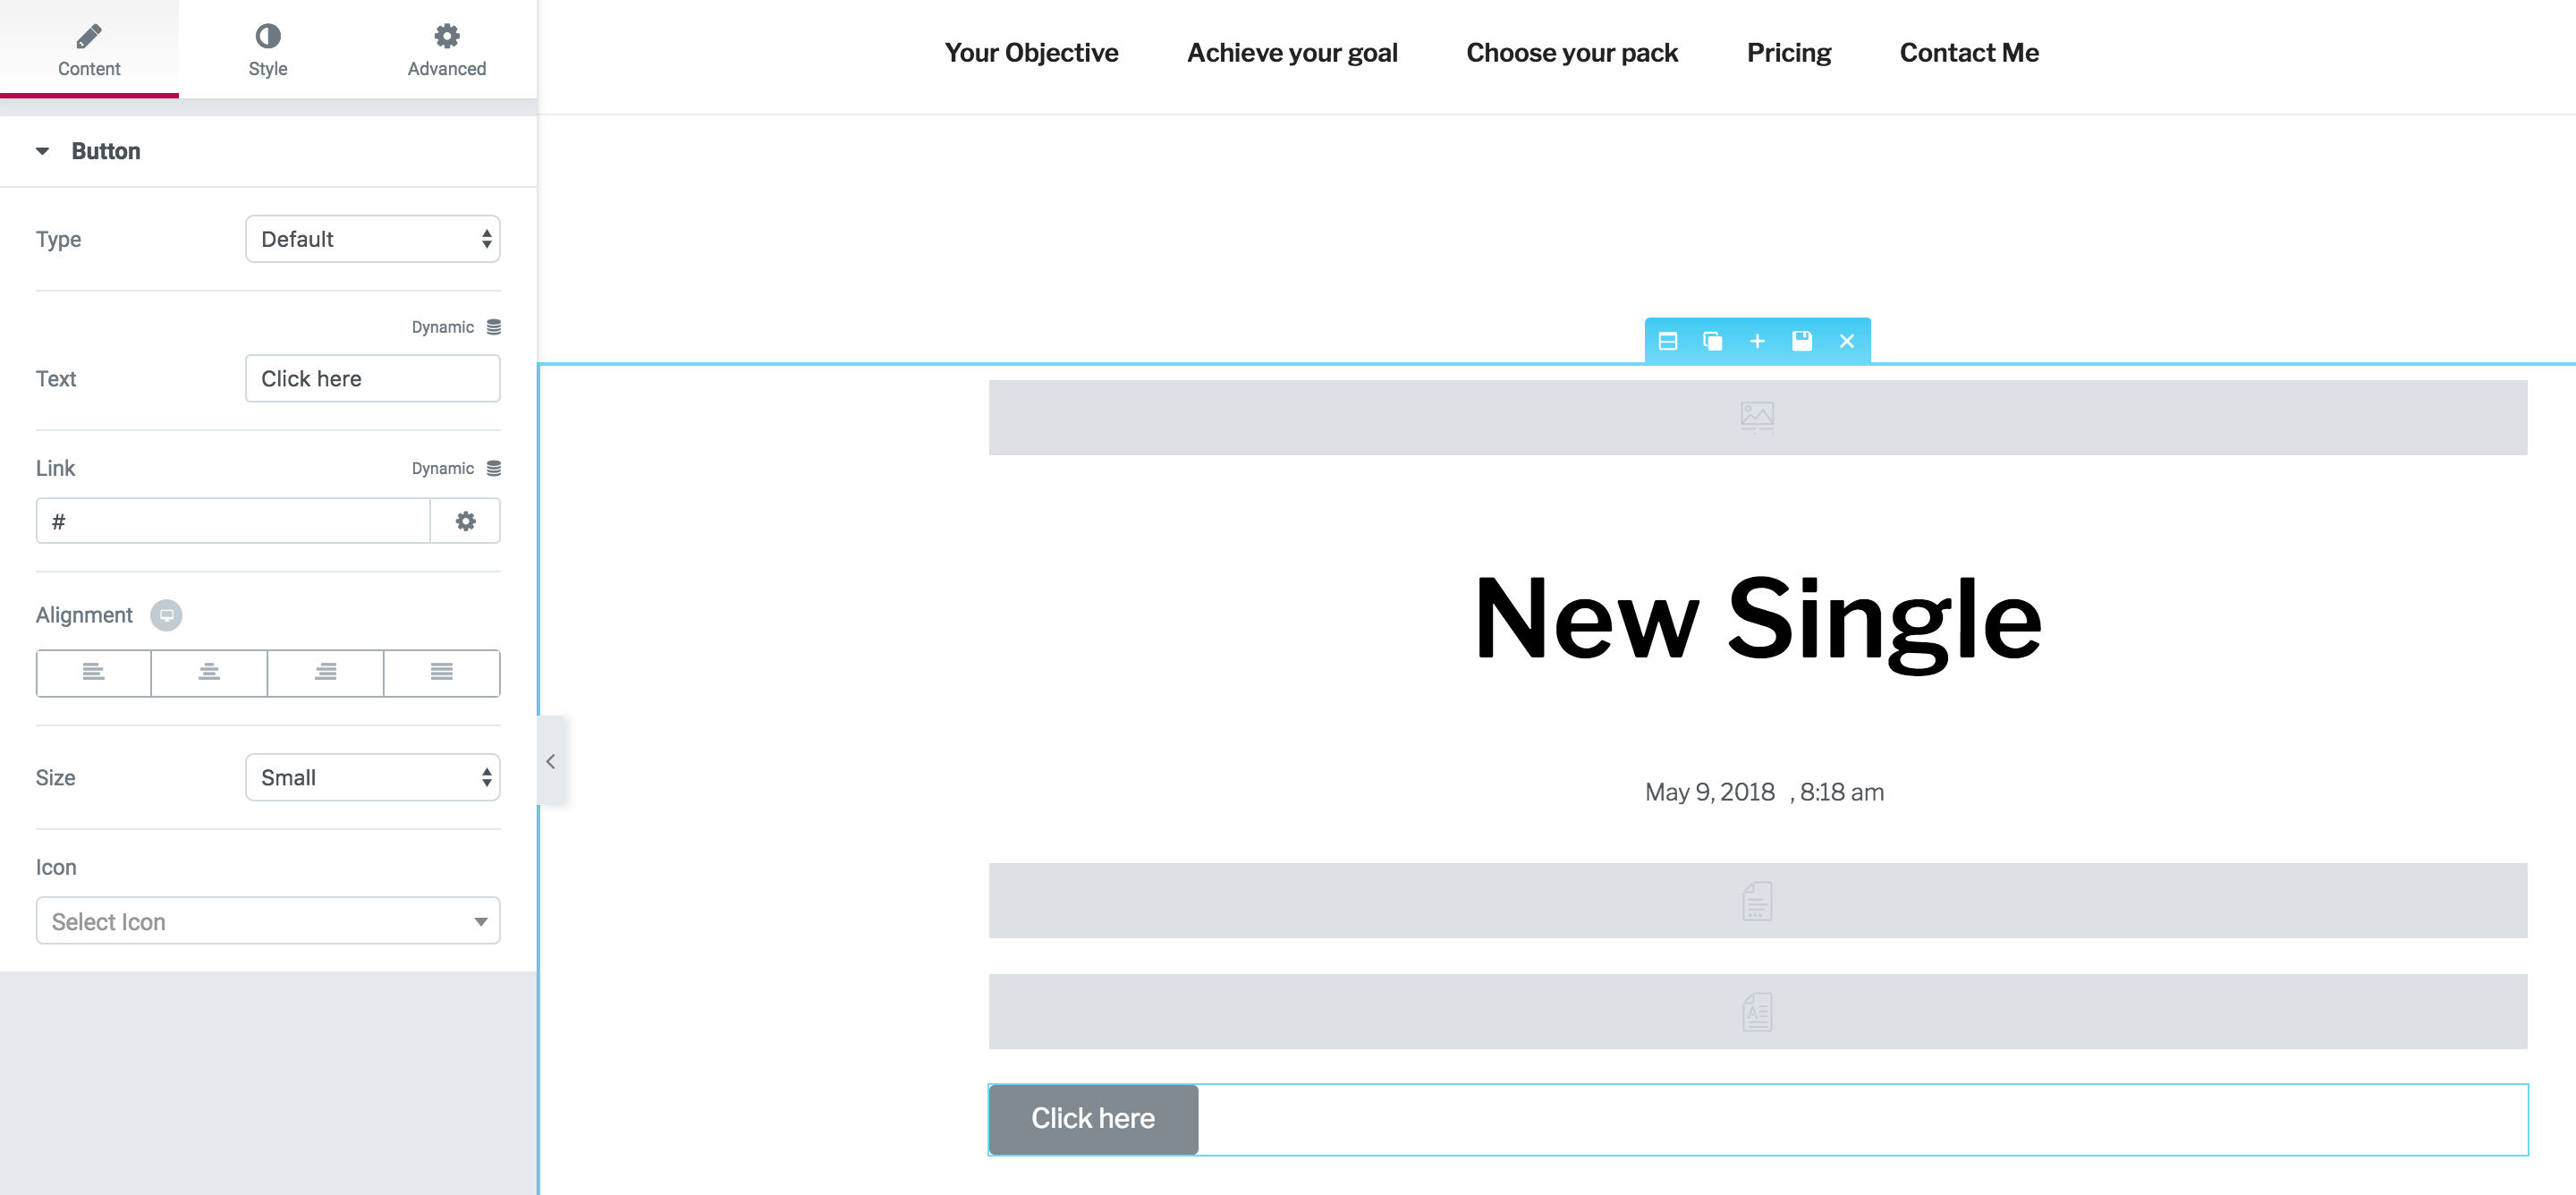
To edit individual elements, select it and the menu will change to show its settings instead. This gives you a great deal of creative freedom, so add a few elements and see what you can make them do.
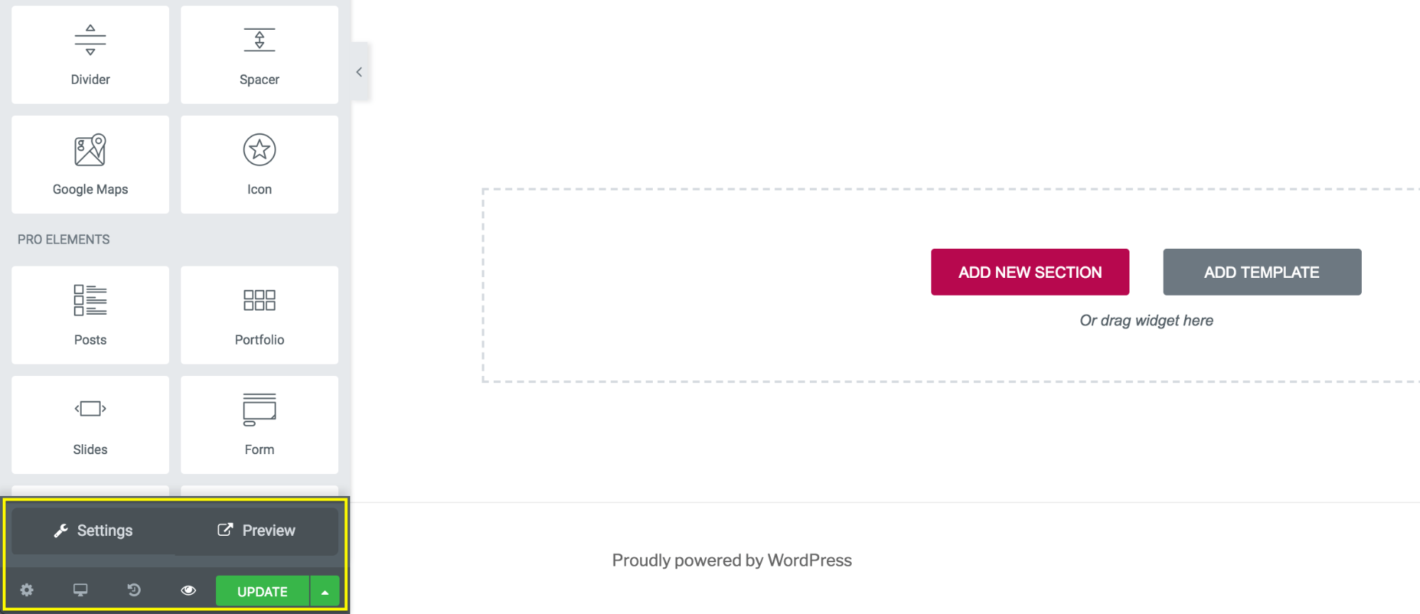
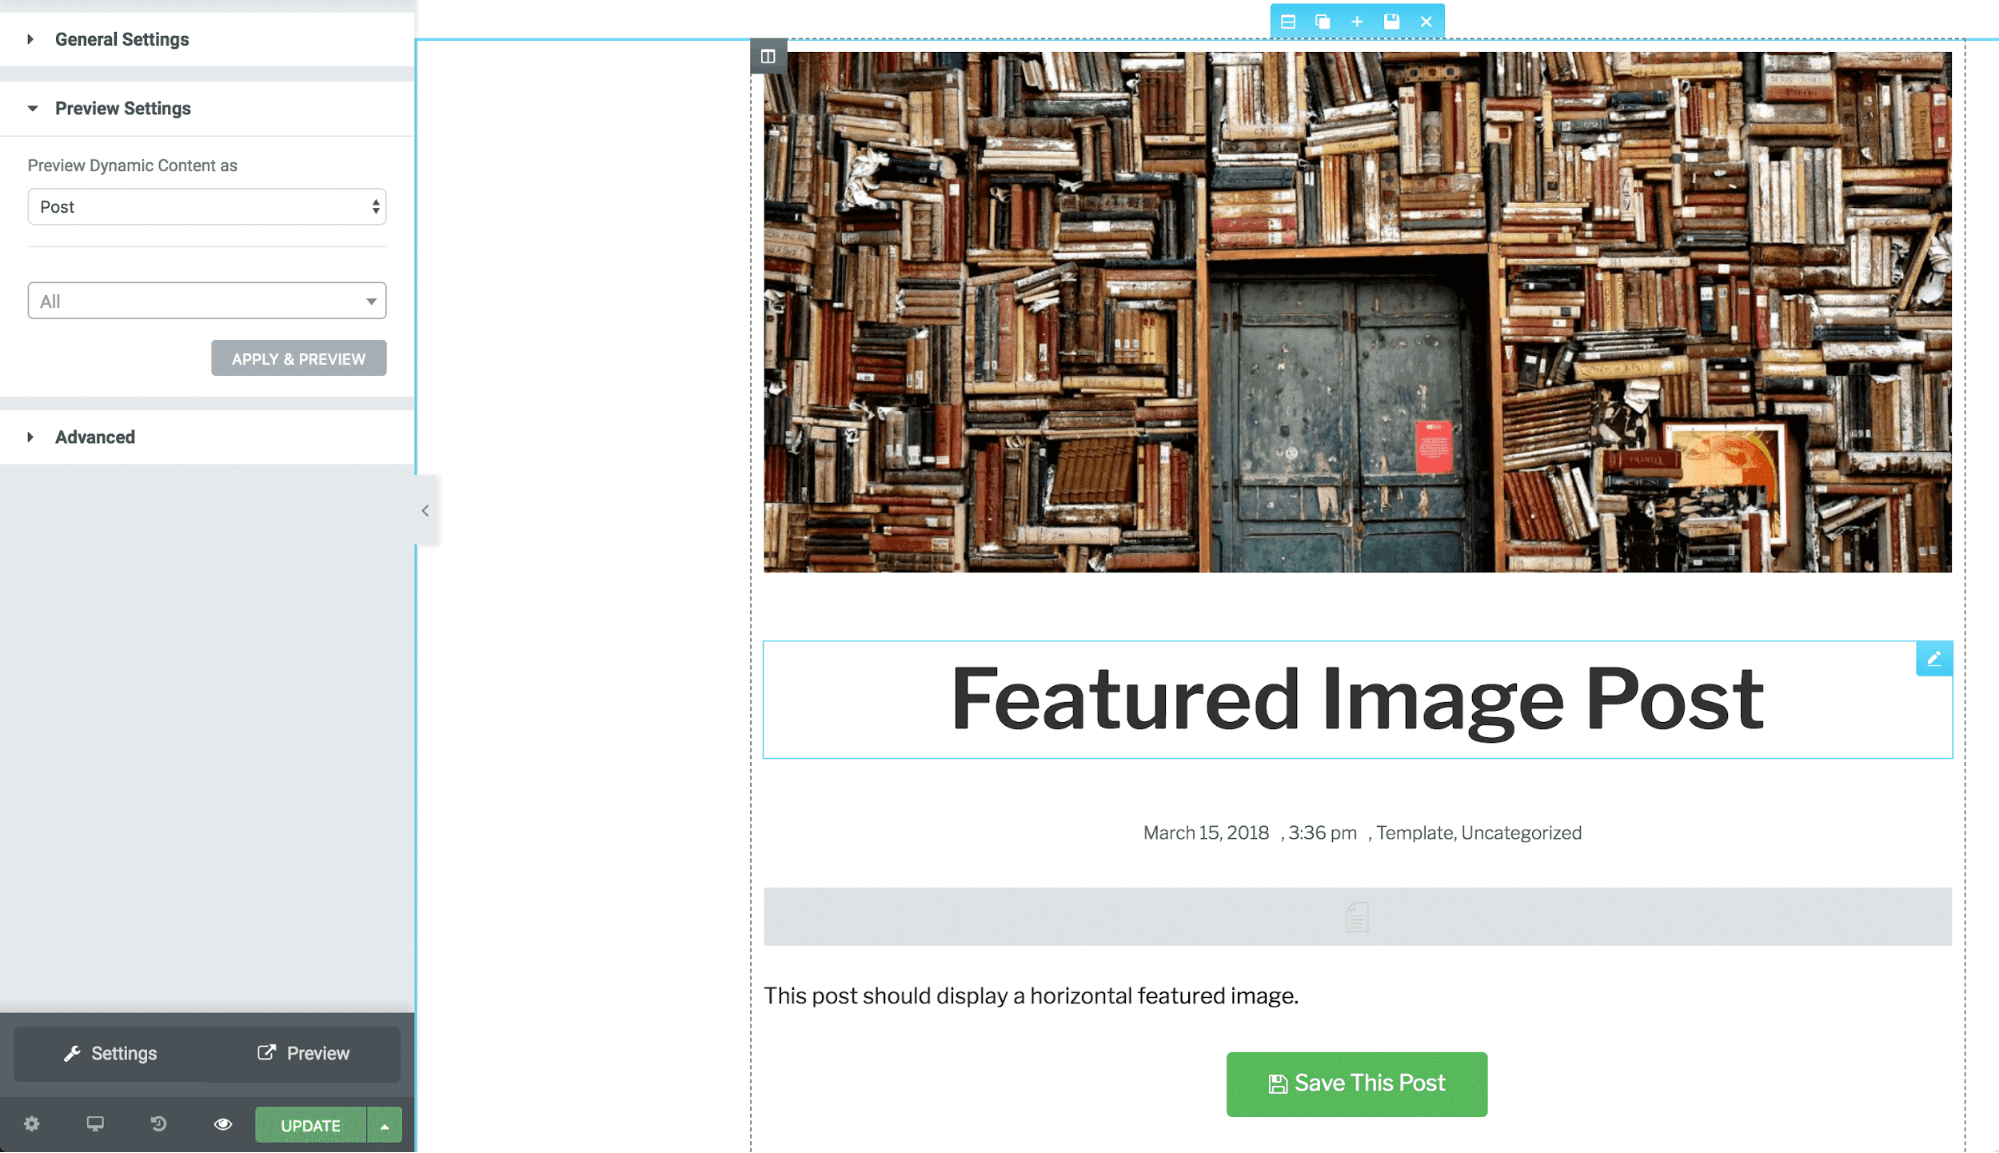
For an even better idea of how your design will look in practice, you can use the Preview feature. This enables you to see how a selected post will look with your template. You can access it by clicking the ‘eye’-shaped icon within the bottom left panel, then selecting Settings:
This will add a Preview Settings section to the main menu, where you can select the type of content to use. Select Post here, and choose your blog post from the second field:
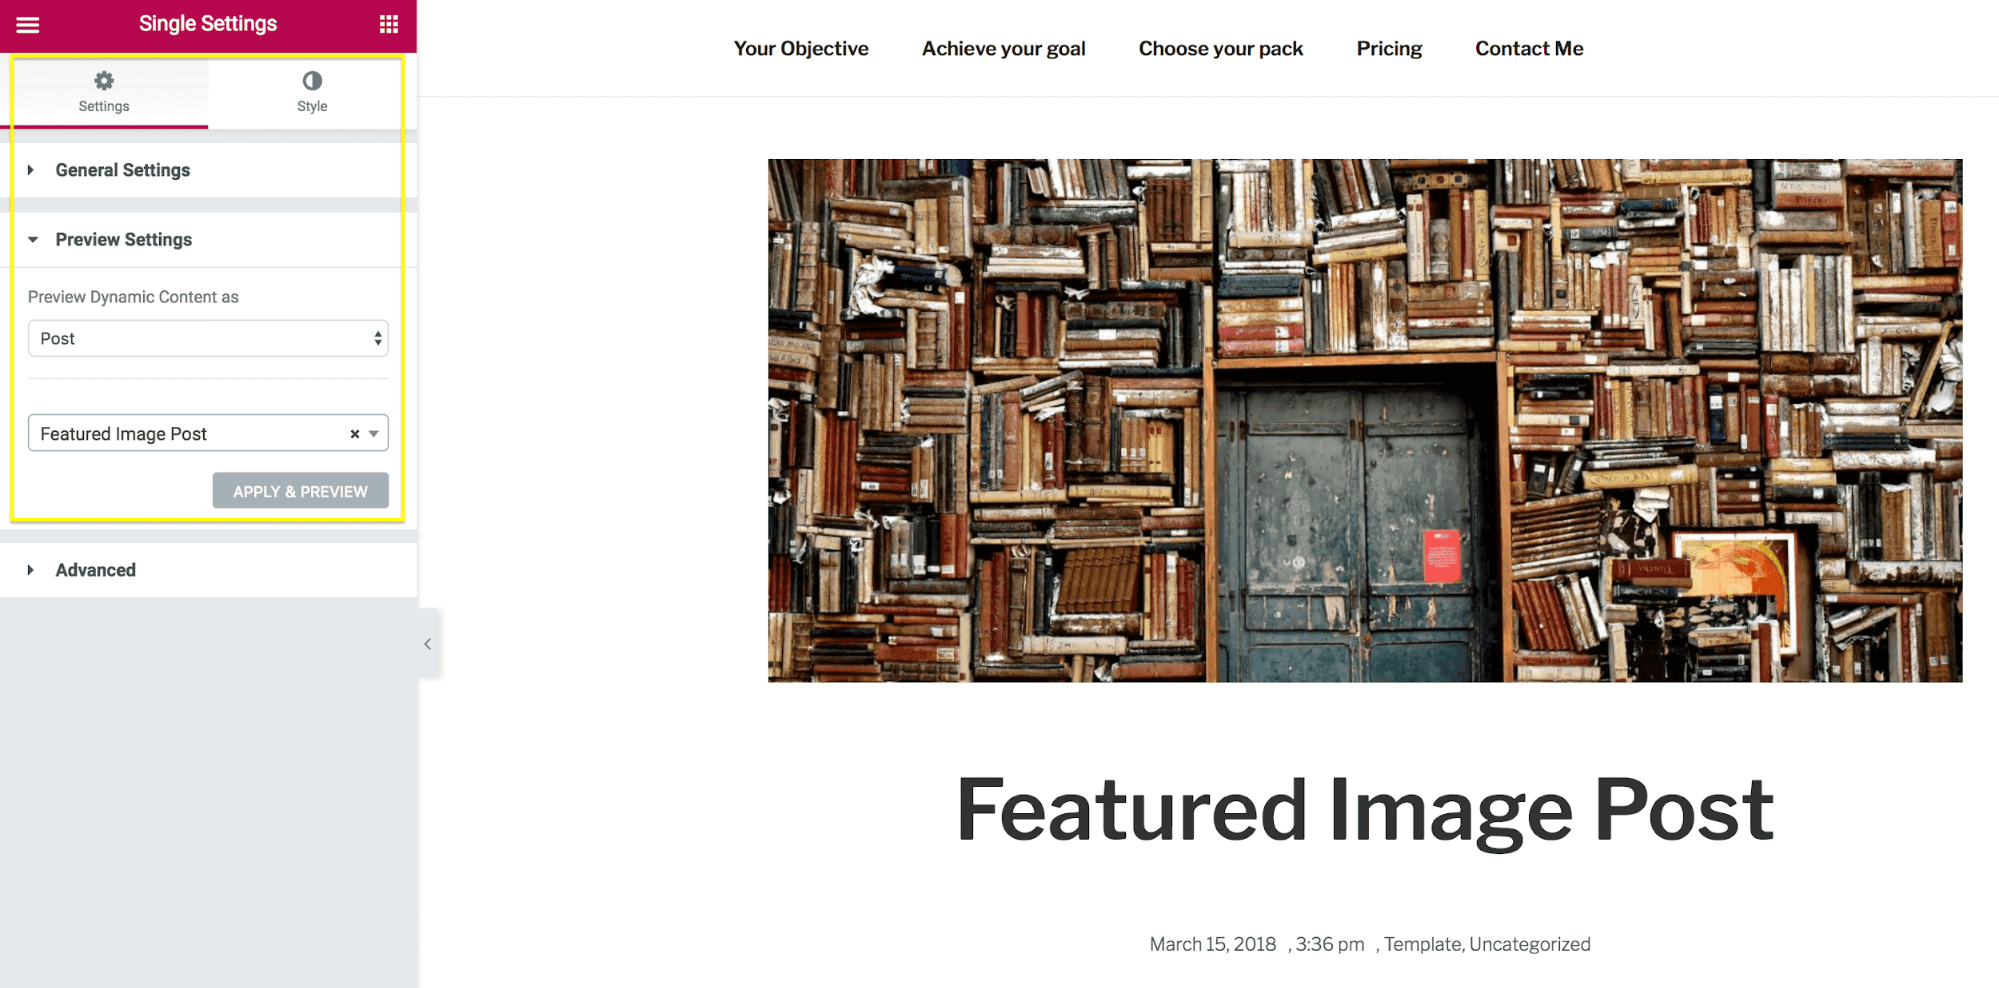
Next, click Apply & Preview to reload the main editor to contain the selected post. You can now continue to edit your template and see how it will affect the look of the post in real-time:
Once you’re happy with your template, it’s time to save and publish it. You can do this using the Publish button in the bottom left corner. When you click this, another pop-up will appear letting you determine where the template will be applied:
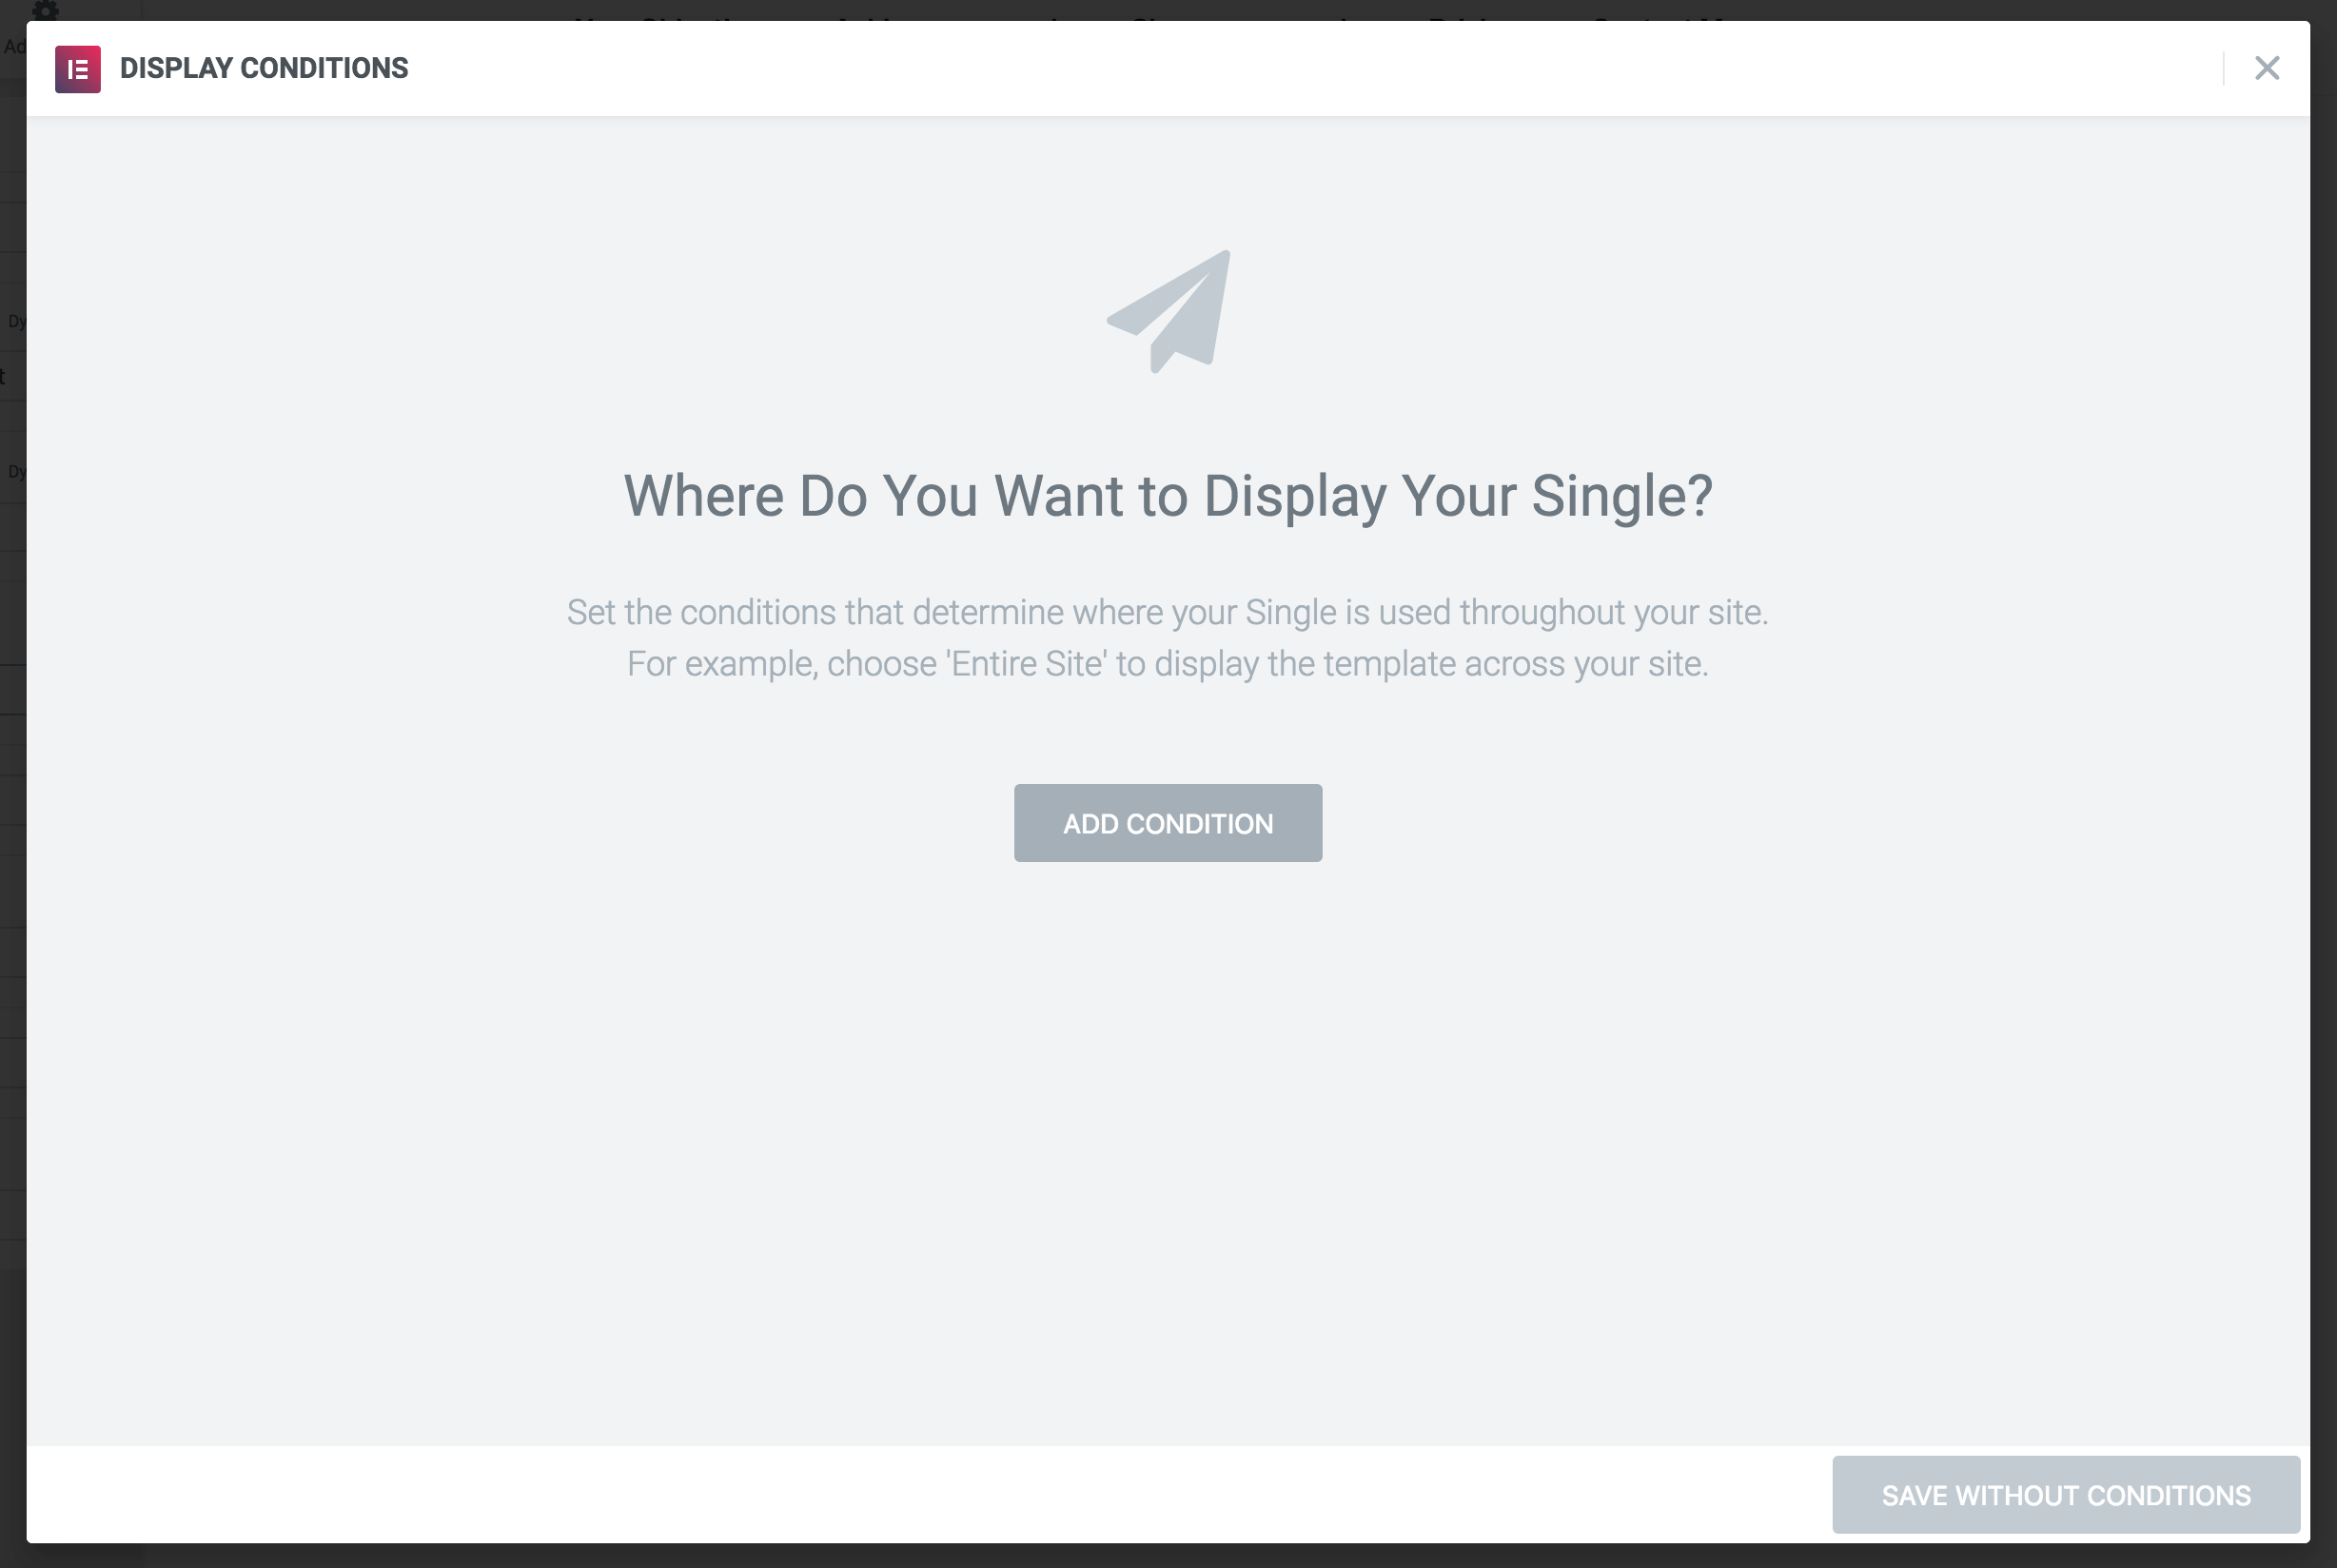
This requires you to create conditions, which can be general or very specific, depending on the template’s purpose. You could choose to automatically apply it to every post on your site, or apply it to all posts in a single category:

You can also add multiple conditions to a template. For example, you could apply it to all posts within one category, but exclude posts with a specific tag. You can even specify individual posts. For this example, let’s make it easy for ourselves and choose Posts, which will apply it to all posts.
When you’ve added your conditions, you can click Publish to save your template. This will add the template to your library and apply it to all posts that match your specified conditions. Open any post on your site to see the template applied:

You’ve now created the template successfully! You can go back and edit it however you like, or change the conditions to apply it to different posts altogether. Templates can also be added into posts and pages, so feel free to experiment with the feature and you’ll soon be able to create amazing reusable templates for your site!
Conclusion
Post templates are a useful WordPress feature that many users haven’t been able to use, as it’s historically required some coding to implement. However, the Elementor Theme Builder has opened custom post templates up to a wider audience. Anybody can now create their own single post templates without touching a single line of code.
In this article, we’ve covered how you can create a custom single post template. There are two methods of doing this, with the classic solution requiring you to using code to manually create the template. However, we’ve also shown you how to use the Elementor Pro plugin to do the same job using its Theme Builder.
Do you have any questions about using custom single post templates? Let us know in the comments section below!
Image credit: rawpixel.
The post How to Create a Custom Single Post Template (With and Without Coding) appeared first on Torque.
