You spend a lot of time and effort creating beautiful, powerful websites for your WordPress clients. It can be incredibly frustrating when a well-meaning customer accidentally messes with something critical to their site’s functionality.
Fortunately, there is a way you can reduce the risk of this happening. Hiding the relevant link in WordPress can prevent clients from deactivating plugins that are vital to their sites.
In this post, we’ll discuss some of the issues that can arise when your clients deactivate plugins they shouldn’t. Then we’ll provide you with two methods you can use to prevent this scenario. Let’s get started!
The Problem With Clients Accidentally Deactivating Plugins
When you build sites for your clients, you do so with the intent of making them as easy as possible to use and manage. As a WordPress developer, you probably have a handful of go-to plugins you use on every new site you create.
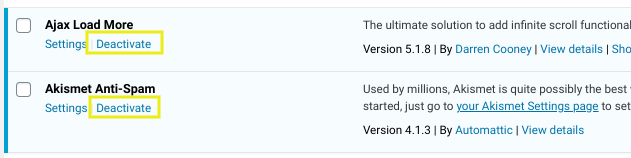
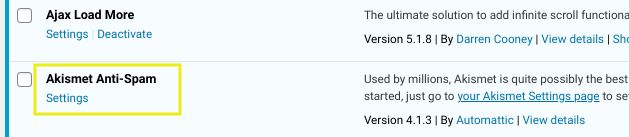
Unfortunately, some clients, especially those who are new to WordPress, have to overcome a bit of a learning curve before comfortably navigating the back end. While they’re picking up how to use their new site, there’s a risk that they’ll accidentally click on something they shouldn’t – such as a plugin’s Deactivate link:
If they deactivate the wrong plugin, key functionality may be disabled and lead to lost conversions and therefore revenue. It can also result in security vulnerabilities and other issues that can disrupt and compromise site performance.
Ultimately, this means you’ll have to spend an unnecessary amount of time fixing what your client broke. This can cut into your productivity and cause undue stress that could otherwise be avoided.
This is why it’s wise to consider a standard method to prevent clients from deactivating plugins. By making it impossible for them to accidentally remove key features from their sites, you minimize the risk of something going wrong. It’s a win-win for everyone.
How to Prevent Your Clients From Accidentally Deactivating Plugins (In 3 Steps)
If you want to reduce the chances of a plugin accidentally being deactivated by a client, the best approach is to completely remove the Deactivate link that appears below each tool on the back end. Here’s how to accomplish this in three simple steps.
Step 1: Find the Plugin’s Folder and File Names
The first step is to locate the plugin folder for the tool you want to remove the Deactivate link for. To do so, sign into the file manager of your hosting account or access the site’s server via File Transfer Protocol (FTP) with an FTP client such as FileZilla.
Next, navigate to wp-content > plugins. There, find the folder for the specific plugin you want to remove the link for. We’ll use Akismet as an example:
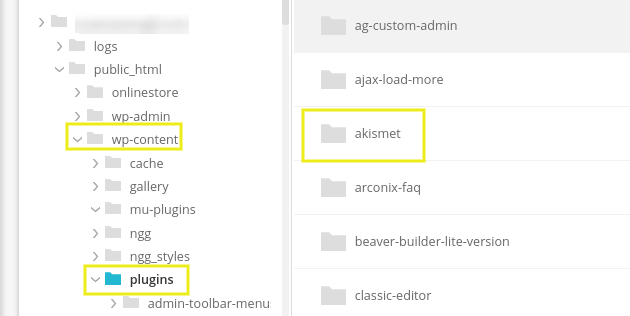
You’re going to need two bits of information: the plugin folder name and the plugin file name. You’ll use these details in the next step with the following format: plugin-folder-name/plugin-file-name.php.
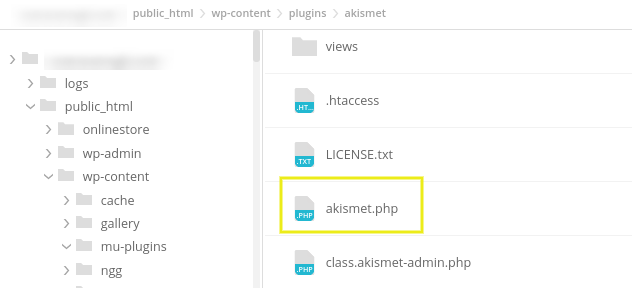
The plugin folder name will be the name of the plugin. The file name is usually the same, with a .php extension. So, in our example, it’s akismet/akismet.php:
Make note of this information. Also, if you want to remove the Deactivate link for more than one plugin, repeat this process for each tool.
Step 2: Edit the functions.php File
The next step is going to be adding a snippet of code to your client site’s functions.php file. If you’re unfamiliar, you can access this file in the wp-content > themes directory:
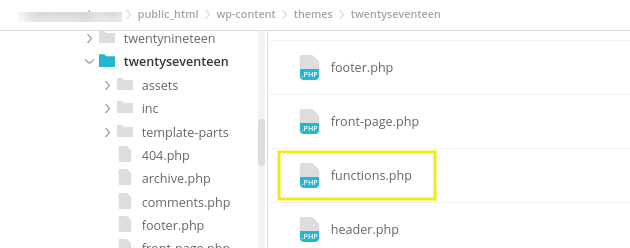
Within this folder, locate the currently active theme (or, preferably, child theme) for your client’s website. In this folder, there will be a functions.php file. After you locate and open it, copy and paste the following code:
add_filter( 'plugin_action_links', 'disable_plugin_deactivation', 10, 4 );
 function disable_plugin_deactivation( $actions, $plugin_file, $plugin_data, $context ) {
 // Remove edit link for all plugins
 if ( array_key_exists( 'edit', $actions ) )
 unset( $actions['edit'] );
 // Remove deactivate link for important plugins
 if ( array_key_exists( 'deactivate', $actions ) && in_array( $plugin_file, array(
 'akismet/akismet.php',
 'plugin-folder-name/plugin.php'
 )))
 unset( $actions['deactivate'] );
 return $actions;
 }
Note: You’ll replace the information listed in the $plugin_file array with the folder and file names you collected in the first step. You can list as many as you want. When you’re done, save your changes and reupload the file.
Step 3: Check to See That It Worked
If you followed these steps correctly, the Deactivate link for the plugin(s) you specified should now be hidden in the back end of your WordPress client site. To make sure it worked properly, log back into the admin dashboard.
Go to the Plugins page and look for the plugin in question. The Deactivate link should now be gone:
If it didn’t work, check to make sure you inserted the code in the correct theme’s functions.php file. You may also need to refresh your browser.
How to Prevent Clients from Deactivating Plugins With User Role Editor
If for some reason you don’t want to add extra code to the functions.php files of your client sites, you can accomplish a similar result with User Role Editor:

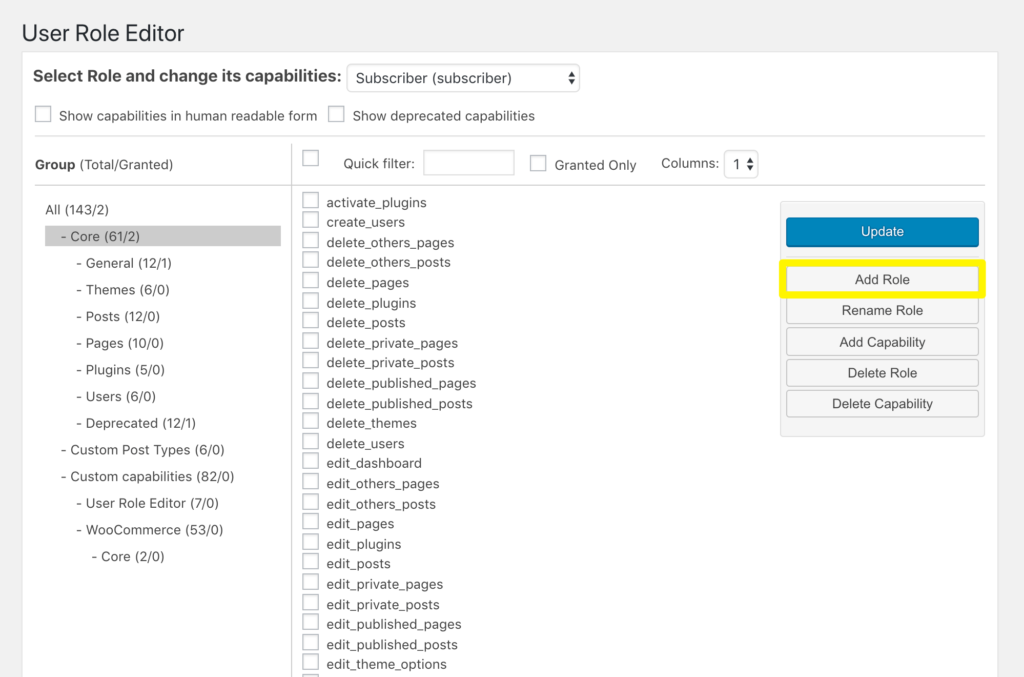
This free plugin enables you to create new user roles in WordPress and assign custom permissions to them. To do so, install and activate it, then navigate to Users > User Role Editor.
Here, click on the Add Role button:
Then, name the role appropriately:

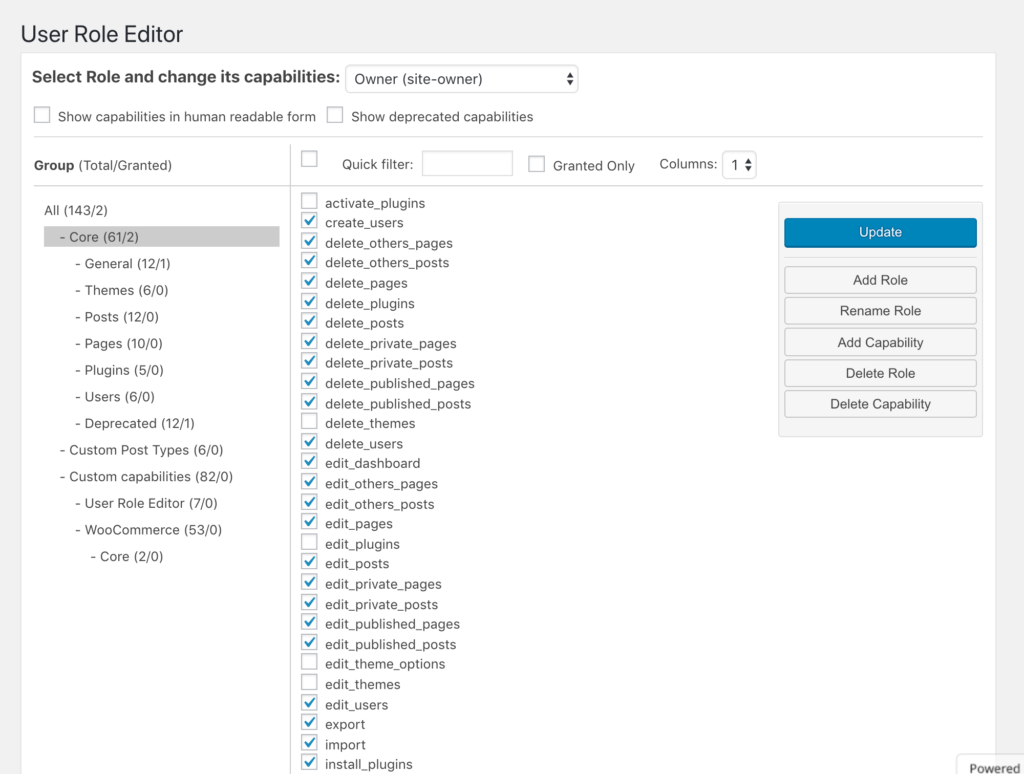
Finally, simply click on the checkboxes next to the permissions you want your clients to have. Make sure to leave the options pertaining to plugins unchecked:
After you save this new role and assign it to your client, the back end will look like this when they log in:

Note that the Plugins link is missing entirely from the sidebar (as is the Appearance link, since we left the delete_themes permission unchecked, too). This may or may not be a workable solution for you.
In some cases, you may still want clients to be able to install new plugins. Alternatively, some site owners may be opposed to your limiting their permissions in this way because they want more control.
Conclusion
If your client isn’t familiar with WordPress, there’s a chance they may end up accidentally deactivating a key plugin and, in turn, disabling their site’s functionality. Fortunately, there are ways to prevent this from happening.
In this post, we discussed how you can create a custom user role for your clients, or manually hide the Deactivate link from them in three simple steps:
- Find the plugin’s folder and file names.
- Edit the functions.php file.
- Check to make sure the Deactivate link is no longer visible.
Do you have any questions about disabling plugin deactivation in WordPress? Let us know in the comments section below!
The post How to Prevent Your Clients From Accidentally Deactivating Plugins appeared first on Torque.
