With everyone around the world self-isolating, it’s important to make sure your site is as optimized as possible. Now more than ever, you want people to come to the site and stick around.
With WordPress, you can easily customize any aspect of your website, including the theme you use. However, tweaking its code directly can be risky, and you may lose your changes when you update it. Using a child theme, you run none of those risks.
A child theme is basically a copy of its ‘parent’. You can set one up rather quickly and with this approach, you can edit your theme safely. Plus, you won’t lose any of the changes you’ve made, even during an update.
In this article, we’ll dig deeper into why you should be using child themes for custom development. Then we’ll show you how to create one in a few simple steps. Let’s get to work!
The Benefits of Using a Child Theme
A child theme is a template that imports the style of its parent. For all practical purposes, it’s a copy of the original, only you can make changes to it without affecting the latter.
Let’s say, for example, you want to modify your theme’s functions.php file to add a new feature. You dig into its code, make the necessary changes, and everything works perfectly.
Soon after, however, a new version of your theme is released. Naturally, you jump at the chance to install it since it’s always wise to update your WordPress components.
However, updating the theme overwrites the changes you’ve made to its core files. The new feature you added to functions.php is gone and you have to start all over again.
Alternatively, you could create a child theme and edit its functions.php file instead. When the update is released, you’ll apply it to the parent theme and your changes will be preserved.
Not only does it make for a much cleaner development process, but it’s also safer for testing new functionalities. After all, if you break anything, you can simply deactivate the child theme and start over.
How to Create and Customize a Child Theme (In 5 Steps)
Creating a child theme is simple, but there are a few steps involved. To follow along, you’ll need a File Transfer Protocol (FTP) client such as FileZilla. Once you’ve installed it and have your credentials in hand, you’re just five steps away.
Step 1: Create a Folder for Your Child Theme
Every theme you install in WordPress sets up its own folder on your server, which contains all the files it needs to work. You can find these directories by using FTP to navigate to wp-content/themes:

One of these folders belongs to your active theme. Take note of its name, then create a new directory. For this tutorial, we’ve called ours twentytwenty-child since we’re going to be using Twenty Twenty as the parent theme:

You can follow the steps in this post using any parent theme you want. The name you set for its child doesn’t make any technical difference either. However, it helps if it’s something that’s easy to identify.
Step 2: Set Up a style.css File
Next, we’re going to set up the file that WordPress uses to recognize new themes. It’s called style.css and as the name implies, it contains all the CSS styles for your site.
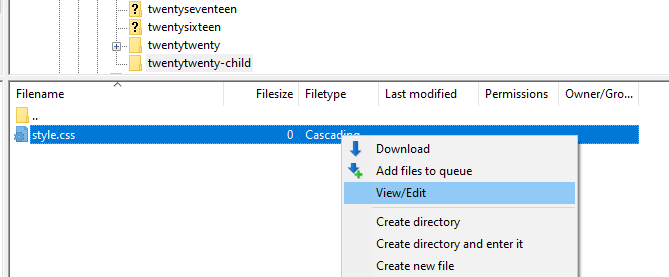
For now, create a new file within your child theme directory and name it style.css. Once it’s ready, right-click on it and select View/Edit:
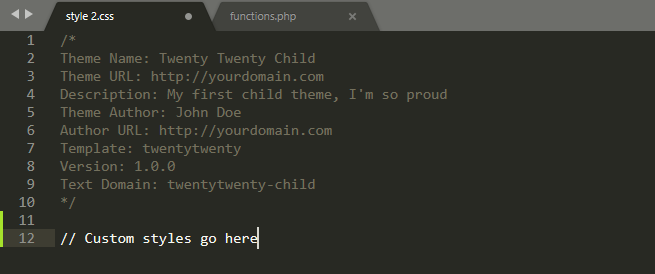
This will open the file with your local text editor. Right now, it should be empty. Copy the following code and paste it within your child theme’s style.css file, then customize the placeholders:
/*
Theme Name: Twenty Twenty Child
Theme URL: http://yourdomain.com
Description: My first child theme, I'm so proud.
Theme Author: John Doe
Author URL: http://yourdomain.com
Template: twentytwenty
Version: 1.0.0
Text Domain: twentytwenty-child
*/
Replace every instance of the parent theme’s name with the one you’re using. You’ll also want to include your own domain and information, then save the changes to style.css and close it.
Step 3: Import the Parent Theme’s Styles and Scripts
For your child theme to retain its parent’s style and functionality, you need to import all the code that makes it work. You can do this through a process called ‘enqueueing’.
To get started, set up a new file called functions.php within your child theme’s directory. Then open it and paste the following code within:
Save the changes to functions.php. You’ll notice that this code doesn’t specify anything about the parent theme. That’s because we already defined the template it needs to import when we edited the style.css file.
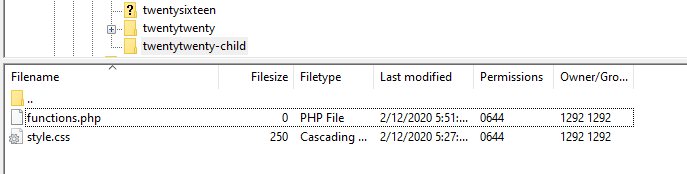
Here’s how your child theme folder should look now:
Technically, you could achieve the same result by copying and pasting the contents of the parent theme’s functions.php file. However, with that approach, you’d need to modify the codebase manually every time an update was released.
By enqueueing the parent theme’s styles and scripts, you bypass that issue. Now, your child theme should be working. All that’s left is to customize and activate it.
Step 4: Customize Your Child Theme
Making changes to your child theme works pretty much the same as editing any other. For example, you can customize your site’s style by tweaking its style.css file. All you have to do is add any new CSS code you want below the theme description you set up earlier:
Keep in mind – any changes you make will override conflicting styles or functions from the parent theme. That goes for style.css, functions.php, and any other files you set up.
If this is your first rodeo when it comes to theme customization, we recommend you check out our full guide on the subject. We also have tutorials on CSS basics, so take a look at it if you’re not comfortable with stylesheets yet.
Step 5: Activate and Maintain Your Child Theme
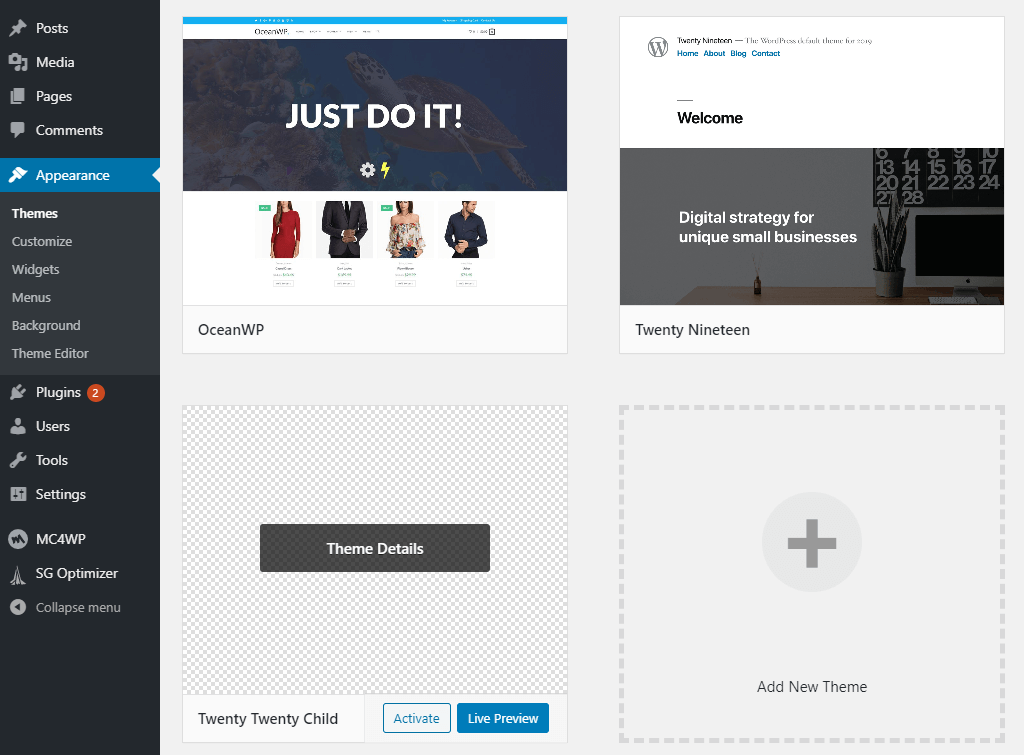
If you go to your dashboard and navigate to Appearance > Themes, you should see your child theme listed:
Activating your child theme works just like any other. After you click on the Activate button, go ahead and check out your homepage:

In a nutshell, if you were previously using the parent theme, your site should look exactly the same as it did before. Until you start making customizations, you won’t notice a difference between the two.
It’s important to note that while you’re using a child theme, you can’t delete its parent files. Otherwise, it won’t be able to import the styles or functions it needs to work properly.
Likewise, you’ll want to check for any updates available for the parent theme as usual. Just because you’re using a child theme, doesn’t mean you’re exempt from security best practices.
Conclusion
If you’re going to add new functions to your WordPress theme, the safest way to do so is through a child theme. That goes double if you’re working on a client website.
Fortunately, setting up a child theme is relatively simple. Here’s how the process works:
- Create a folder for your child theme.
- Set up a styles.css file.
- Import the parent theme’s styles and scripts.
- Customize your child theme.
- Activate and maintain your child theme.
Do you have any questions about how to use a WordPress child theme? Let’s go over them in the comments section below!
The post How to Create and Customize a WordPress Child Theme appeared first on Torque.
