Learning how to create a customer journey map is a great way to get into the heads of your audience. It’s a technique that allows you to create better websites, products, and services. Customer journey mapping also lets you understand what visitors really want and need and then give it to them.
If you have never heard about any of this before, don’t worry. In this post, we will give you everything you need to know about it. Below, we will talk about what a customer journey mapping is and how to create a customer journey map for your website or shop.
Let’s take it away.
What is a Customer Journey Map?
In short, a customer journey map is a way to visualize how a customer interacts with a company, website, or offer.
When you are in business for yourself, your goal is most likely to get users from point A to point B, the latter being where they perform an action you want them to. This can be something like buying a product, signing up for a newsletter, etc. A customer journey map shows you how they cross that gap.
On the surface, a customer journey, which is also called the buyer’s journey, is relatively simple.
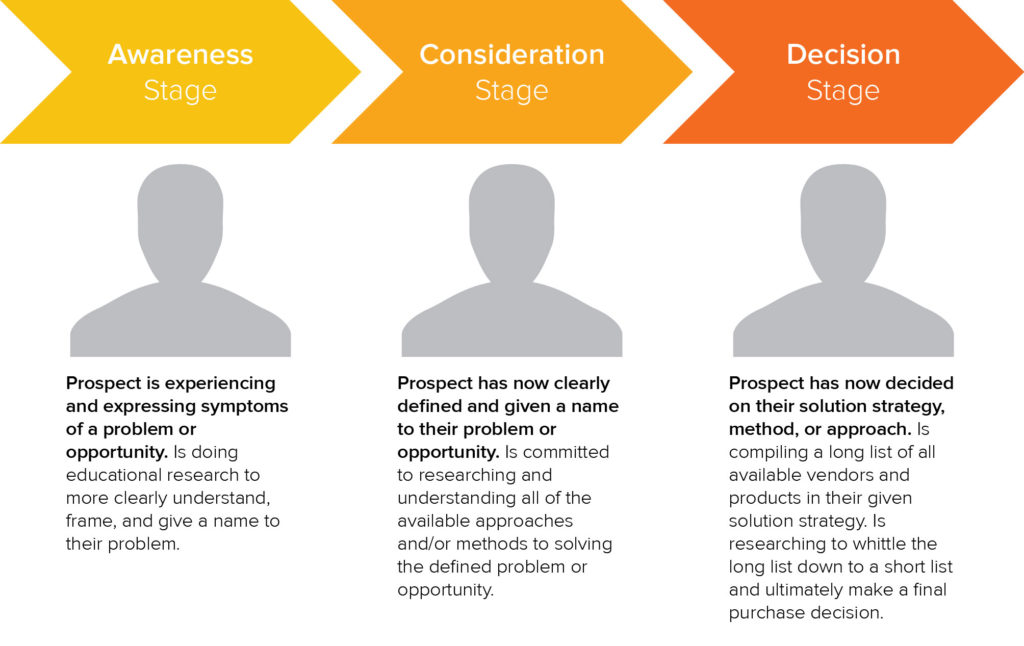
However, in reality, a customer journey is often a lot more complex. There are many moving parts and steps from, say, their first contact on social media to the thank-you page they land on after making a purchase. It’s also rarely linear.
How Does Customer Journey Mapping Help?
However, why would you even do this thing? What is the benefit? In short, when you know your customer journey, it gets much easier to help them arrive at your desired destination.
First of all, mapping out the customer journey acts as a reference point for your team and the entire business. Knowing it makes it much easier to make decisions and set up your sales machine as best as possible (as you will see below).
For existing businesses, a customer journey map can also help understand where and why people get stuck and where your sales funnel is leaking so you can take measures to fix it.
In short, knowing the journey your clients take can help you better align your every step with your end goal and structure it in a way that makes its achievement more likely.
If you can do that, it makes you more attractive to your target audience because they feel better understood and served by you. In addition, understanding your audience more deeply increases your ability to create content and other offers that they will love.
In essence, knowing the customer journey allows you to better serve your people.
Types of Customer Journey Maps
Before starting out, it’s important to know that you can create different types of maps of the customer journey. Depending on what your goal is, each of them can make more sense. Here are some frequent formats:
- Current state — Used to visualize how customers currently interact with your site or company. This is the most commonly used kind.
- Day in the life — Map out a normal day in the life of your customer. This helps you understand them better and identify unmet needs.
- Future state — Helps you think through how you think customers will interact with your site in the future and how you want to deal with that. This is good for goal setting.
Of course, it can also make sense to mix these types or make several customer journey maps.
Make Sure You Focus on the Right Things
Before we get to the how-to part, let’s talk about some key points to keep in mind when creating a customer journey map.
First of all, the focus needs to be on your customers’ point of view, not yours. The goal is to understand them, not project your own wishes on your audience. Because of this, it often makes sense to have a customer journey map created by someone outside of your own organization.
Secondly, be aware that customer journey maps track both mechanics and emotional motivation. You are not just looking at the physical steps someone has to take to reach the end goal but also what moves them to do so internally. The goal is not just to make your website more streamlined but improve it based on a deep understanding of your audience.
In the end, you want to end up with something like this:
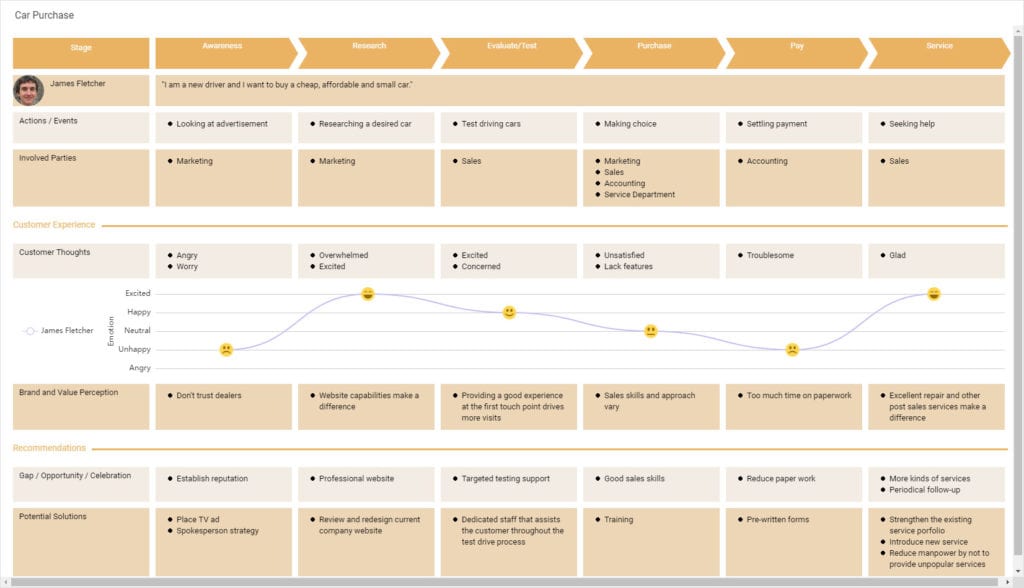
Does it make sense now how visualizing your clients’ journey could be beneficial? Then let’s learn how to create a customer journey map from scratch.
Creating a Customer Journey Map Step by Step
Alright, now that you are aware of what we are trying to accomplish, it’s time to talk about how to achieve it in practical terms.
1. Really Get to Know Your Audience
As mentioned, customer journey mapping is all about getting people on your site from A to B and understanding what would make them move there. In order to do that, you need to know them very well, what makes them tick, their likes, dislikes, and more.
A tried and true way of doing that is to create buyer personas. They are a great method to think about customers on a more personal level.
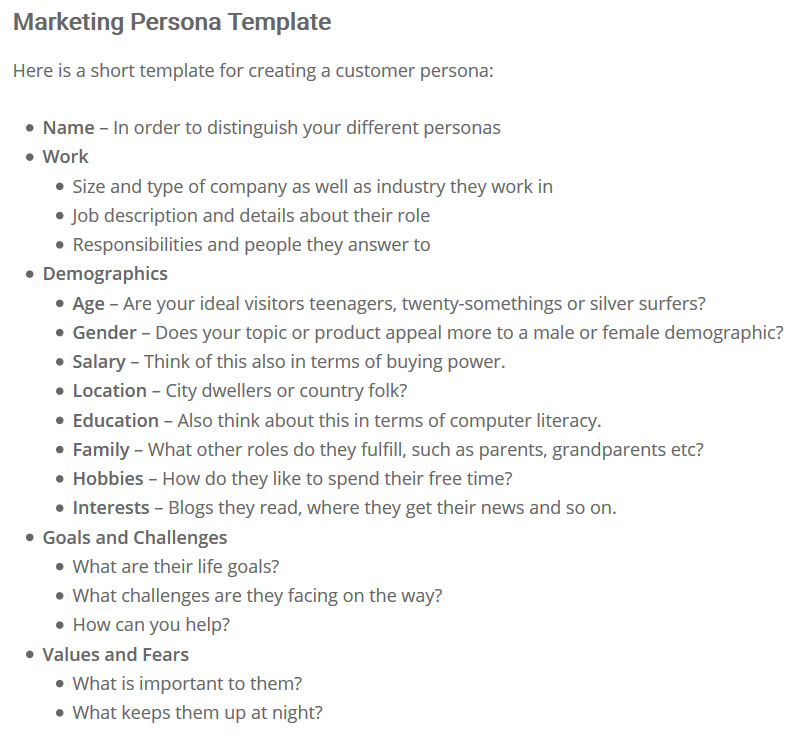
We actually cover this topic in detail in our article about market research for websites. It also includes things like keyword research, competition analysis, collecting feedback, and listening to social media. So, as a first step you might want to head on over there.
In addition to a persona, you can also refer to available website data you have such as in Google Analytics or other analytics solutions. They can be a great help in pinpointing who is coming to your site.
Here, reports like demographics, location, and interests are most important. In Google Analytics, you find all of these under the Audience section.
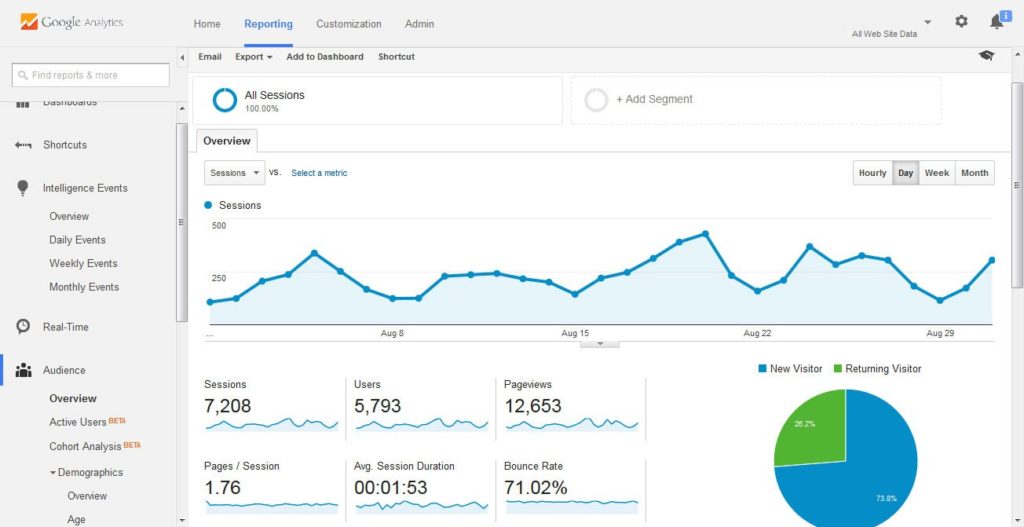
In the end, you should have the feeling that you understand very well who your customer is and what motivates them.
2. Define the Basic Steps of the Customer Journey
Customer journey maps will look different for every business. How depends on many factors including your marketing strategy. For that reason, it’s important to break it down into the essential phases for your own case.
Most of the time they look something like this:
- Awareness/exposure — Through what channels will your audience find your site/business? Which channels are they already using? Which ones would you like them to include?
- Research/choice evaluation — What will customers find when further looking into your product or service? What will they learn about and how? How will the user experience be?
- Purchase/conversion — How will clients navigate through your site to arrive at the desired end goal (purchase or else)? Which pages will they visit?
- Post-purchase — How will you communicate with customers after they have completed your desired action? How will you motivate them to return? What kind of support will you offer when they run into issues?
Think through what steps you would take to get to where you want your customers to go. Start sketching it out into a customer journey.
How you want to do that is up to you. You can do it in the form of a spreadsheet, with pen and paper, a flip chart, whiteboard, or else. However, something you can share with the rest of your organization and update over time is probably the best.
Be aware that you can have several paths and more or fewer steps. However, for the beginning, it makes sense to only focus on one path at a time. You can go through the other consecutively.
3. Include Touchpoints and Actions
When you know the basic stages, you need to define what people will do at each step. You do that with touchpoints and actions.
Touchpoints define where customers are going to interact with your business. For example, a landing page can be a touchpoint as well as an after-purchase thank-you page. Now it’s time to add those to the map.
When you have compiled the locations where customers will be, it’s time to think about the actions they will take there ideally.
Once you have an idea as to what you want them to do, it’s easier to anticipate what you need to provide in order for them to take action. That way, you are better able to create each page and each step of the customer journey to make that outcome more likely.
As you can see, it’s all about anticipating your customers’ needs and serving them. This can also mean reducing the actions necessary to achieve something and getting rid of the entire steps in the journey.
4. List Motivations and Obstacles
As mentioned, when you create a customer journey map, you need to think about the mechanics as well as the impetus behind each step. Therefore, in addition to the above, it also helps to look at motivations and obstacles customers might encounter.
Each action is usually motivated by an emotion or pain point. This will change depending on the customer’s location inside the journey. If you think this through, you can better anticipate what they will struggle with at any moment and then help smooth over the pain point to make them go forward.
A good way is to write out possible thoughts verbatim. Like a persona, this will help you get in their head. Examples:
- There are so many options. I wish there was an easy way to compare all of these products so I know which is the right choice for me.
- Is this a legitimate website? I don’t want to be defrauded and lose my money.
- What if I don’t like the product? How can I get my money back or find help?
You get the picture. The same with obstacles. Customers will likely encounter things along the way that will stop them from continuing. This can be shipping costs, a lack of trust indicators, or else.
When you are aware of potential roadblocks, you are more likely to be able to mitigate them, for example, via additional information, assurances, etc. If you are not sure as to what would make them hesitate, look back on the buyer personas and data you have on them.
5. Deploy, Track, and Improve
When you are done, it’s time to put your customer journey map into practice.
You might have found a bunch of things to change in your current customer journey or maybe you have just set it up for the first time. Either way, once you are through the above, it’s time to implement it so you can have people actually take the journey.
Yet, one thing you should definitely do is track them to see where problems lie. While you will never get this perfect (there is no 100% conversion rate), that doesn’t mean you can’t try to find weak spots and fix them.
A great way to look for that is the behavior flow chart in Google Analytics (found under Behavior > Behavior Flow).
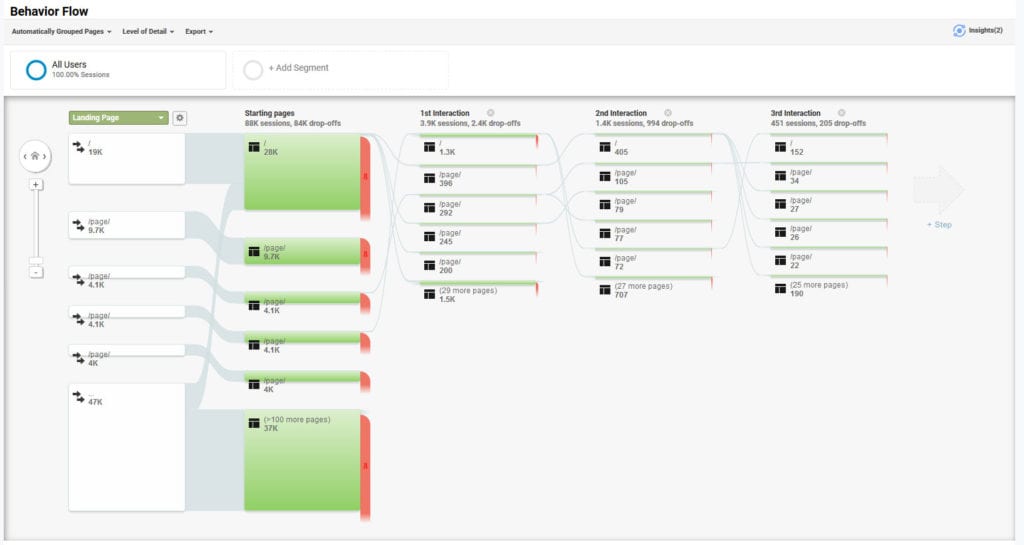
It shows where people are going on your site. It’s also a great tool for finding touchpoints. You can hover over each step to see how many visitors you are bleeding in each particular place.
If most drop-offs happen in the same place, there is likely something to fix there. Alternatively, if you are steadily losing people everywhere, that could mean your entire customer journey could use improving.
Think about the reasons why parts might not be working. Having a look at your buyer personas can help you come up with hypotheses. When you have a theory, you can then test it with A/B split testing. Rinse and repeat.
Build a Customer Journey Map to Success
Learning how to create a customer journey map is a super useful skill to improve your website and business. It allows you to better understand and anticipate user needs, improve conversions, and build a better website. This benefits both your clients and your bottom line.
To drive the point home, here are the basic steps for mapping out your customer journey:
- Create a buyer persona and collect data to understand your audience and customers
- Define the basic steps of your customer journey
- Think through touchpoints and actions
- Define customer emotions and obstacles
- Implement the map and track problems for further improvement
Once you have completed it, it makes sense to revisit your customer journey map every now and then. Going through the process more often might yield new insights that could help you further improve it.
How do you create a customer journey map? Any additional tips or tools? Share in the comments section below!
The post Why and How to Create a Customer Journey Map (5 Easy Steps) appeared first on Torque.
