Page redirects in WordPress are not the most straightforward topic if you are dealing with it for the first time. Many people have heard of page redirects before but aren’t always sure when you need to use them or how to implement them.
In the following blog post, you will learn everything you need to know about page redirects (in WordPress and otherwise).
This includes what they are and why they matter when to use what type of redirect, where to apply them, and different ways of correctly implementing page redirects on your WordPress site.
Let’s get going.
What Are Page Redirects and Why Do You Need Them?
Page redirects are basically like a send-on notice for the post office. When you move, you can get one of those and any mail that was sent to your old house will automatically be delivered to your new mailing address.
Redirects are the same thing but for web pages only that, instead of letters and parcels, it sends visitors and search spiders to another web address.
Implementing page redirects can be necessary for many reasons:
- A mistake in your title and URL that you want to correct
- Attempting to add/target a different keyword with your page
- The entire permalink structure of your site has changed
- Some external link is pointing to the wrong address and you want visitors to find the right page
- You want to change parts of your URL, like remove www or switch to HTTPS (or both)
- You have moved to an entirely new domain (or merged another site with yours) and want the traffic and SEO value of the old URL to land on the new one
Why Do They Matter?
From the above list, it’s probably already obvious why page redirects are a good idea. Of course, if your entire site moves, you don’t want to start from scratch but instead, benefit from the traffic and links you have already built. However, even if you only change one page, implementing a redirect makes sense.
That’s because having non-existent pages on your site is both bad for visitors and search engine optimization. When someone tries to visit them, they will see a 404 error page. This is not a pleasant experience and usually very annoying (as entertaining as 404 pages can be).
Because of that, search engines are also not a big fan of this kind of error and might punish you for it. Also, you want them to understand your site structure and index it correctly, don’t you? Therefore, it’s a good idea to leave a “this page no longer exists, please have a look over here ” message whenever necessary.
Different Redirect Codes and What They Mean
When talking about redirects, you need to know that there are several different types. These are categorized by the HTTP codes that they have been assigned to, similar to the aforementioned 404 error code for a missing page. However, for redirects, they are all in the 300 category:
- 301 — This is the most common kind. It means that a page has moved permanently and the new version can from now on be found at another location. This page redirect passes on 90-99 percent of SEO value.
- 302 — This means a page has moved temporarily. The original URL is currently not available but will come back and you can use the new domain in the meantime. It passes no link value.
- 303 — Only used for form submissions to stop users from re-submitting when someone uses the browser back button. This is probably not relevant to you unless you are a developer.
- 307 — The same as a 302 but for HTML 1.1. It means something has been temporarily moved.
- 308 — The permanent version of the 307.
When to Use What?
Of course, the biggest question is, when to use which type of page redirect?
While there are several options, you usually only need two of them: 301 and 302. Out of those, probably more than 90 percent of the time, you will use a 301. That’s because for the rest (except 303), it’s not always clear how search engines handle them, so you basically stick to those two options.
As for when to use which, much of it you can already understand from what the code tells the browser or search spider, however, here’s a detailed description:
- 301 — Use this when you are planning on deleting a page and want to point visitors to another relevant URL or when you want to change a page’s permalink (including the domain).
- 302 — Use this, for example, when making changes to a page that visitors are not supposed to see or when you redirect them to a temporary sales page that will soon turn back to the original. That way, search engines won’t de-index the existing page.
Redirects and Page Speed
While page redirects are great tools for webmasters and marketers, the downside of them is that they can have an effect on page speed.
As you can imagine, they represent an extra step in the page loading process. While that’s not much, in a world where visitors expect page load times mere seconds, it matters.
In addition, page redirects use up crawl budget from search engines, so you can potentially keep them from discovering your whole site by having too many of them. Therefore, here are some important rules for their usage:
- Avoid redirect chains — This means several hops from an old to a new page. This is especially important when you redirect http to https and www to non-www. These should all resolve to the same domain directly (https://domain.com), not ping pong from one to the next.
- Don’t redirect links that are in your control — This means, if there is a faulty link inside a menu, inline, or similar, change them manually. Don’t be lazy.
- Try to correct external links — If the fault is with an incoming link, consider reaching out to the originator and ask them to correct it on their end.
In essence, keep page redirects to a minimum. To see if you have multiple redirects in place, you can use the Redirect Mapper.
How to Find Pages to Redirect and Prepare the Right URLs
So, besides when you do a site or page move, how do you find pages to redirect?
A good place to start is the 404 errors/crawl errors in Google Search Console. You find them under Coverage.
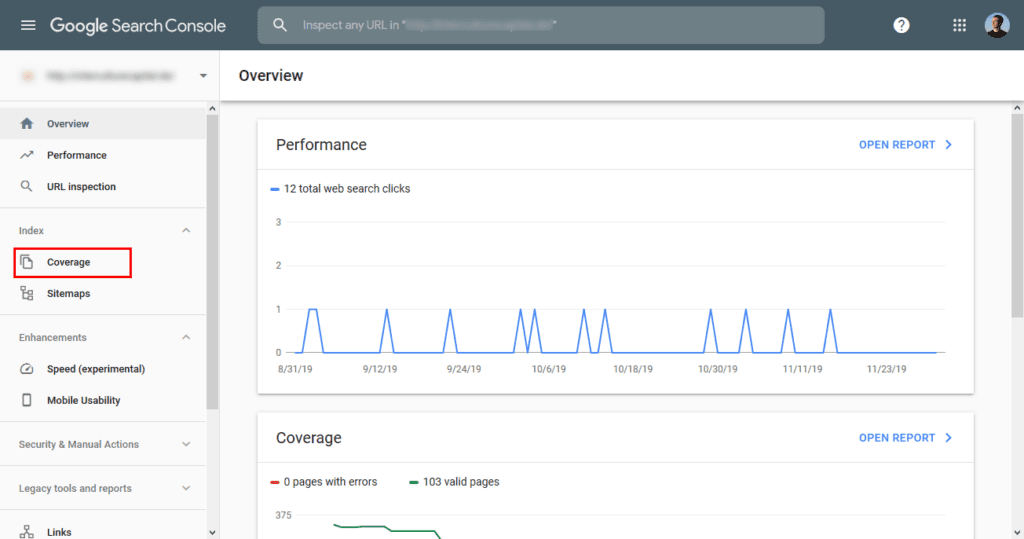
Note that Search Console now only shows 404 errors that threaten your pages from being indexed and not all of them. Therefore, to track down non-existent pages, you can also use a crawler like Screaming Frog. Some of the WordPress plugins below also help you with that.
Then, to prepare your page redirects:
- Get the correct to and from URL — This means to stay consistent in the format. For example, if you are using a trailing slash, do it for both URLs. Also, always redirect to the same website version, meaning your preferred domain including www/non-www, http/https, etc.
- Get the slug, not the URL — This means /your-page-slug instead of http://yoursite.com/your-page-slug. This way, you make your redirects immune to any changes to the top-level domain such as switching from www to non-ww or from http to https.
- Redirect to relevant pages — Meaning similar in topic and intent. Don’t just use the homepage or something else, try to anticipate search intent and how you can further serve it.
How to Correctly Implement Page Redirects in WordPress
You have different methods of implementing page redirects in WordPress. Basically, you can either use a plugin or do it (somewhat) manually via .htaccess. Both come with pros and cons:
- Plugin — Easy to use, nontechnical, however, potentially slower because many of them use wp_redirect, which can cause performance issues.
- .htaccess — This is a server file and very powerful. For example, you can include directives for using gzip compression in it. Using this is faster because page redirects are set up at the server level, not somewhere above it. However, making a mistake can mess up and/or disable your entire site.
Let’s go over both options:
1. Using a Plugin
You have different plugin options for redirects in WordPress. Among them are:
- Redirection — This is the most popular solution in the WordPress directory. It can redirect via Core, htaccess, and Nginx server redirects.
- Simple 301 Redirects — Easy to use, few options, does just what you need and nothing more.
- Safe Redirect Manager — With this plugin, you can choose which redirect code you want to use (remember what we talked about earlier!). It also only redirects to white-listed hosts for additional security.
- Easy Redirect Manager — Suitable for 301 and 302 redirects. The plugin is well designed and comes with many options.
All of the plugins work in a very similar way. They provide you with an interface where you can enter a URL to redirect and where it should lead instead.

Some of them, like the Redirection plugin, also have additional functionality. For example, this plugin also tracks whenever a visitor lands on a page that doesn’t exist so you can set up appropriate page redirects.
2. Using .htaccess
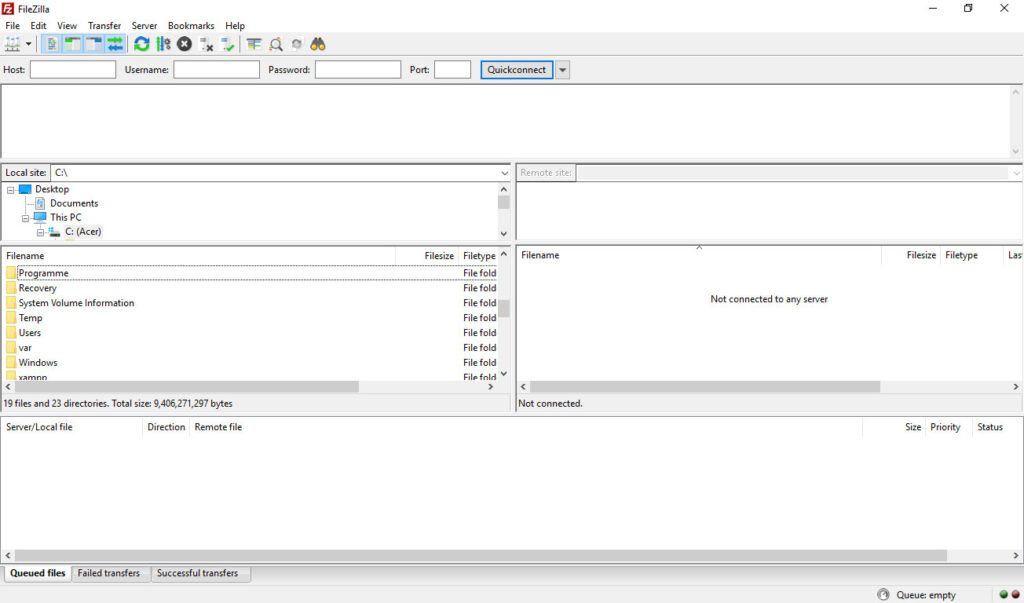
.htaccess usually resides on your server inside your WordPress installation. You can access it by dialing up via FTP.
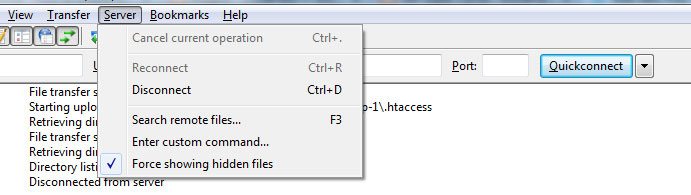
Be aware though that it is hidden by default, so you might have to switch on the option to show hidden files in your FTP client of choice.
The first thing you want to do is download and save it in a safe place so you have a copy of your old file in case something goes wrong. After that, you can edit the existing file (or another local copy) with any text or code editor.
A simple redirect from one page on your site to another can be set up like this:
RewriteEngine On
Redirect 301 /old-blog-url/ /new-blog-url/
If the brackets already exist (as they should when you are using WordPress), all you need is this:
Redirect 301 /old-blog-url/ /new-blog-url/Just be sure to include it right before the closing bracket. You can also use wildcards in redirects. For example, the code below is used to redirect all visitors from the www to the non-www version of a website.
RewriteCond %{HTTP_HOST} ^www.mydomain.com$
RewriteRule (.*) http://mydomain.com/$1 [R=301,L]
To explore more options and if you don’t want to write them out manually, there is this useful tool that creates redirect directives for you.
When you are done, save/re-upload and you should be good to go. Be sure to test thoroughly!
In a Nutshell: Page Redirects in WordPress Are Super Useful
Page redirects have a very important function. They keep visitors and search engines from landing on non-existent pages and are, therefore, a matter of both usability and SEO.
Above, you have learned all you need to know about their usage and how to implement them. You are now officially ready to start sending visitors and search spiders wherever you want.
Note that these aren’t the only ways to implement page redirects. However, they are the most common and recommended. If you want to know less common ways, check this article on CSS Tricks.
What do you use to implement page redirects in WordPress? Any more tools or tips? Share them in the comments section below!
The post How to Do Page Redirects in WordPress – The Complete Guide appeared first on Torque.
