It has now been a year since WordPress released its new Gutenberg Editor and it has now matured enough to become a very handy way to design and build your websites.
Gutenberg has now overcome its teething issues and is a great way for both developers and noncoders to build and design the exact website they want.
In this WordPress Gutenberg tutorial, we will show you both the basics of Gutenberg and also some of the more advanced types of content you can create such as custom lists, a search, and templates. First, let’s look at exactly why Gutenberg has become such a useful option for building websites.
Why Gutenberg makes it easier to build great websites
Gutenberg uses blocks to build your pages. Blocks are elements that contain different types of content so you can create your layouts.
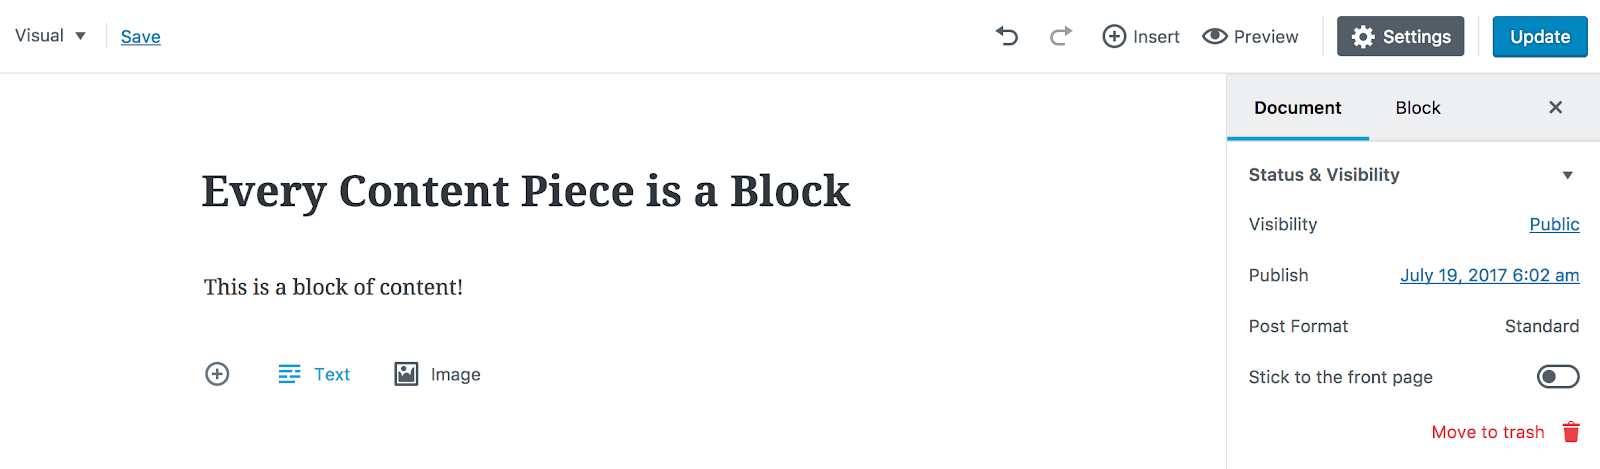
The block editor is still evolving but it is already incredibly intuitive and flexible. You do not need to be a coding expert to create content.
Not only that, but there are a host of other small but important advantages that you gain by using Gutenberg, which we outlined in our blog post on why the Gutenberg Editor is so great.
The best blocks plugin to use with Gutenberg
Gutenberg’s launch more than a year ago has given developers ample time to create excellent plugins that not only complement but enhance the website building experience with Gutenberg.
One of my favorite plugins is Toolset Blocks, which includes many tools that make it easy to work with Gutenberg:
- Building websites is straightforward. Before you might have had to design your pages using a separate software before a developer implemented them. Now you can do everything on WordPress.
- Use dynamic content. Dynamic content will help lift your website from simple to custom. Instead of static content you can use Toolset Blocks to pull your content from your website’s database. For example, you can create dynamic content for post titles, excerpts and featured image.
- No coding needed. You no longer need to be an experienced developer to build your websites. Instead, you can just use Toolset Blocks and Gutenberg to design your layouts and add complex content without coding.
- Edit on the back-end and see how it looks on the front-end. You no longer need to switch between the front and back-end when building your website. The beauty of blocks is everything on the back-end looks how it will when you hit publish.
- Less documentation. You will no longer need to read as much documentation to master it. In fact, you can experiment with the blocks easily as you build your website.
- Fewer plugins. Instead of adding a page builder and many other plugins you can just use Gutenberg and Toolset Blocks.
There are also a number of other great blocks extension plugins for Gutenberg which are worth checking out but for the purpose of this tutorial.
How to build a custom WordPress website using Gutenberg blocks
Now that we have seen the advantages of building websites using Gutenberg let’s take a look at how we actually do it. Below we will go through the basics as well as some more complex features you can create using blocks.
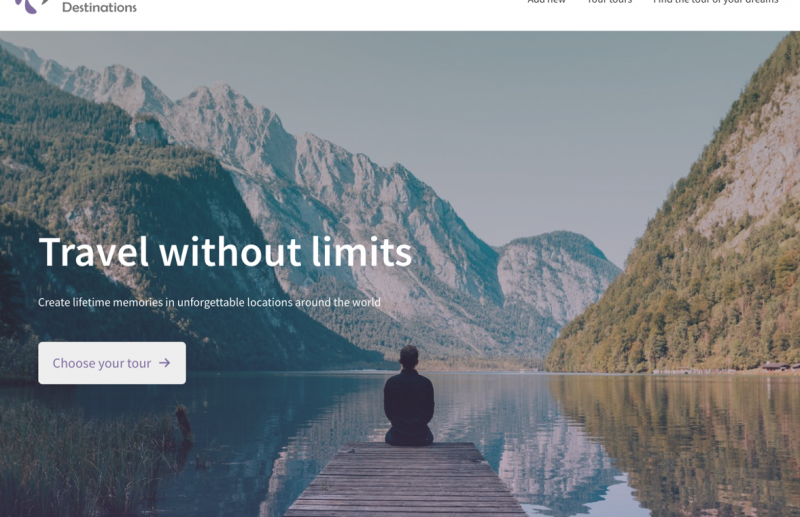
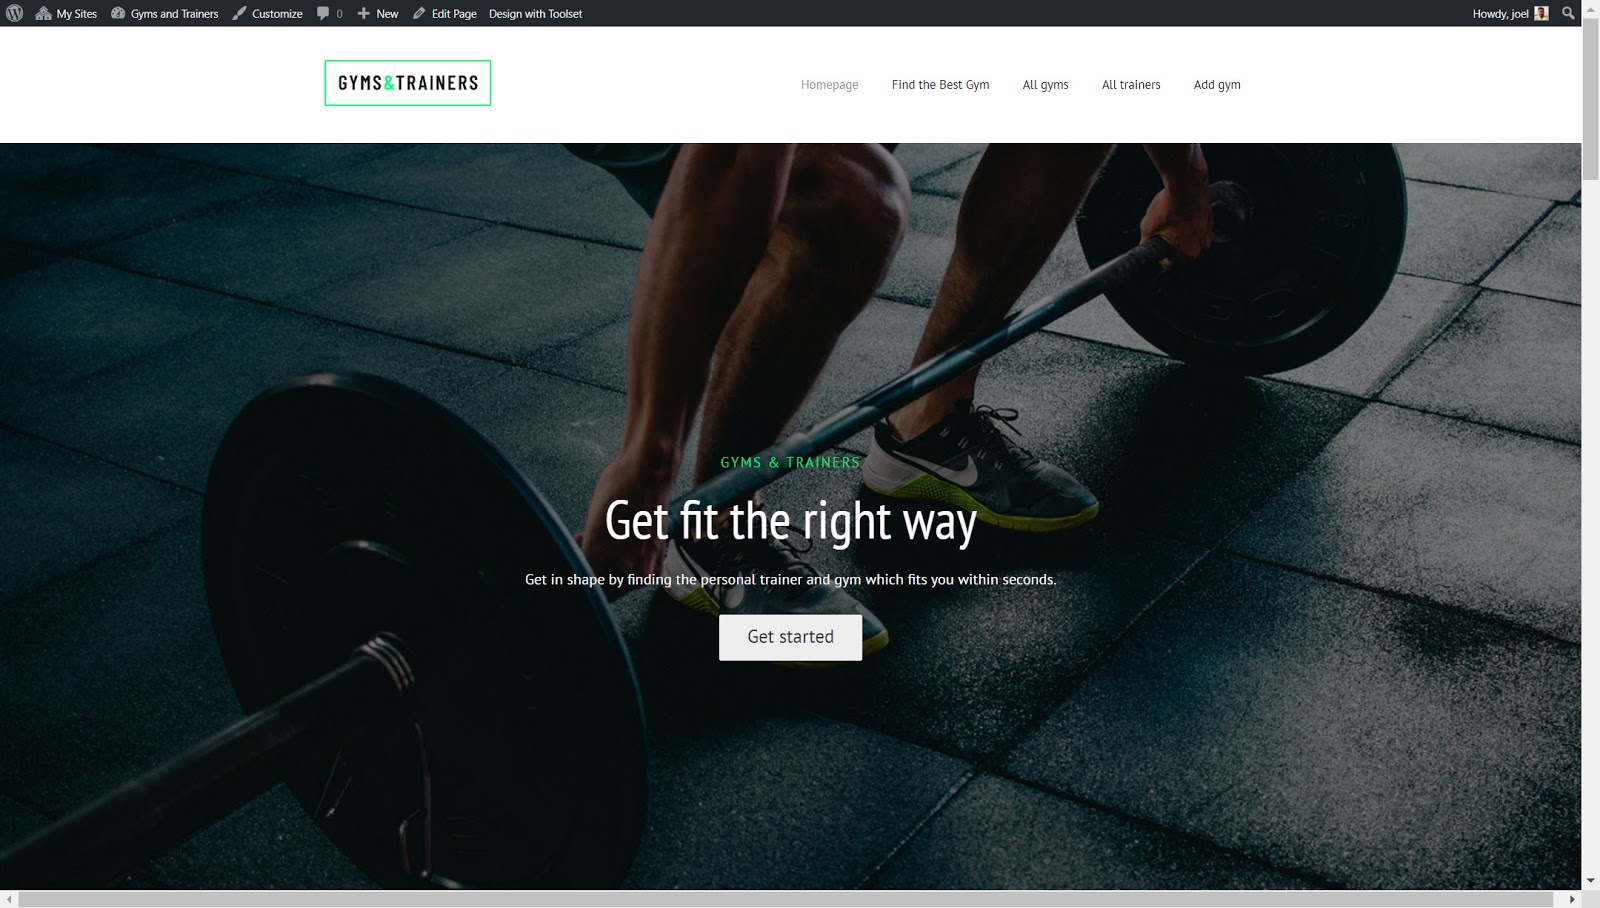
I created a demo gym/personal trainer website using Gutenberg and Toolset Blocks and will take examples from that as I go through the tutorial.
Here is what we will cover in this tutorial:
- Adding, editing, moving and deleting blocks
- Display content side by side
- Navigating through your blocks
- Displaying Fields in your Block Editor Designs
- Displaying an image gallery
- Styling Toolset Blocks in the editor
- Typography controls
- Creating a template
- Building your archive pages
- Creating custom lists of content
- Adding a custom search
Adding, editing, moving and deleting blocks
First of all, we will start from the beginning and will show you the basics of creating and removing your blocks. Even though it might initially seem a complete mystery it should only take a few minutes to get the hang of this new approach to editing.
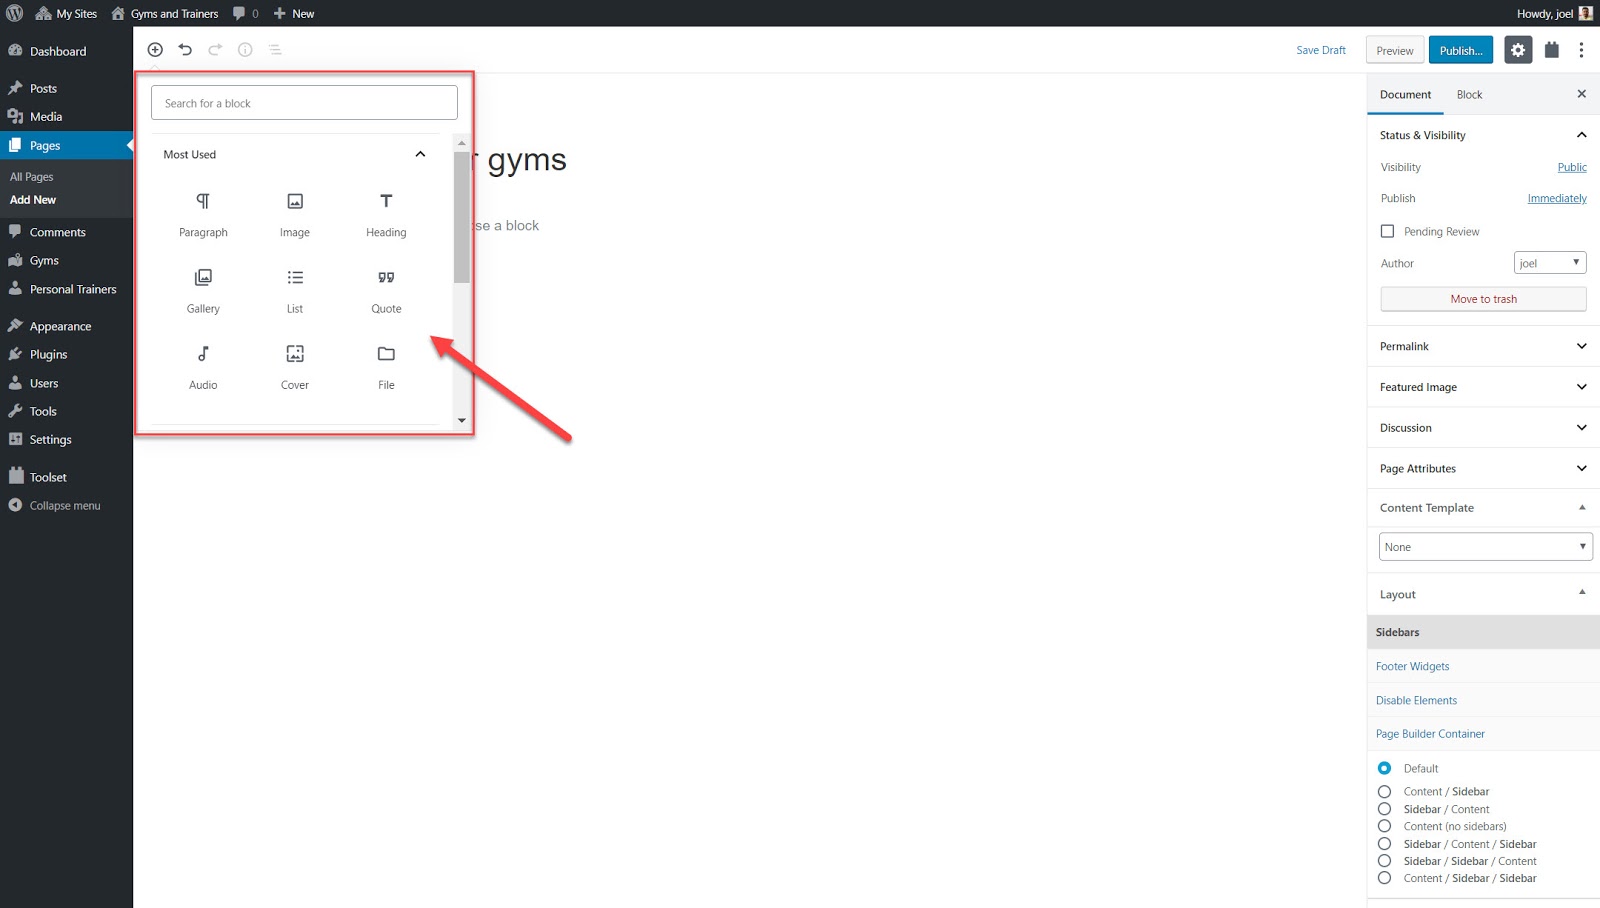
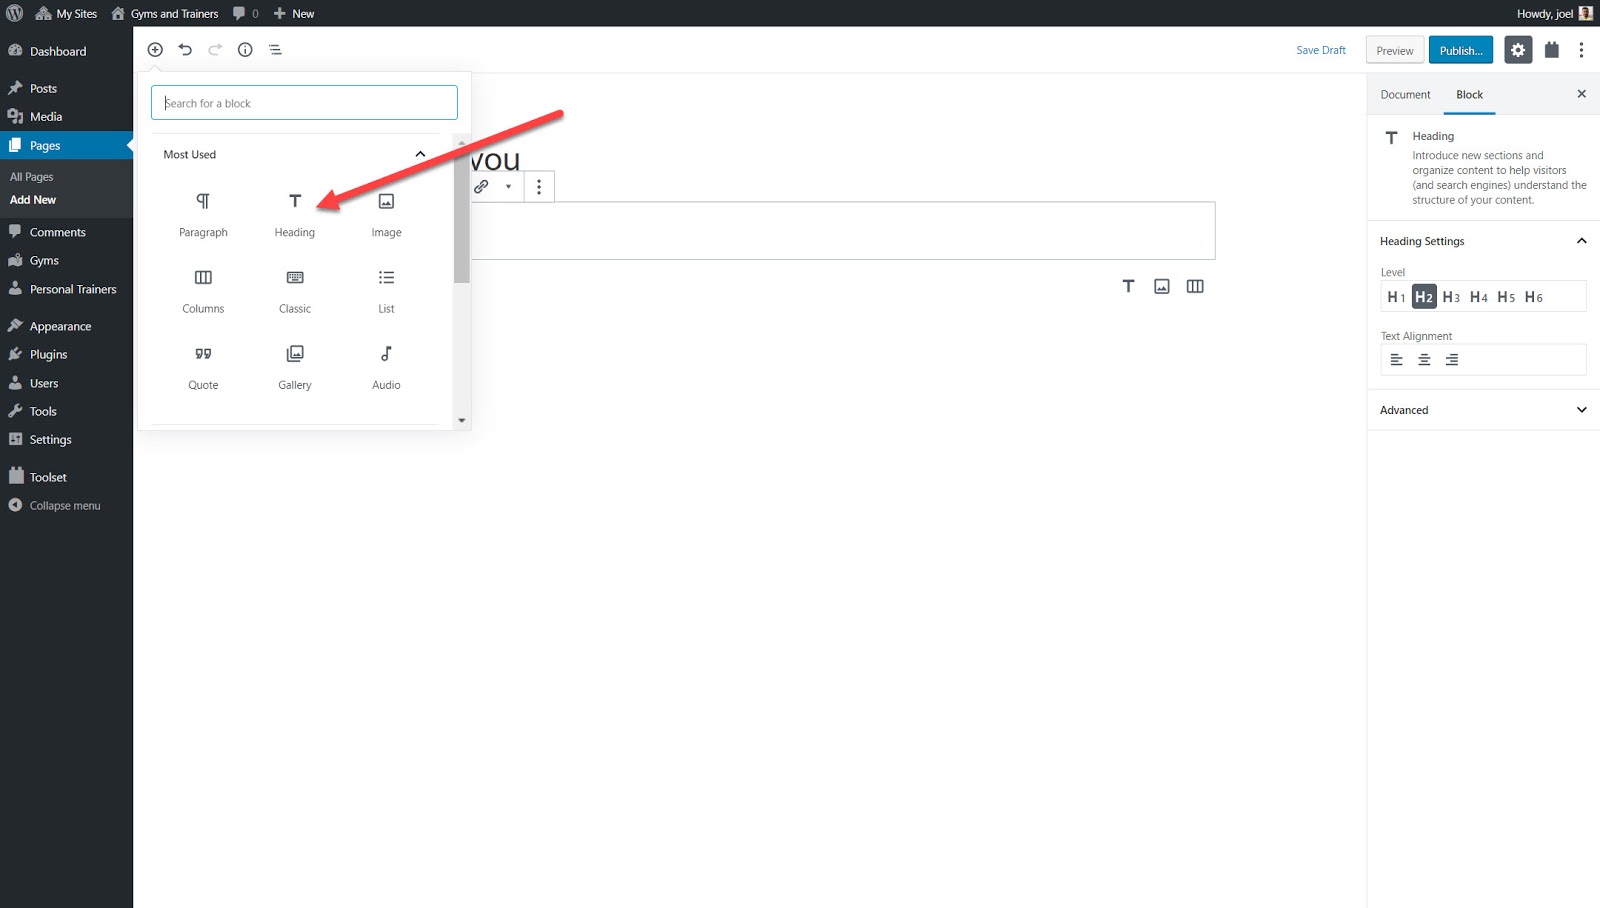
- Open up the page or post you want to edit and click the + button.
- Choose the block you want to use and insert it.
- Enter your content for the block. Below I added the Heading block and created a title.
- On the left of each block, you will see a set of controls which you can use to move your blocks around your page. For example, above or below other blocks.
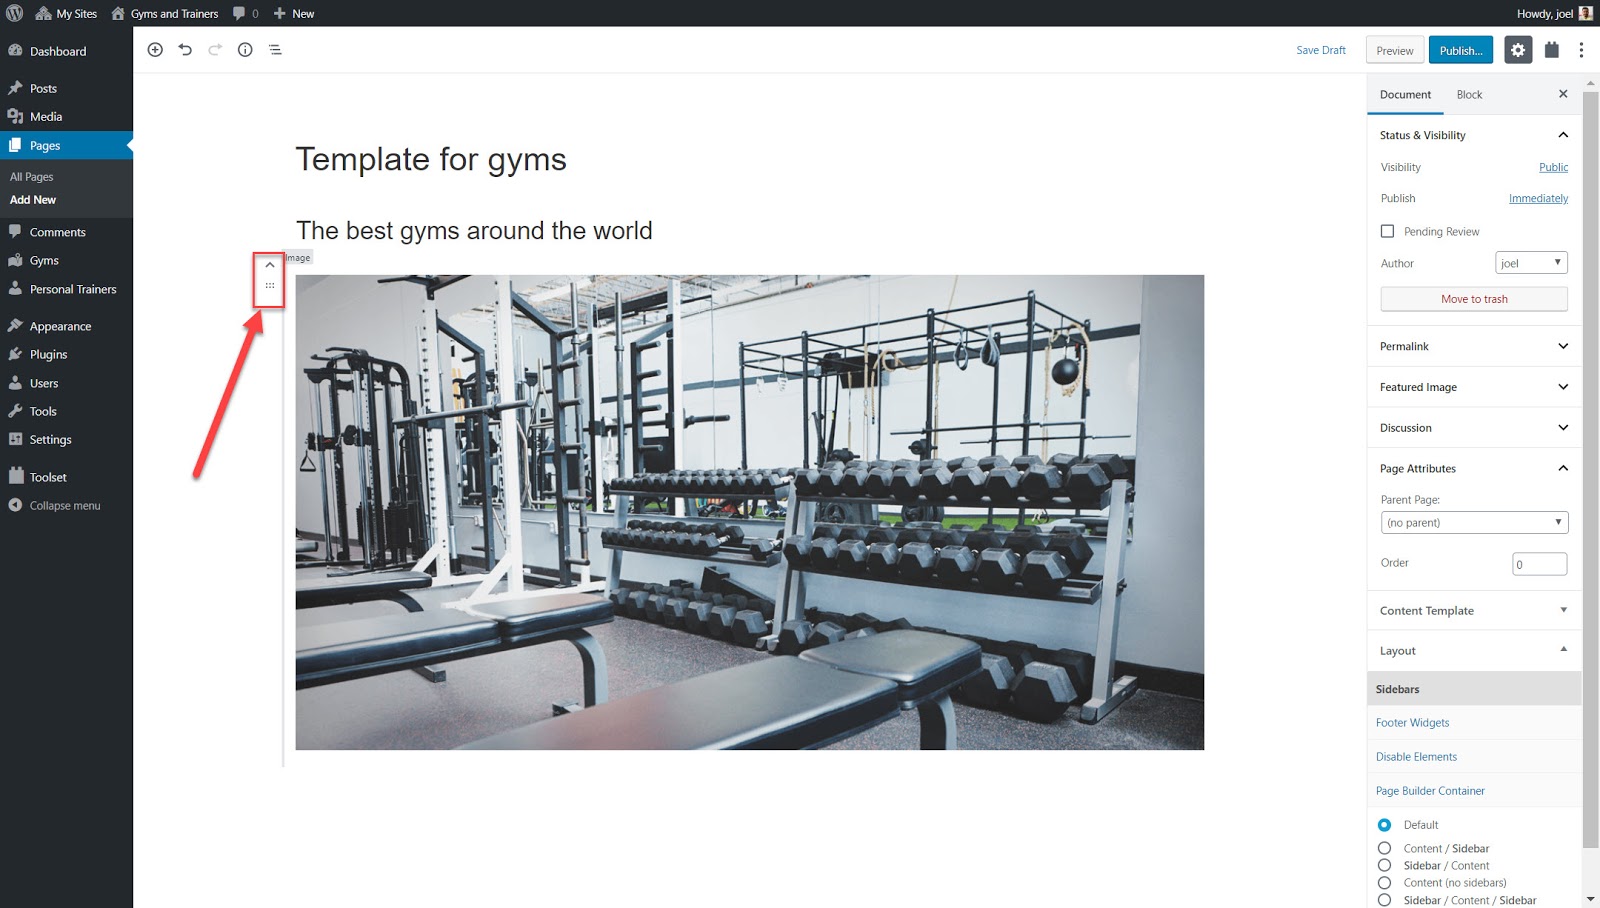
- Style and edit your blocks and its content using the right sidebar.
- If you click on the three-dot option you can see additional options such as the Remove block
How to display your content side-by-side
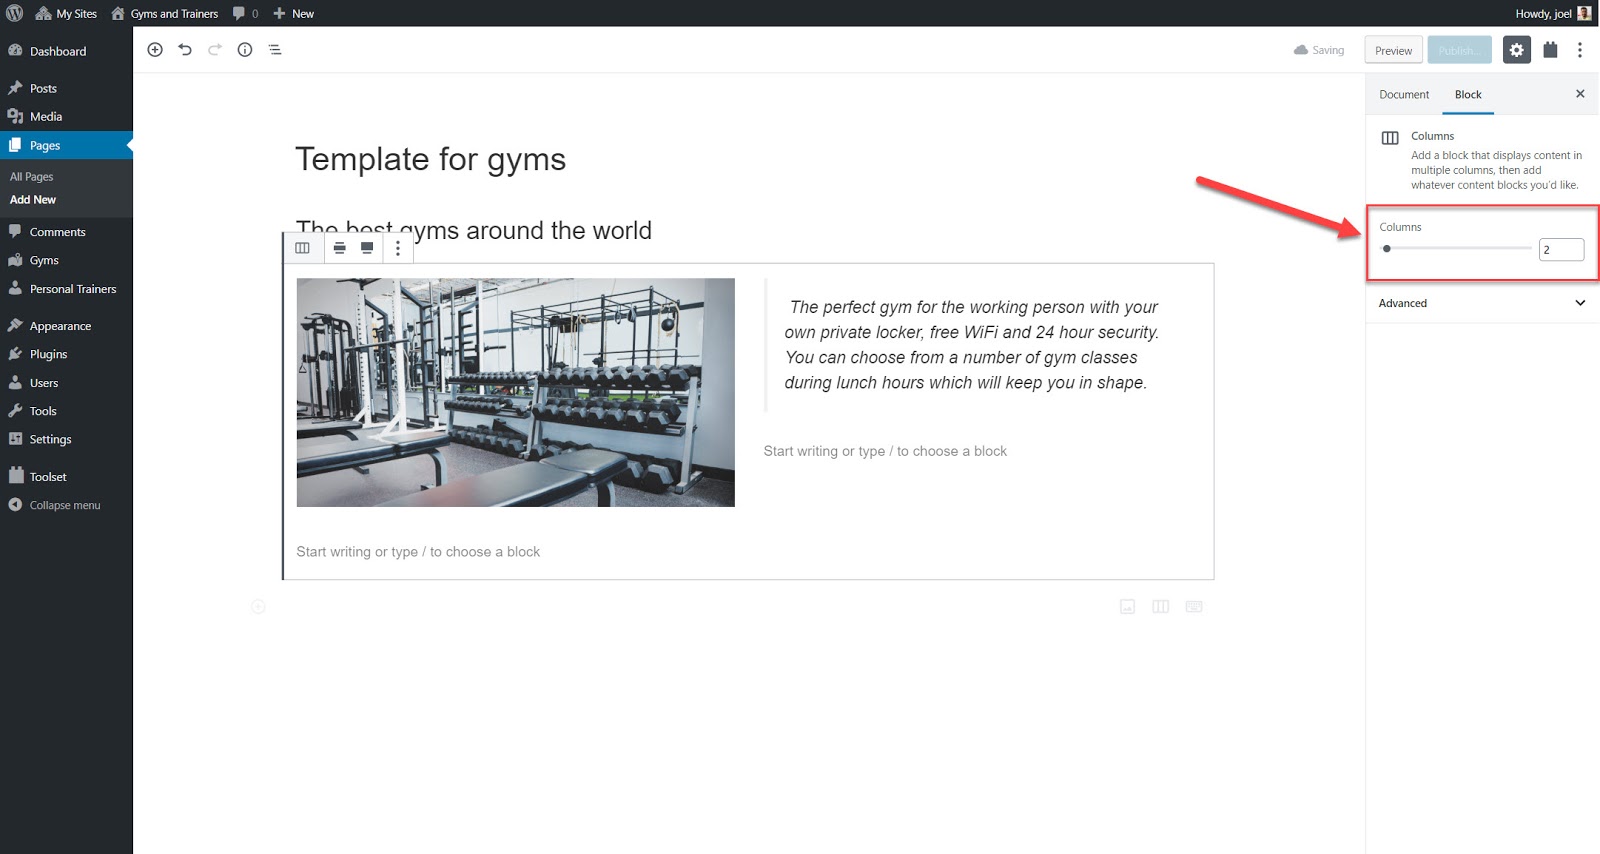
You can add multiple columns for your pages by using the Columns block.
- Select the + button.
- Search for and insert the Columns block.
- On your page, you will now see two columns.
- Increase the number of columns by dragging the toggle on the column block across.
Navigating through your blocks
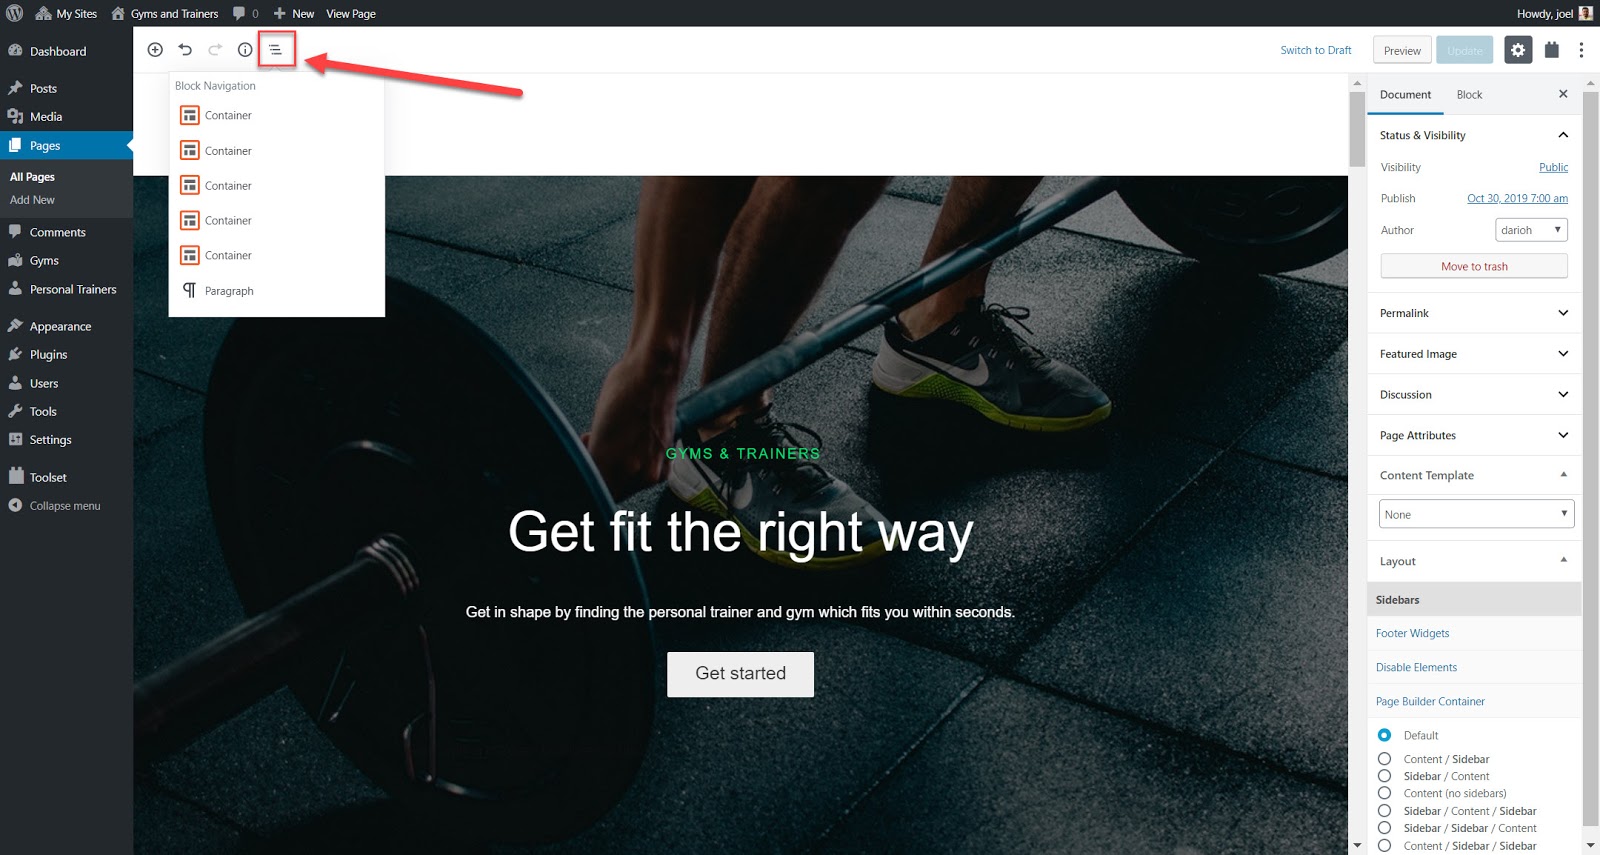
The more you add to your site the more blocks you will have. This means you will have a lot of content to juggle around and make sure it all looks and functions exactly how you wanted.
One of the easiest ways to manage them all is by using the Block Navigation button which you can find at the top of the editor.
Displaying fields in your block editor designs
You can display information from the post fields (the title, body etc) or the custom fields you can create using Toolset.
With Toolset Blocks and Gutenberg, there are three ways for you to display your fields.
- Set block content to come from field values
Toolset Blocks has provided a number of blocks that you can use to set content from fields.
Let’s imagine for example, that you want to set your heading texts to display the name of each gym. You can make your Toolset Heading block dynamic so that it pulls up the correct name from the database based on the gym post type you are looking at.
- Head to Toolset->Dashboard and create a new Content Template for whichever custom post type you want to display. I’ve selected my “Gym” custom post type.
- Select the + button when you reach the editor.
- Add the Heading block or whichever block you want to use.
- Turn on the Dynamic Heading Text.
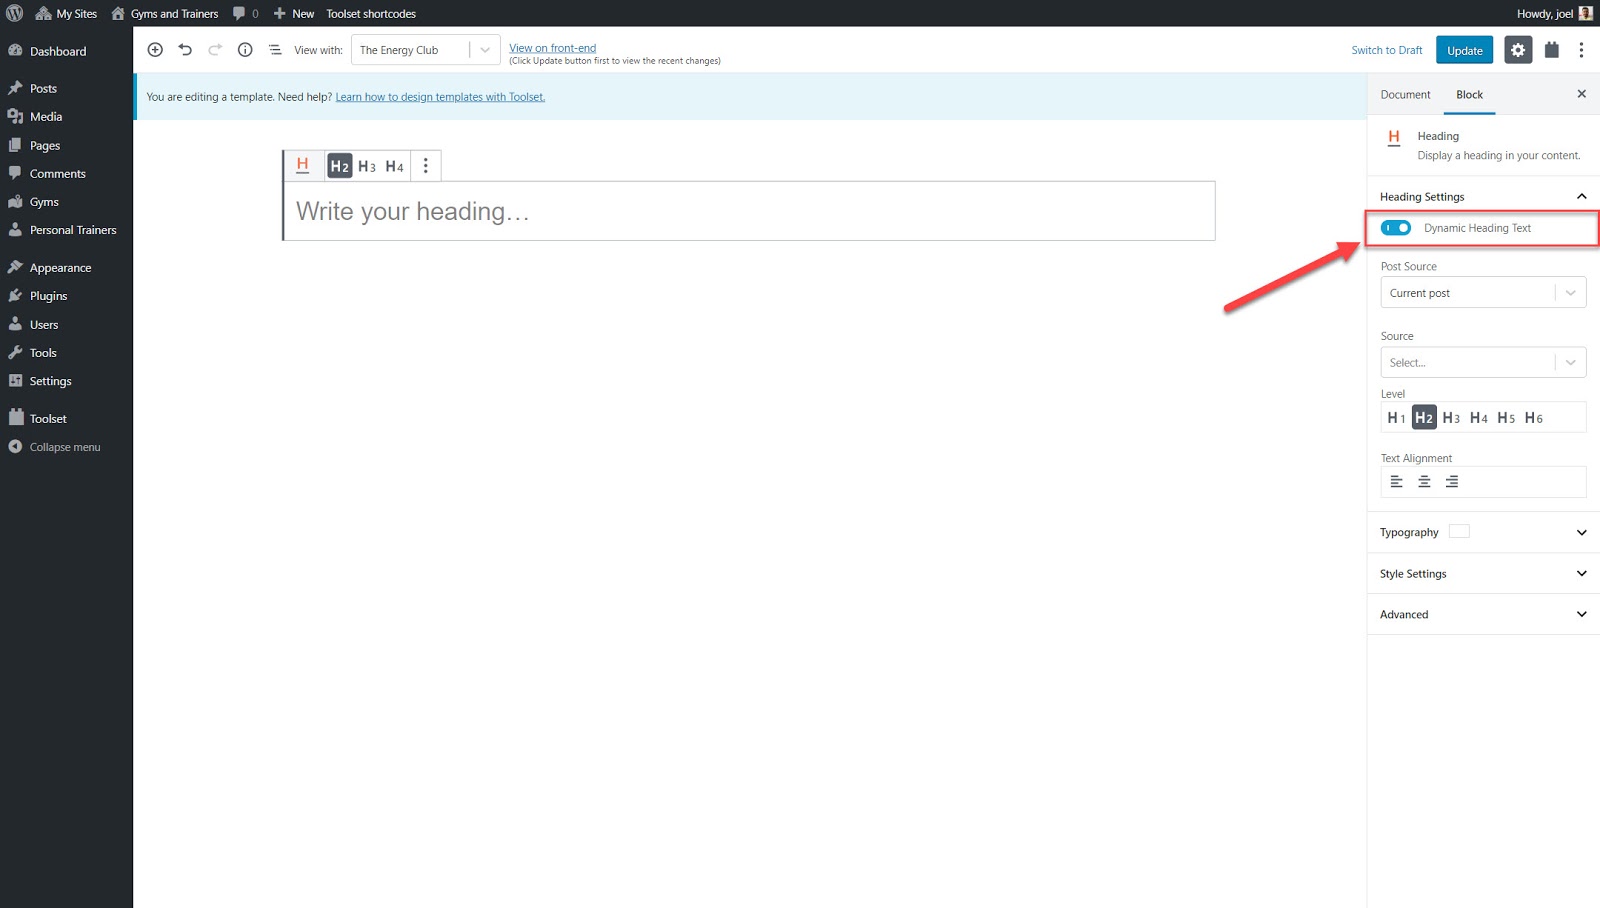
- Select the post field you want to display. Below I have chosen the Post Title.
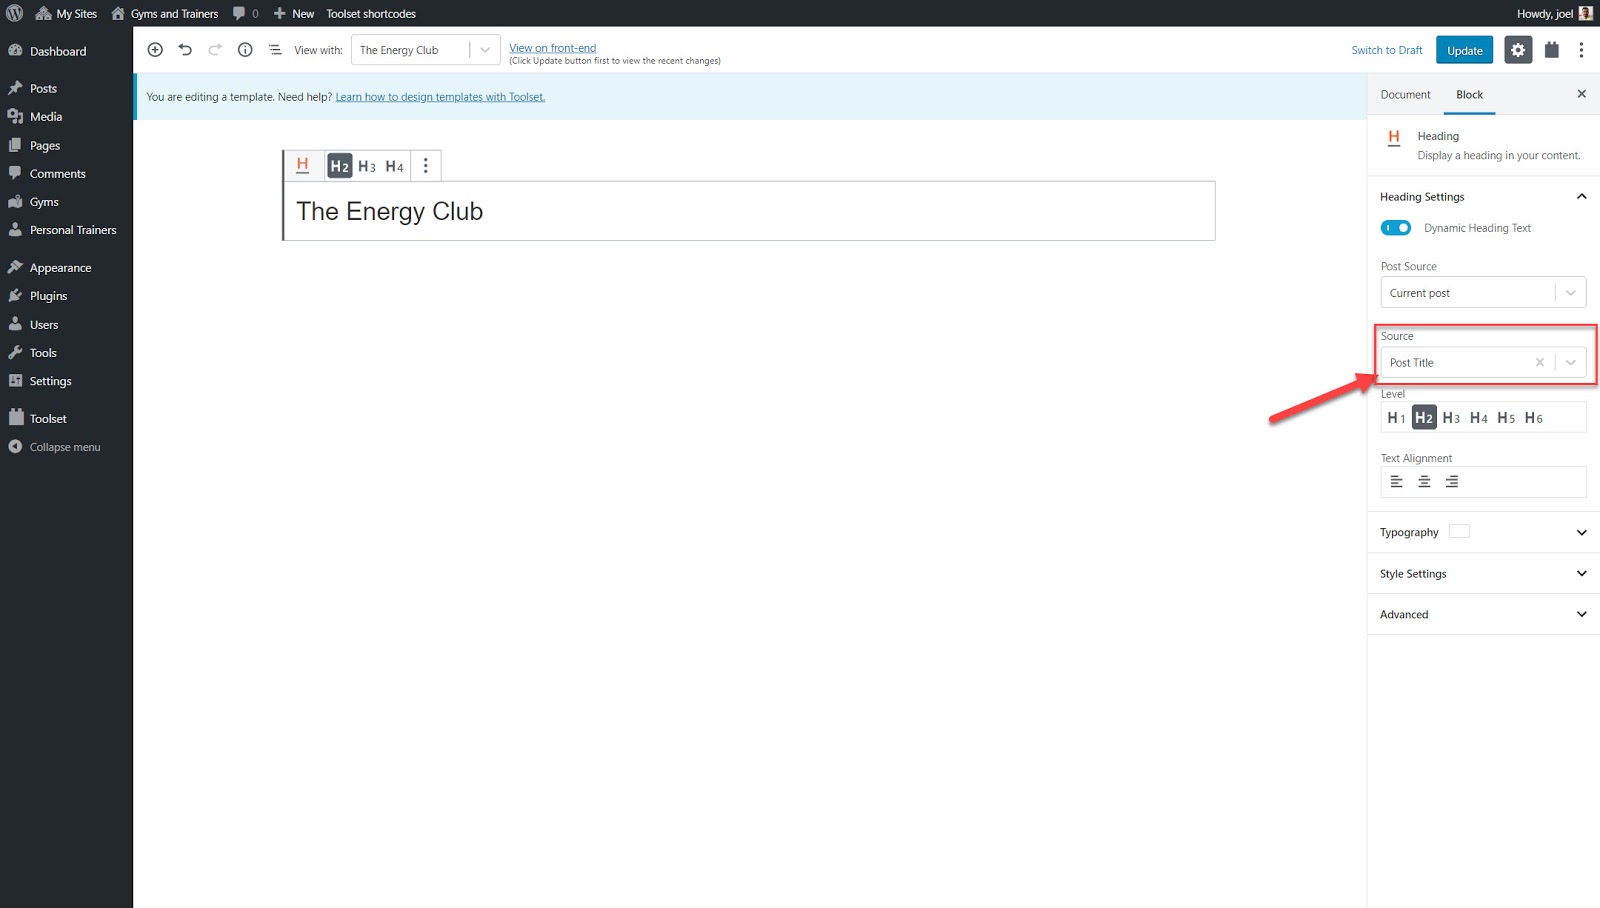
Now, when you click on each gym you will see its name at the top of the post. Of course, with static content, you would see exactly the same name on each post.
2. Display fields as individual blocks
Toolset Blocks also allows you to display any post field or individual custom field created using Toolset as a block. Below I have added the main post content (the description of each gym) to our template for our gyms.
- Select the Single Field block.
- On the right sidebar under Field Type, select the Standard field.
- Under Post Field select the Post Content (body) option.
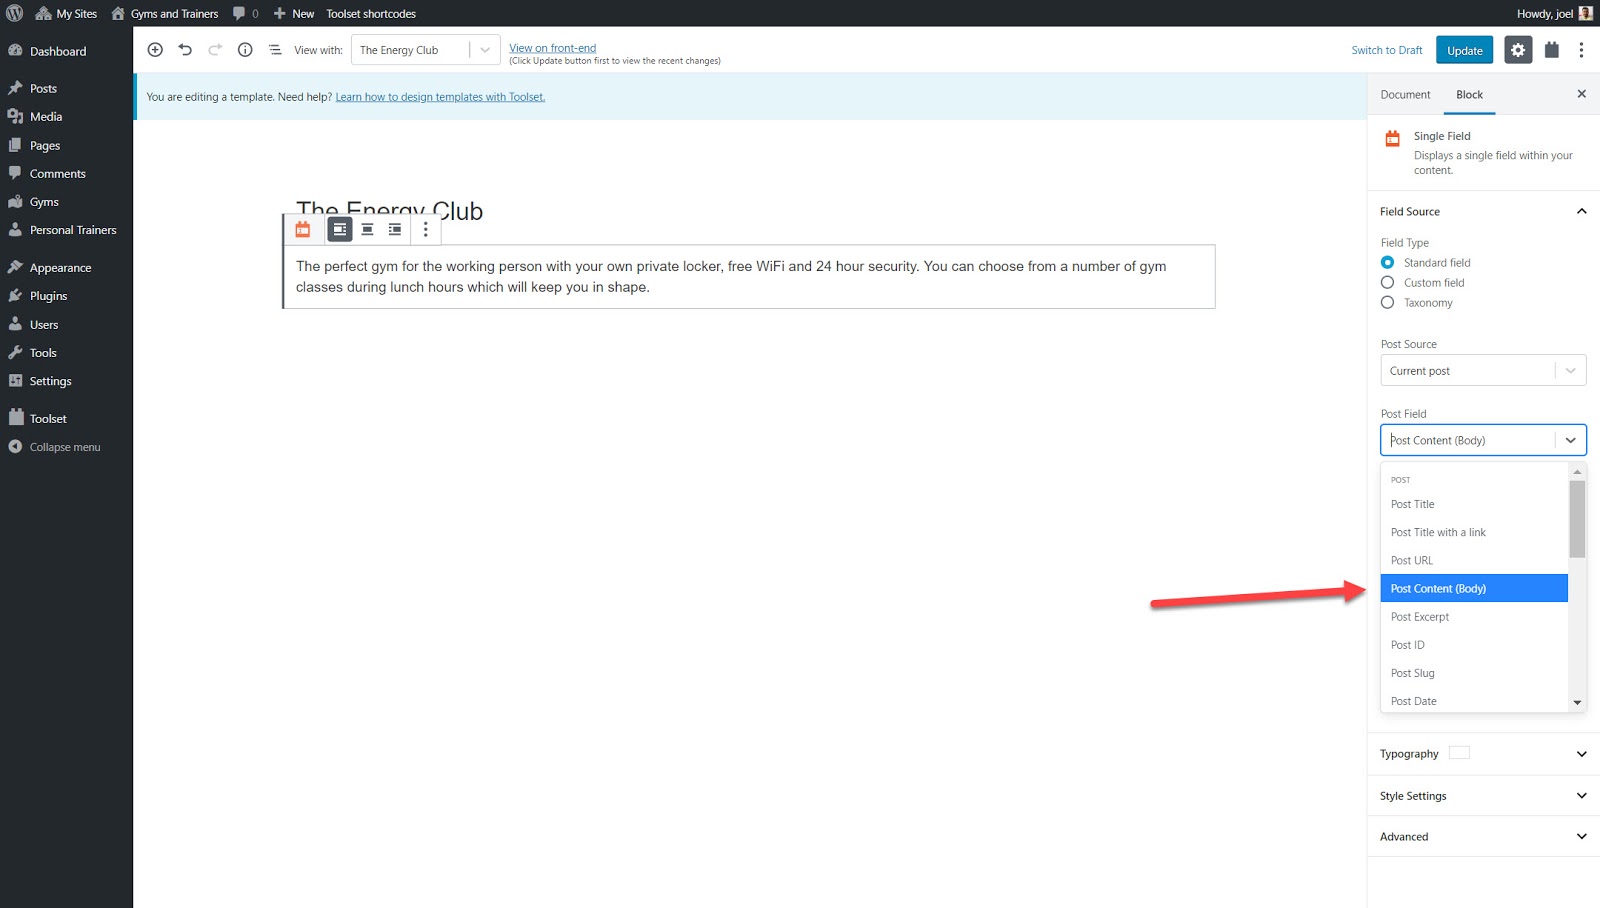
The description for each of the gyms will now appear on their respective posts.
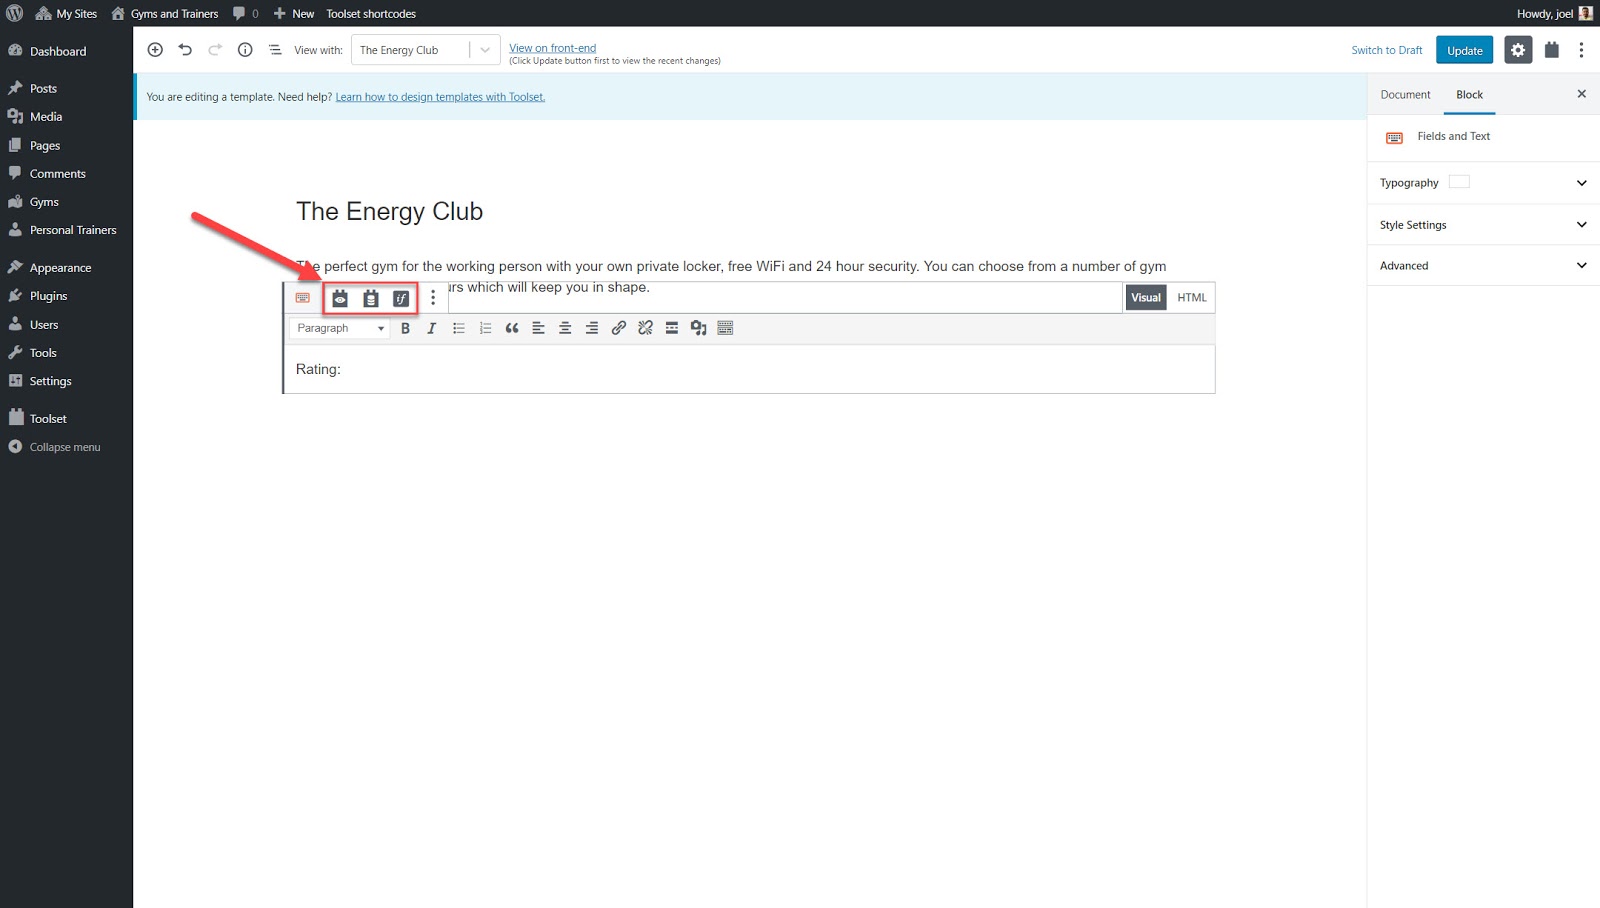
3. Combine fields with text in one block
You might need to add a mix of fields and texts within the same block. For example, if you want to add the rating for each gym you might enter the text “Rating” before the actual field value so users understand exactly what they are looking at.
Select the Fields and text block.

Type in your label. Below you can see I typed in “Rating.”
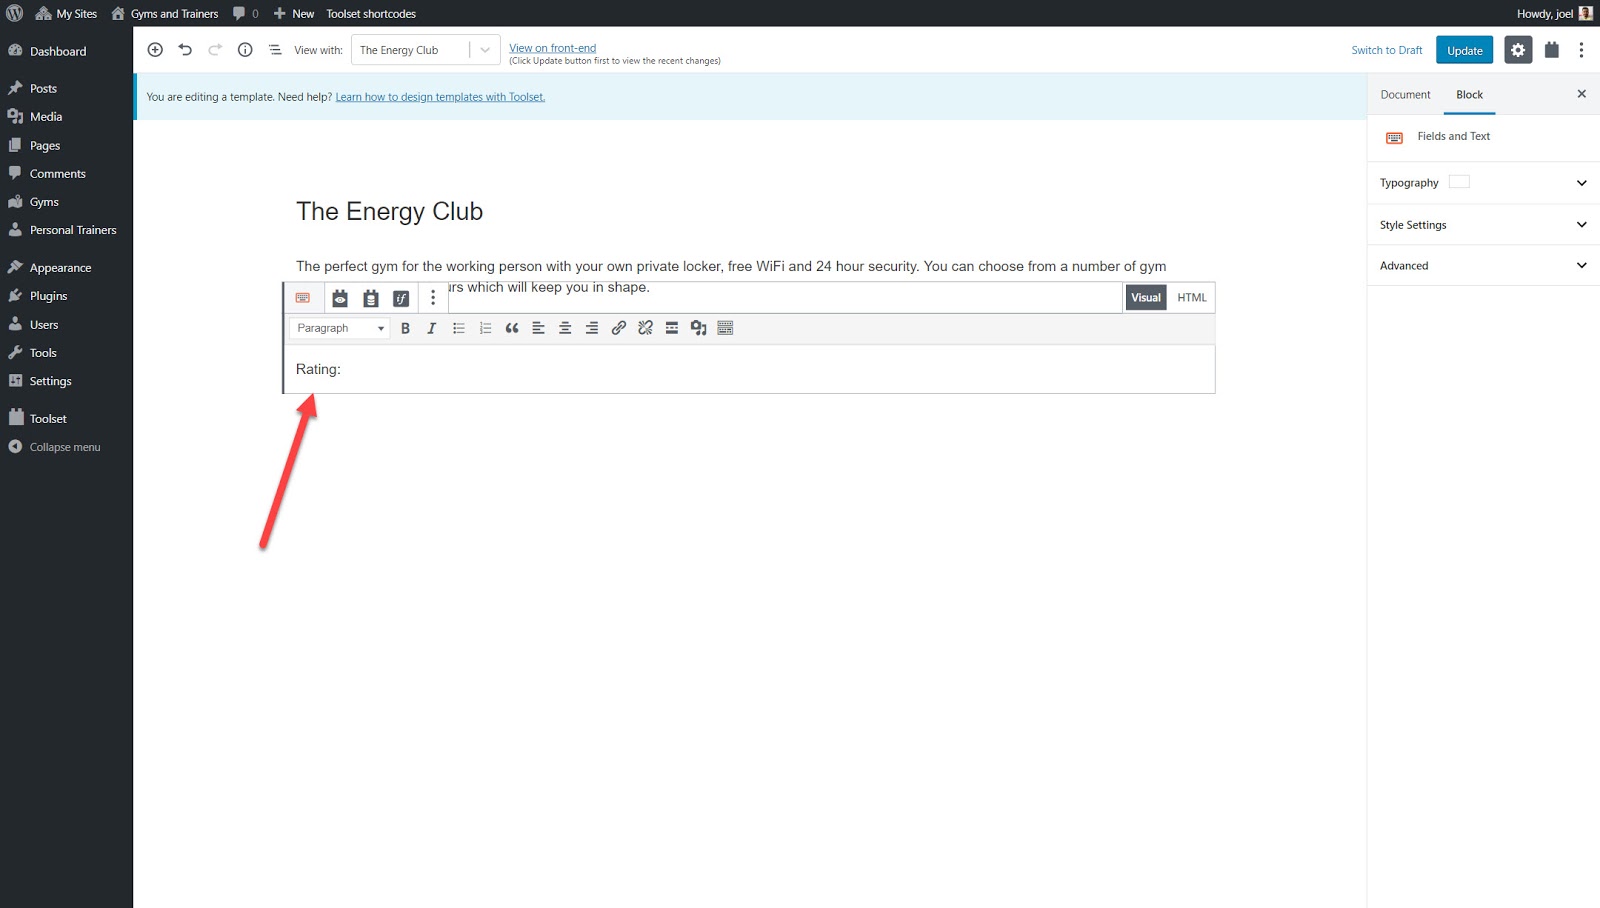
From the icons at the top of the block you can choose to add a field, form or conditional output. For our rating we want to add a field.

Select the content you want to add (in my case it is the Rating field) and click to Insert Shortcode.
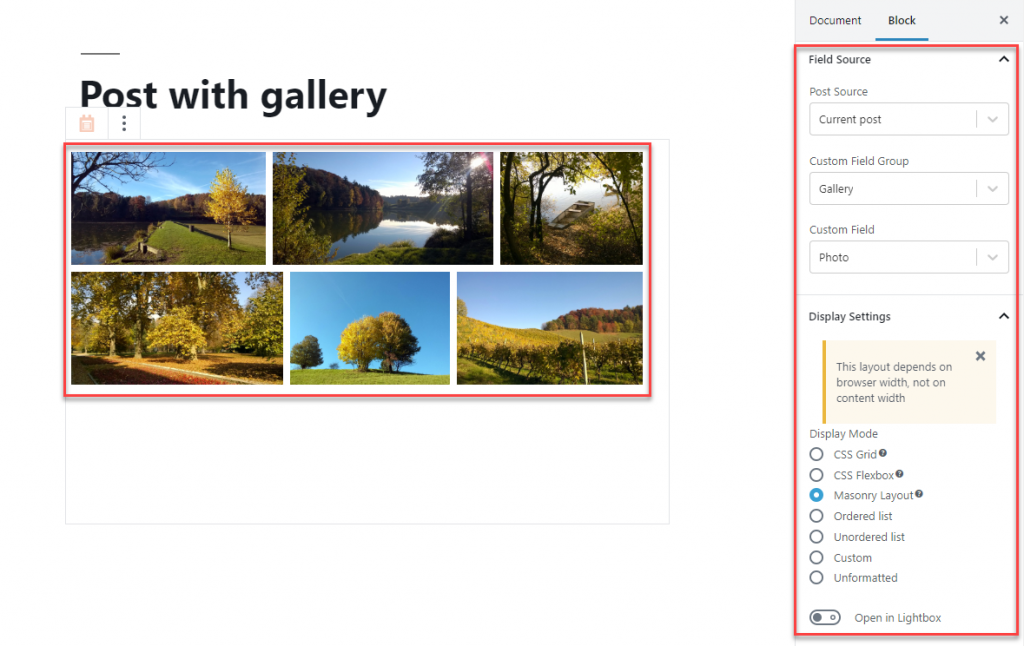
Display an image gallery
You can also add multiple images to your posts using blocks.
Select the Repeating field/Gallery block.
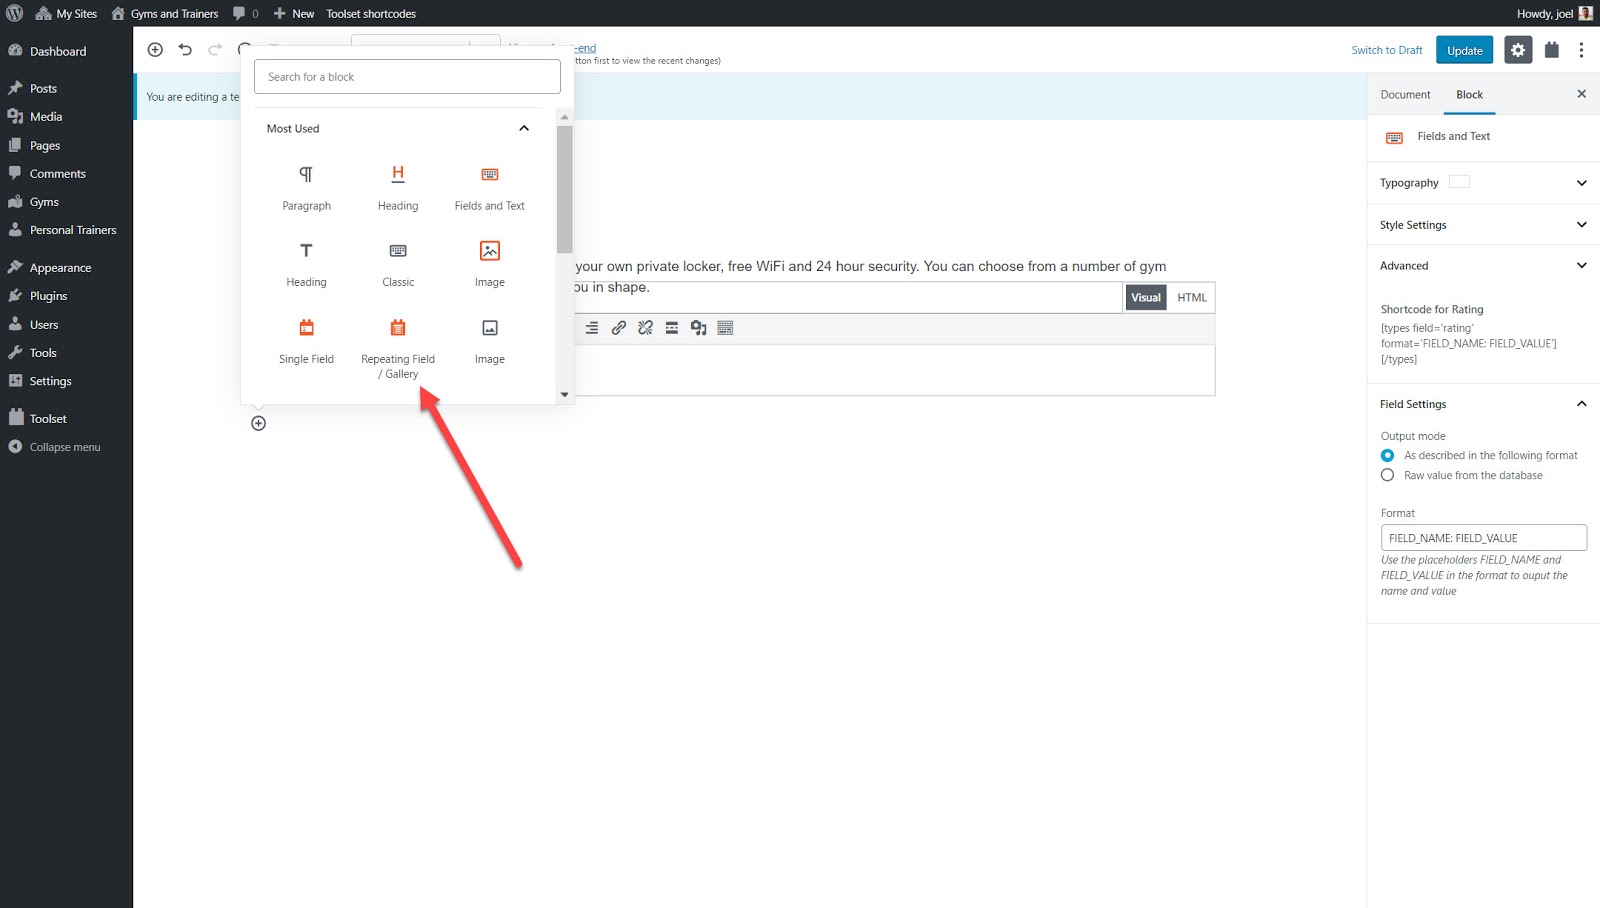
Select the custom field group you want to display. Choose the custom field you want to display.
Styling your blocks in the editor
One of the beauties of using Gutenberg and Toolset Blocks is that you can individually style your blocks to enhance the overall design. For example, you can change the text font, colors, background, and much more.
There are two ways you can style your blocks:
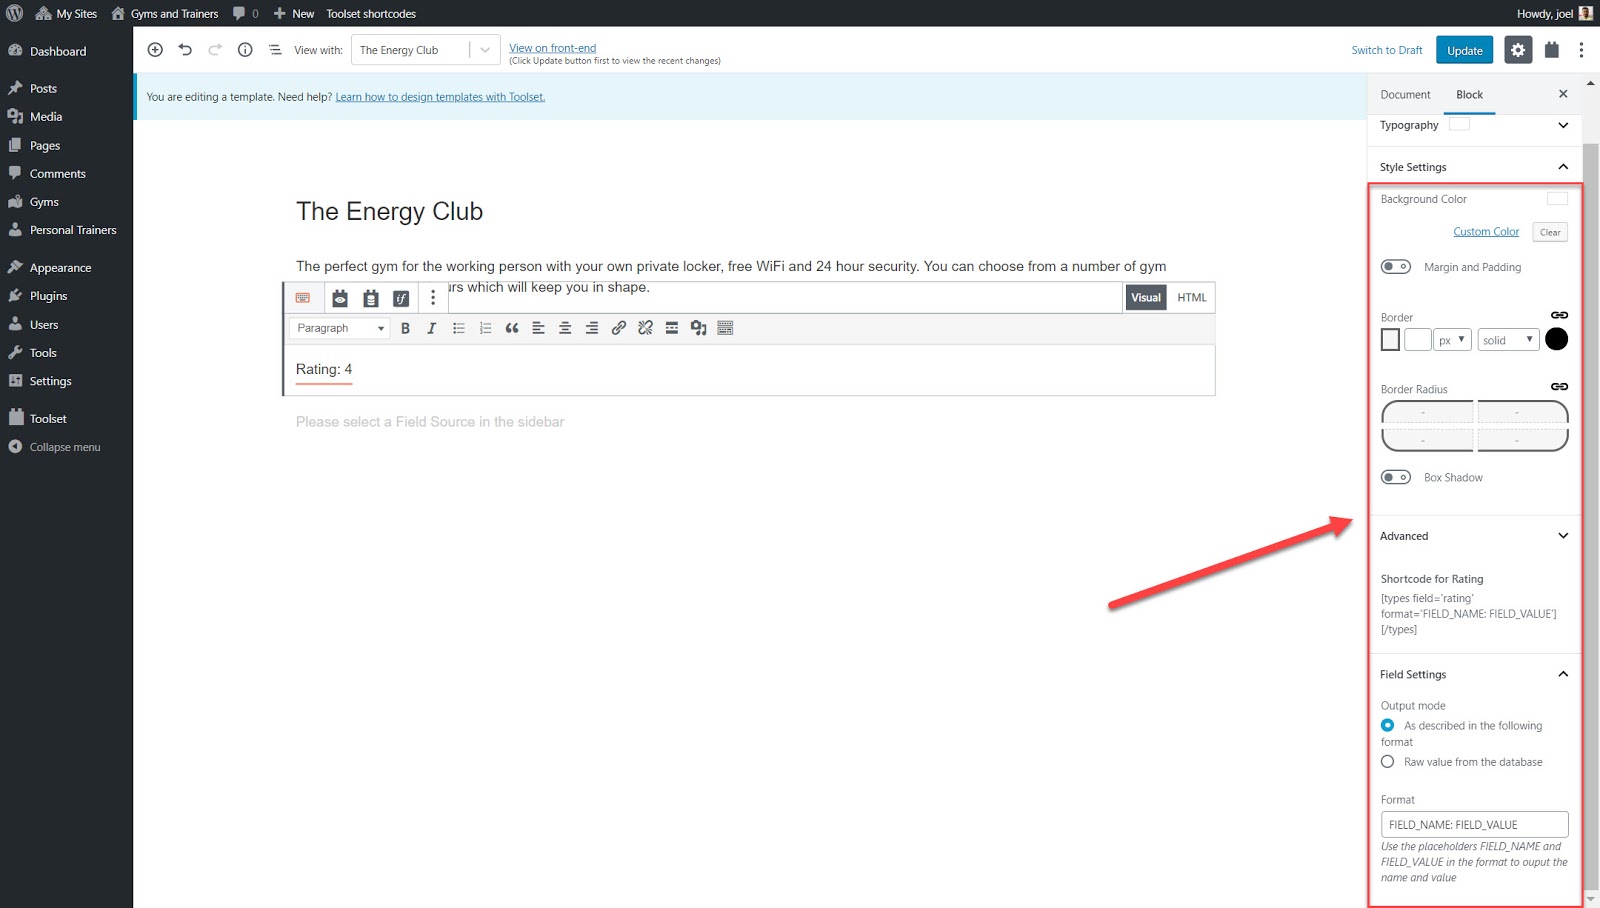
1. Styling items using the interface
- Select the block. For example, I have selected the Ratings block.
- Expand the Style Settings section in the sidebar.
- Here you can adjust your background color, padding, border and much more.
Within each block, there are a number of unique styling options to enhance the design. For example, blocks with text will have font color options while image blocks will allow you to adjust its size.
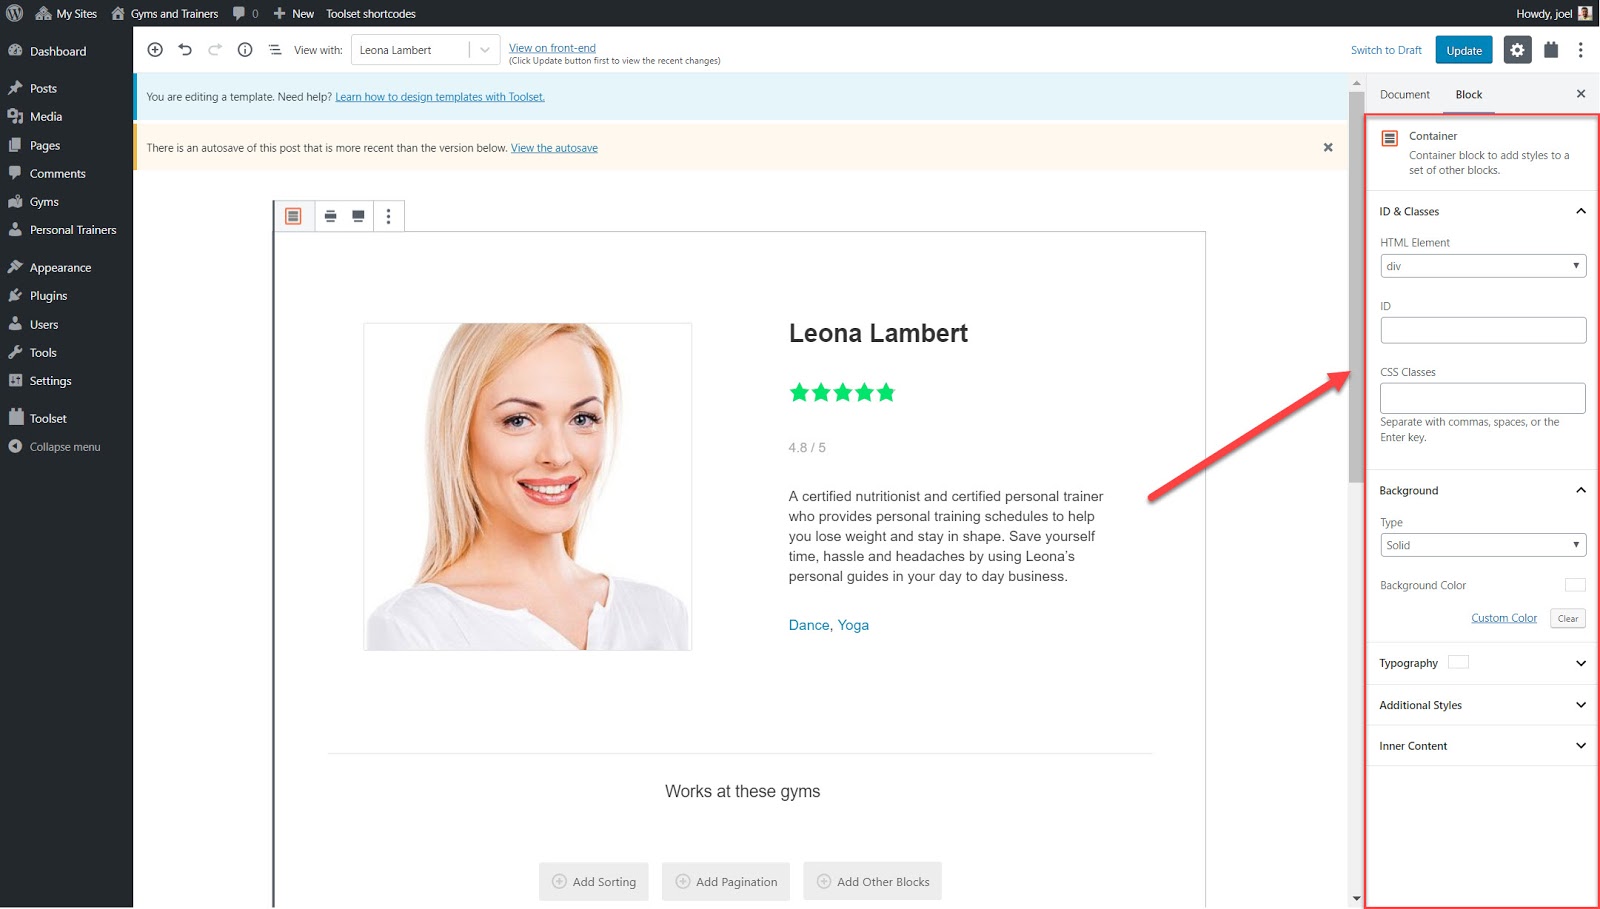
2. Using the Container block
One of the blocks you can find with Toolset is the Container Block which lets you group different blocks together so you can add certain stylings to them which will appear for each of the posts.
For example, I used a Container Block to display all of the information about each personal trainer in one section. This includes the image, rating, name, specialties, and much more. Each personal trainer will then have this same uniform style.
Once again, I can do this by using the sidebar on the right-hand side.
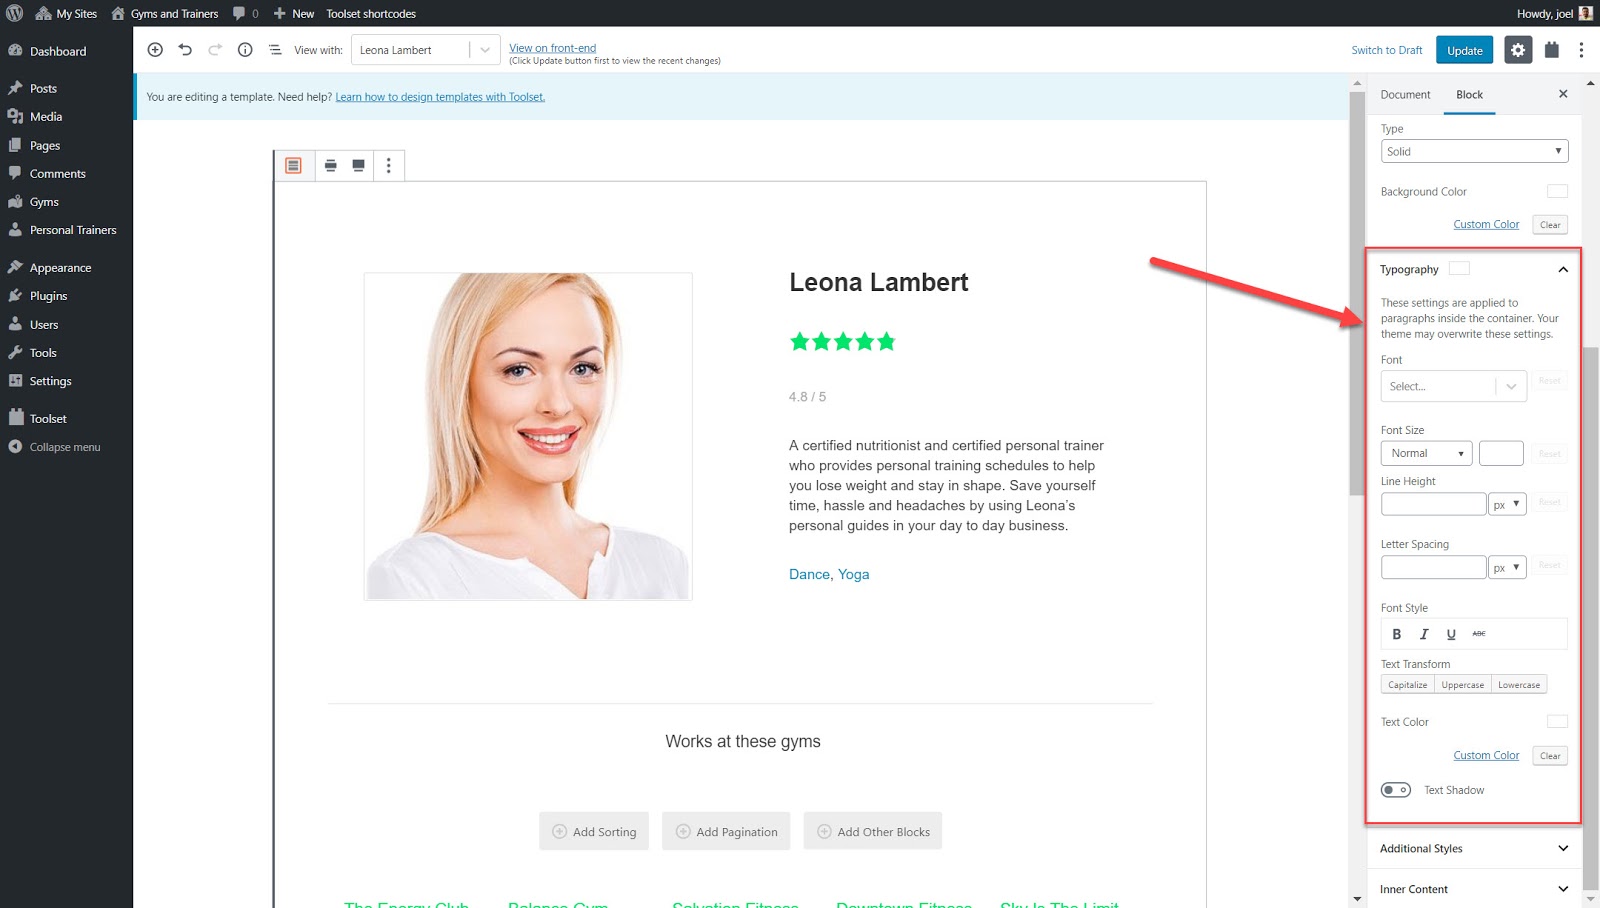
Typography controls
With Toolset Blocks, you can easily style and format your text using its Typography section.
Here is a list of what you can adjust:
- Font type – choose from a huge selection of fonts
- Font size, line height, and letter spacing
- Font style
- Text transform – capitalize, uppercase, lowercase
- Text color
- Text shadow
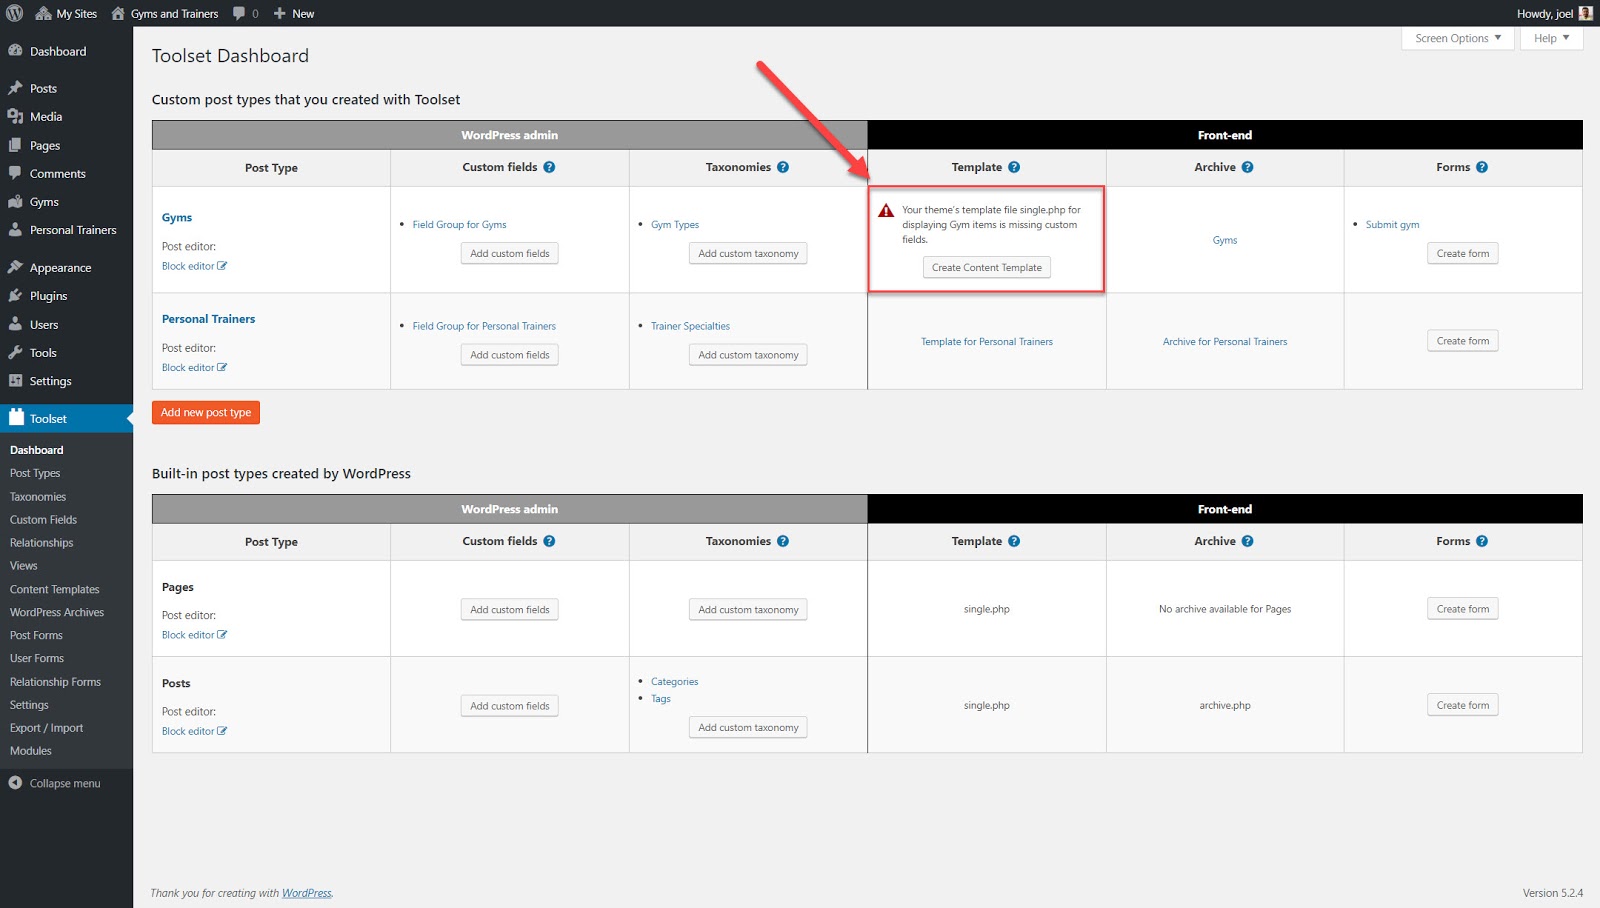
How to create templates to display custom posts
You can create templates for each of your custom post types so that each of the posts has the same design, creating uniformity across your website.
Below I created a template for each of the gyms I wanted to display as part of the “Gyms” custom post type.
- Go to Toolset->Dashboard and click the Create Content Template option for the post type. For example, I have selected to create a content template for my gyms.
- You can then start to add fields to your template. Below I have added a number of different blocks including the Heading, Image and Single Field block which all contain fields.
- Once you save and publish your template each post in that custom post type will display the same layout and styling.
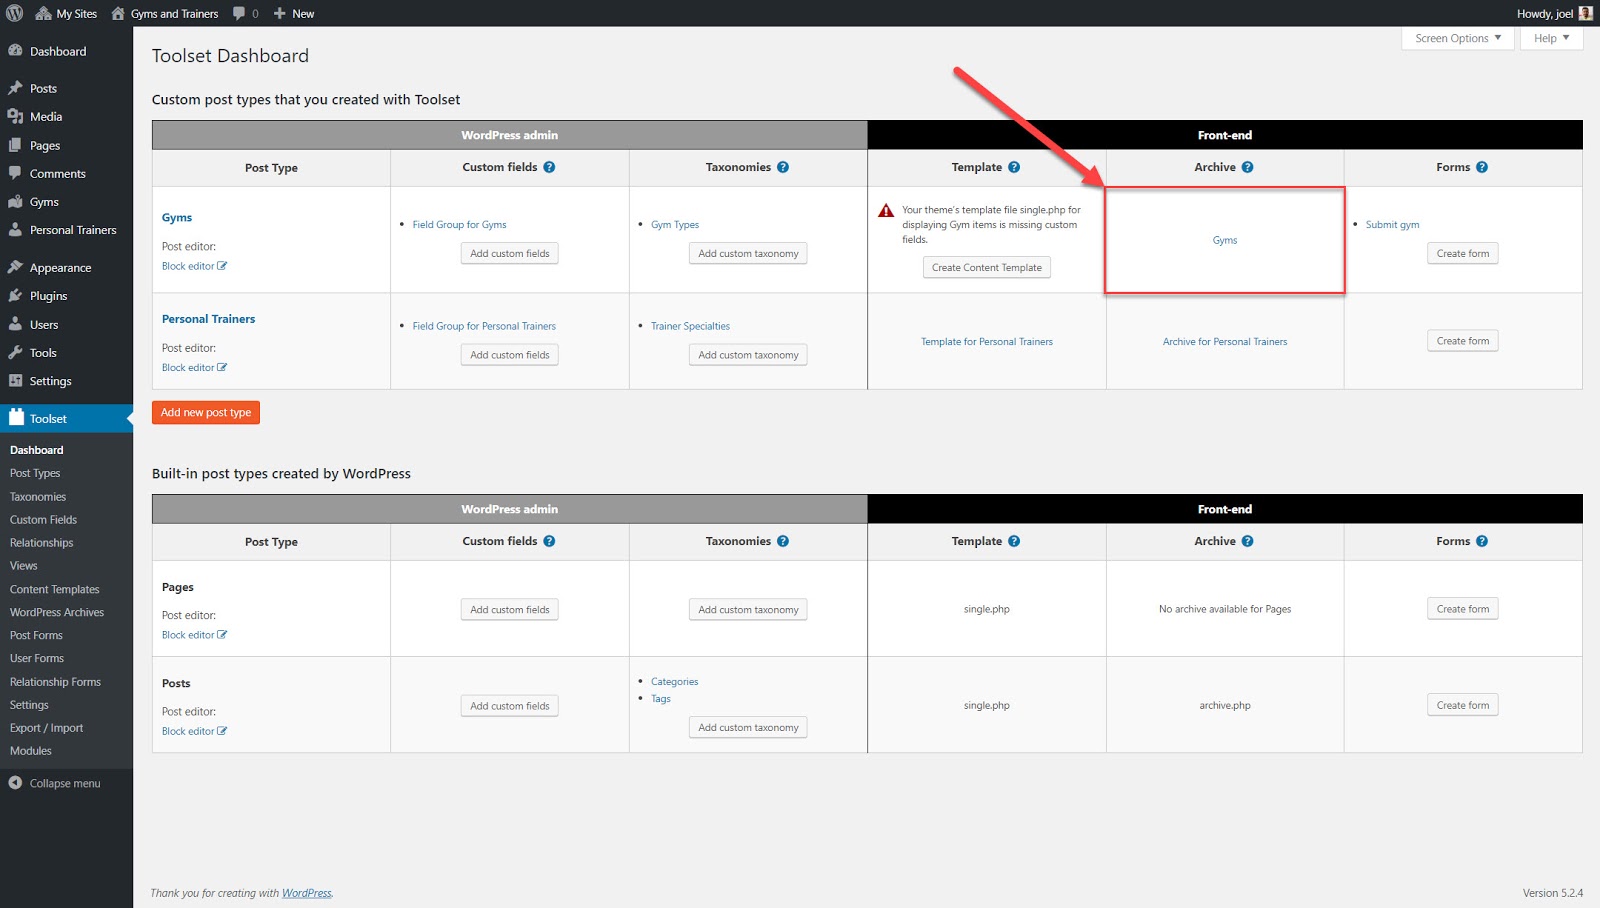
Building your archive pages
Archive pages display the list of content for each custom post type. For example, an archive could be a list of all of your blog posts. You can customize how your archive pages look using Toolset Blocks and Gutenberg.
Below I have created an archive for my “Gyms” custom post type.
- Go to Toolset->Dashboard and click the Create Archive option next to the post type you want to create an archive for.
- In the editor add the different blocks you want to display for each post. Below I have added the image, name, rating, and facilities.
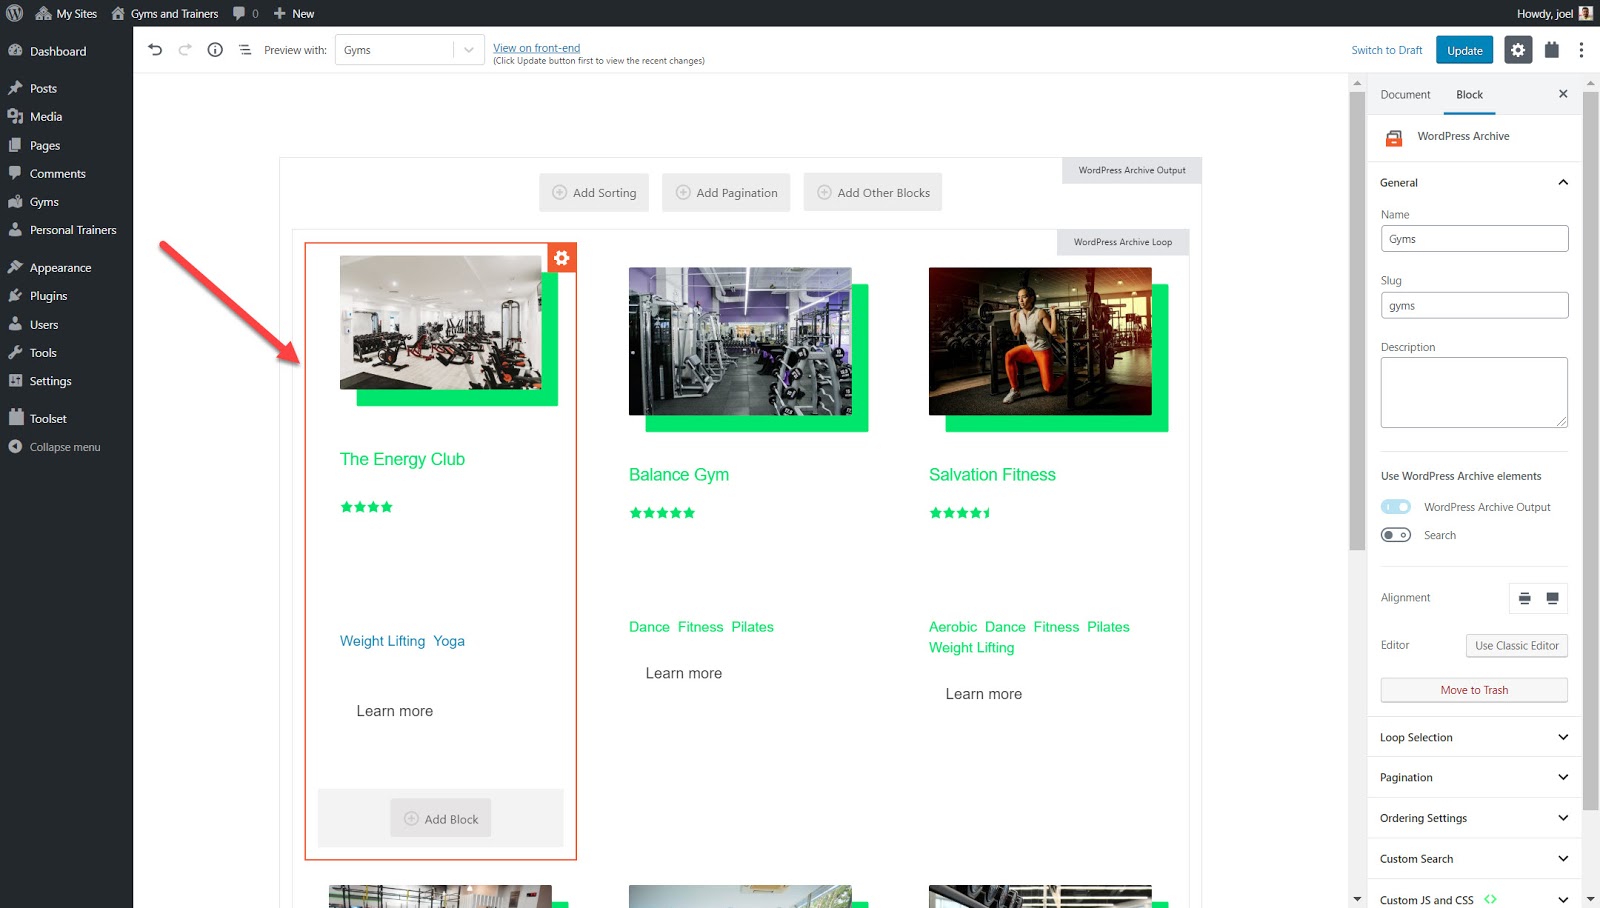
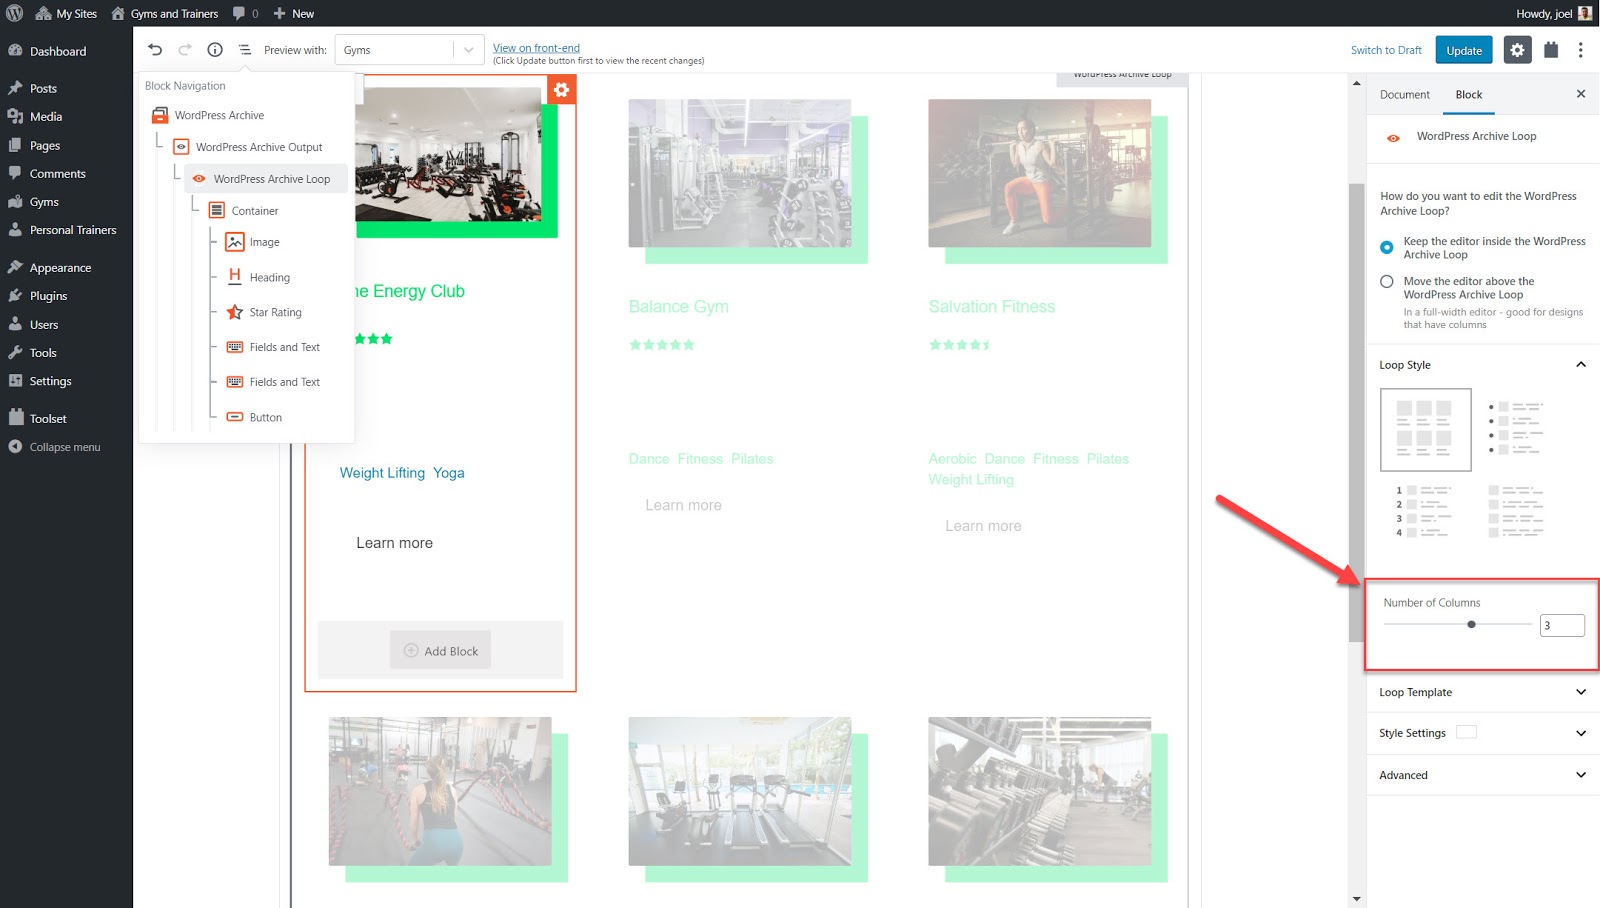
- You can change the number of columns by clicking on the Block Navigation option and select the WordPress archive loop.
- Under Loop Style you can adjust the number of columns.
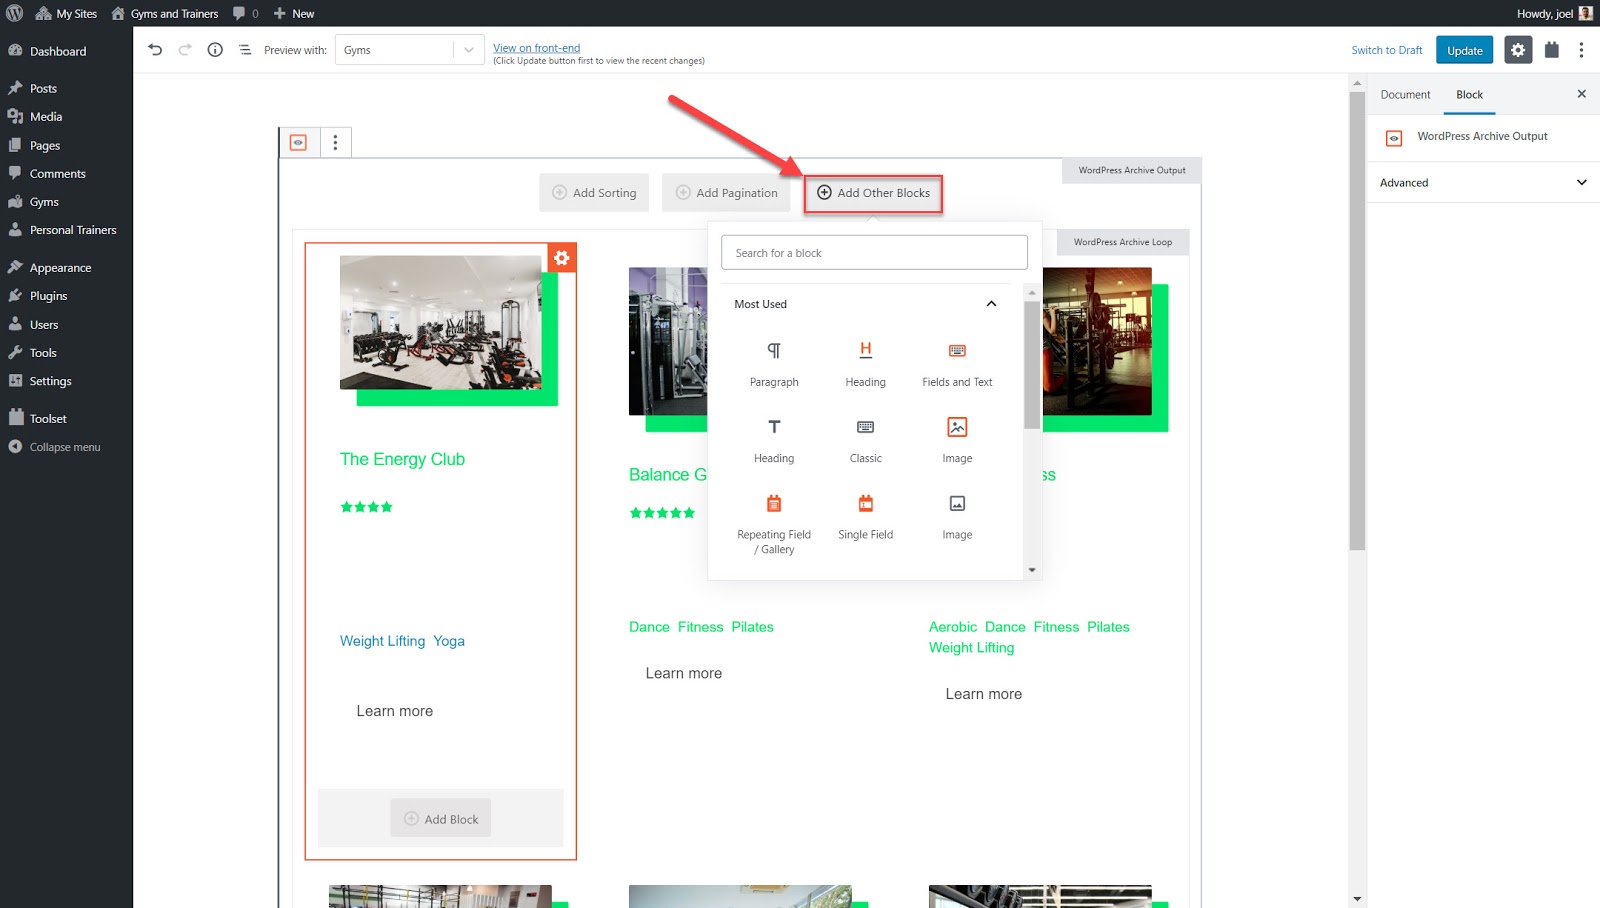
- You can also change the default settings for archives such as the order of the posts and pagination under the WordPress Archive block.
- You can add your own text and other blocks both before and after the main archive loop which displays the posts. All you need to do is click the + icon either before or after to start adding your blocks or text.
Display custom lists of content
You can use Toolset Blocks and Gutenberg to display any of your posts as a list in any order you like. You can also design the list anyway you like such as in a grid, simple HTML, a table or any other way. In Toolset this type of list is called a View.
You can add your list to any page. For example, below I added a list of my featured gyms to my homepage.
- Click the + button on the page you want to add your View to.
- Add the Views block and name it.
- Select the content you want your View to display such as the gyms post type.
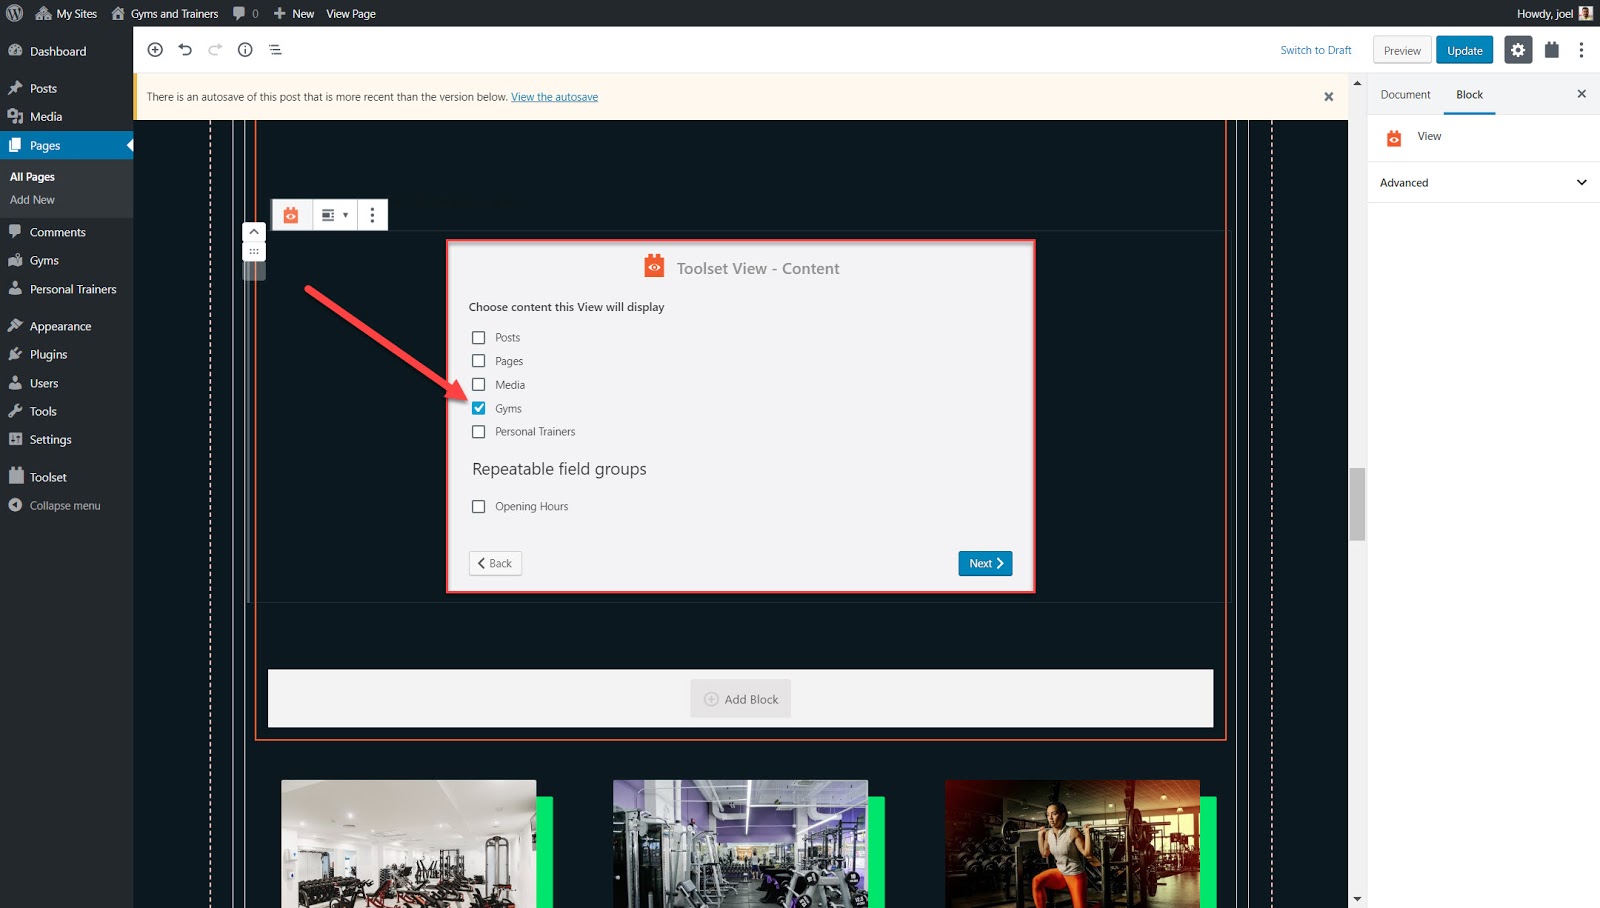
- Add the blocks you want to display.
- You can edit the ordering, which content is displayed and more when you click Block Navigation, select your View and use the sidebar.
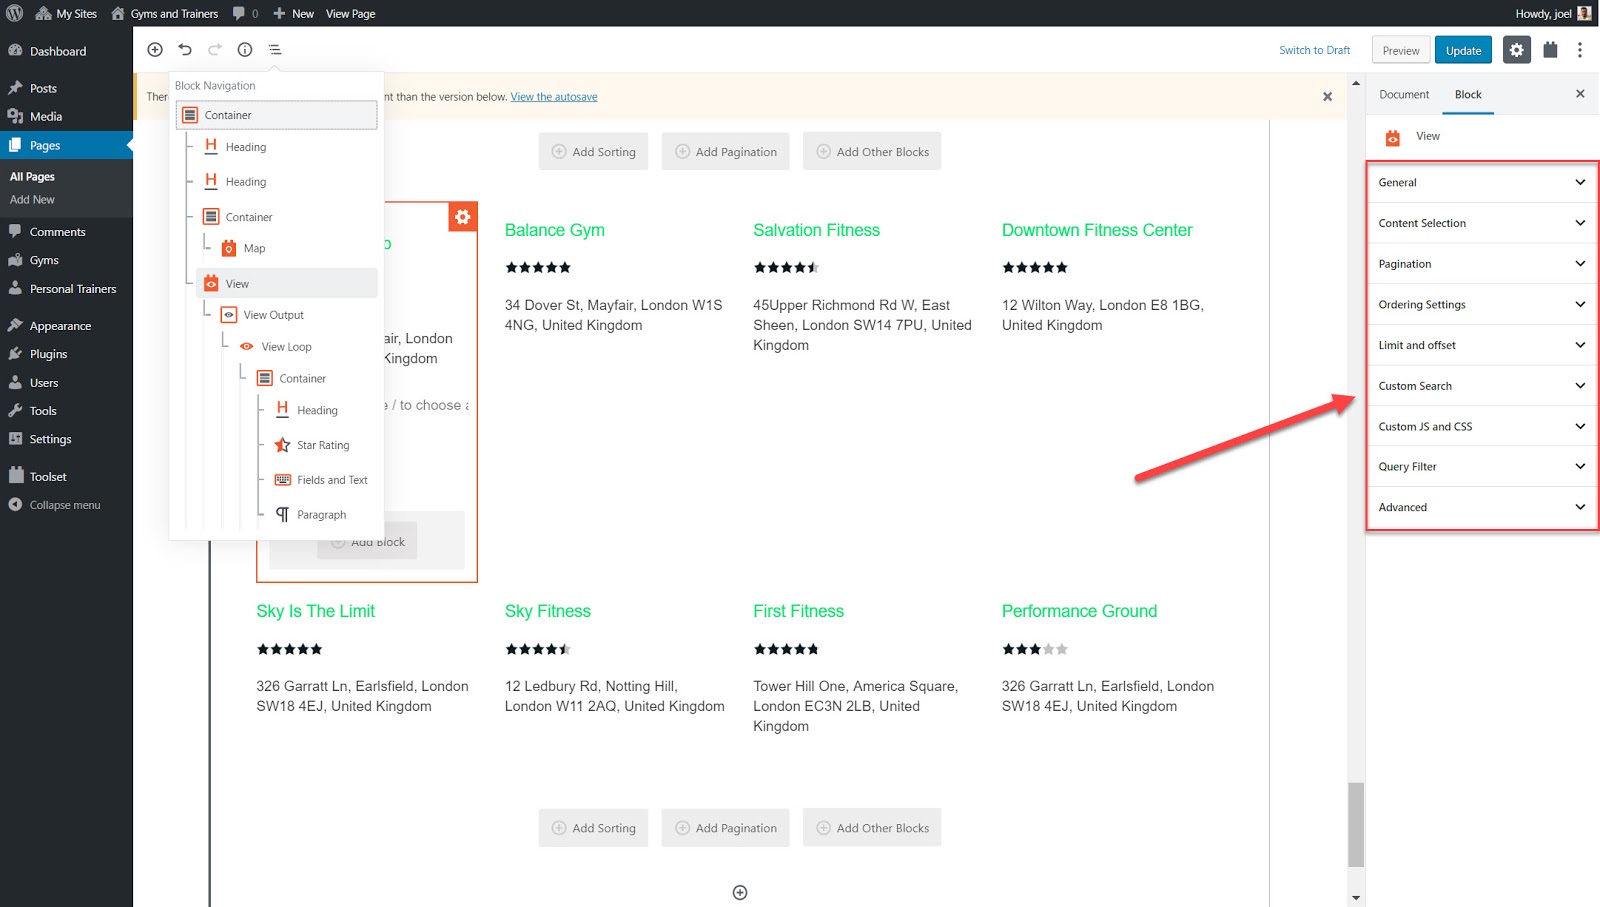
- Under View Loop, you can change a number of settings for the whole View including the number of columns.

Add a custom search
A custom search enables your users to find exactly what they are looking for. Imagine that you want to find a gym that has aerobics classes within 2 km of your house. Rather than waste time browsing each gym I can just add some filters and instantly find the gyms that match my requirements.
- Insert the View block onto your page.
- Enable the Search option in the View creation wizard.
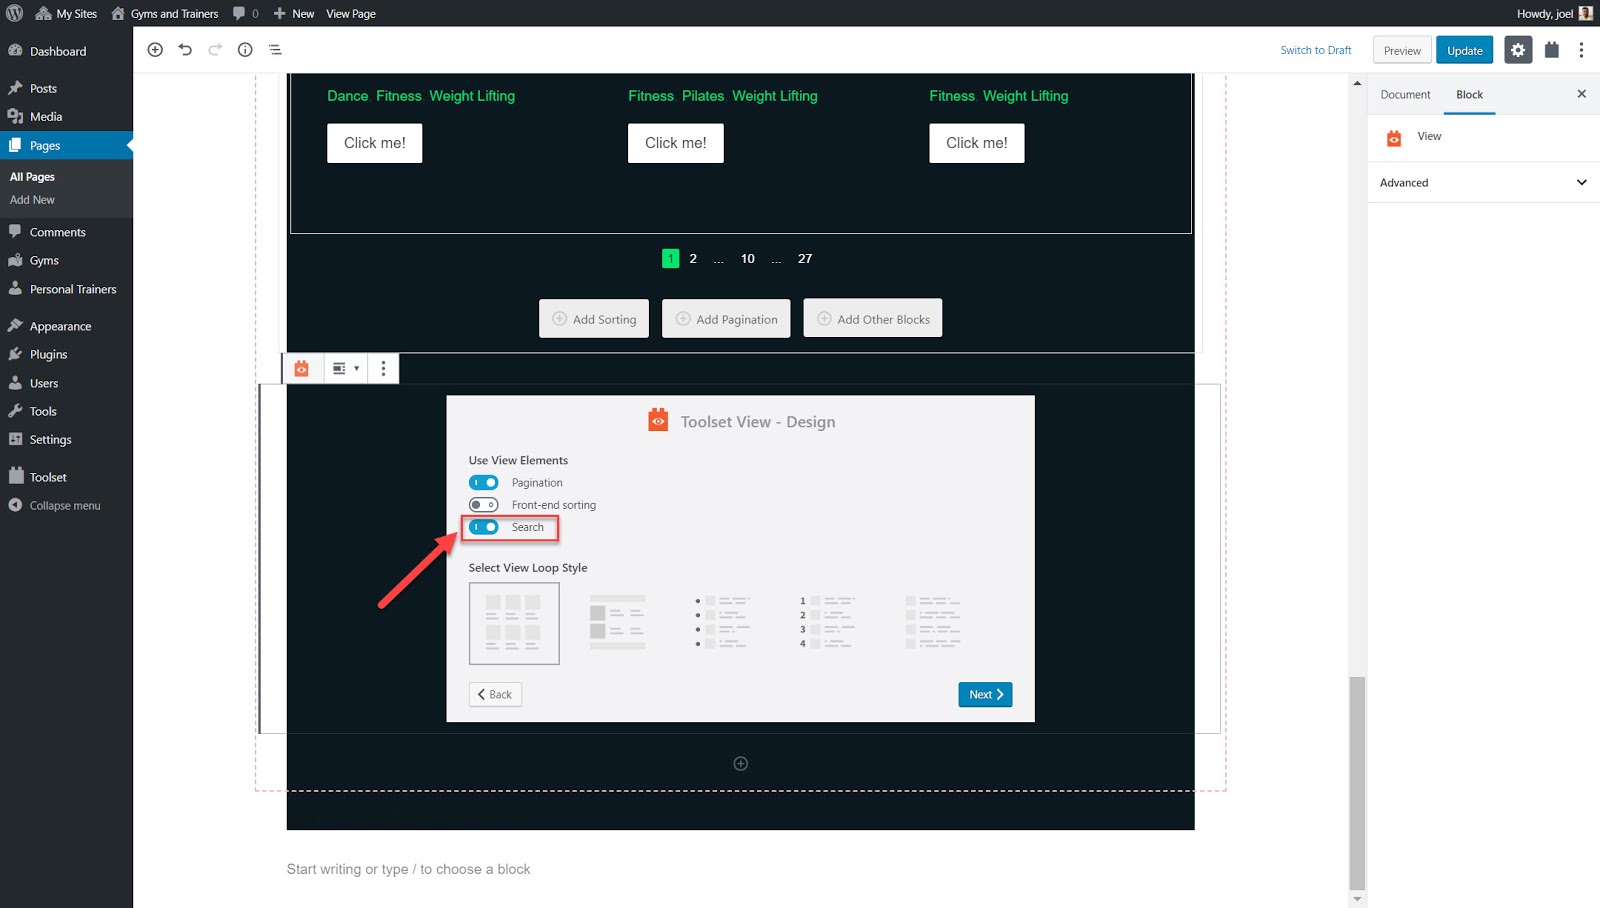
- You can then add Search Fields, Search Buttons and much more in the Views editing area.

- You can use the right sidebar to tweak the options for this search field. This includes the main field settings and label and style options.
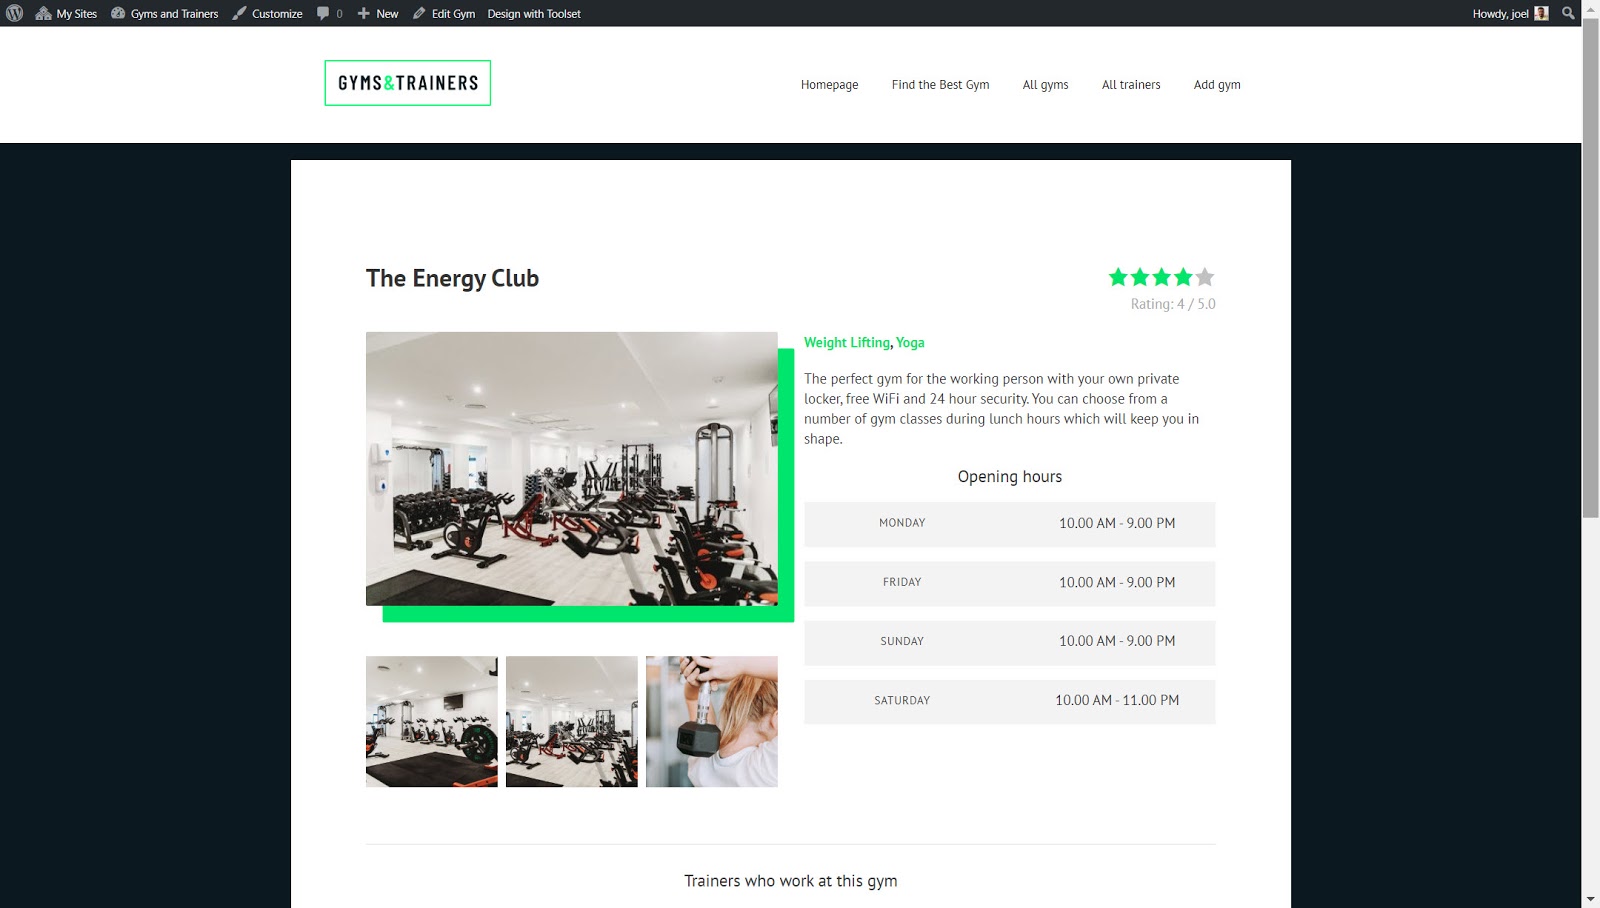
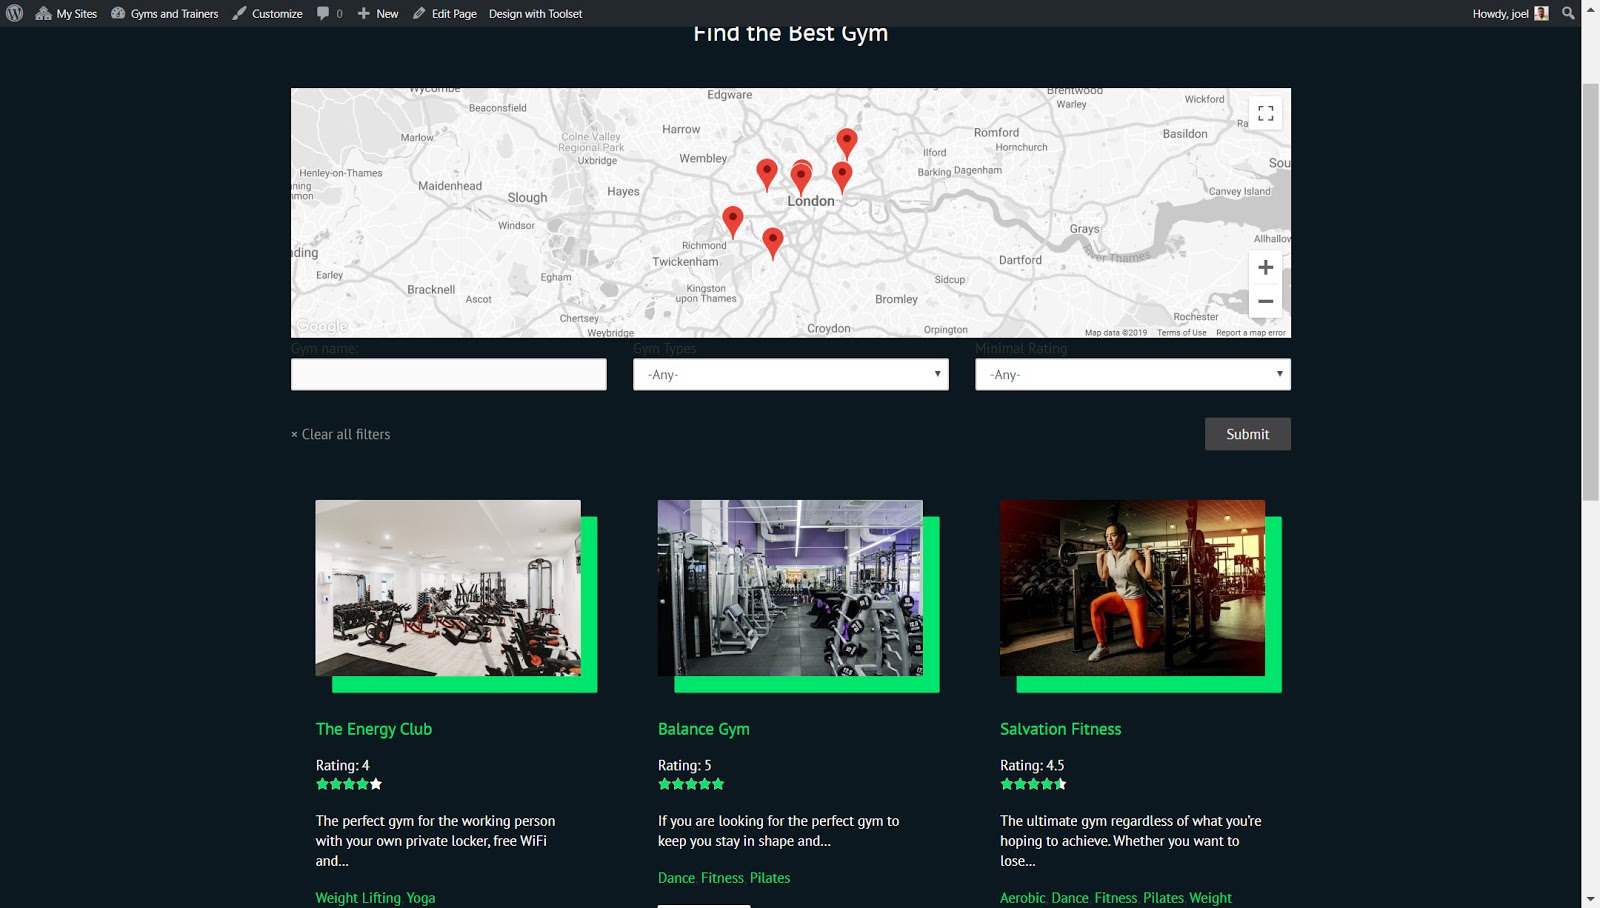
Here is how our custom search for the best gym looks on the front-end.
Start building your custom website today!
You’ve now learned the basics and some of the more advanced features you can create by using Gutenberg blocks on WordPress. Now it’s time to try it out for yourself!
Have you built a website using Gutenberg? What has been your experience? Let us know in the comments below!
The post How to Create a Custom WordPress Website with Gutenberg Block appeared first on Torque.
