It’s one thing to recognize the phrase “website accessibility” and know that it’s important. The challenge is understanding how to actually go about it. However, designing your website with accessibility in mind is imperative to ensuring a positive user experience.
Conducting accessibility audits on your WordPress site helps you ensure better visibility, compliance, and overall performance. It also makes it easier to identify which areas are hurting the accessibility of your site and provides a guide for what elements to improve.
In this article, we’ll discuss the importance of auditing the accessibility of your WordPress site, and provide you with a step-by-step guide on how to get the job done. Let’s get to work!
Why Accessibility Audits Are Vital
‘Accessibility’ refers to the ability of people to access something (be it a place, service, or product) regardless of their physical or mental condition. So ‘website accessibility’ means making sure that everyone, including those with disabilities, is able to access and use your site with ease.
Today, with so much of the world moving online, it’s important that the internet as a whole is accessible. This helps ensure equal access and opportunity to those with disabilities. By making your website more accessible, you can also increase your audience and better adhere to web design, usability, and Search Engine Optimization (SEO) best practices.
As a WordPress user, there are plenty of common accessibility mistakes you can make without even realizing it. These include ineffective translation processes, choosing style over functionality, and failing to comply with governmental policies relating to web accessibility.
Conducting accessibility audits is an effective way to identify and resolve any existing issues like this with your website. This enables you to provide a better experience.
How to Conduct an Accessibility Audit on Your WordPress Site (In 6 Steps)
If you can make your website more accessible to those with disabilities, everyone wins. Here’s how to get started!
Step 1: Review the WCAG 2.0 Guidelines
The Web Content Accessibility Guidelines (WCAG) 2.0 is one of the most useful tools you can reference when conducting an accessibility audit on your WordPress site. It contains a wide range of suggestions and guidelines for making your content and site more accessible to those with common disabilities, such as blindness, deafness, cognitive restrictions, photo-sensitivity, and more.
The foundation of the WCAG guidelines consists of four major principles a website should meet to be considered accessible. It should be perceivable, operable, understandable, and robust. In more concrete terms, you’ll want to keep in mind 12 main goals for making your site more accessible:
- Provide text alternatives for non-text content (such as images).
- Provide time-based media alternatives (captions, audio/video-only, etc).
- Present content in different ways.
- Make color contrast and audio distinguishable.
- Make navigation keyboard-accessible and operable.
- Offer enough time to consume content.
- Don’t include any design or content that could cause seizures.
- Make it easy for users to find and navigate content.
- Make language/text readable and understandable.
- Create pages/navigation in a way that’s consistent and predictable.
- Help users avoid common mistakes.
- Use assistive technologies to maximize compatibility.
These guidelines can be used as a framework and starting point for conducting an audit of your existing site.
Step 2: Create a Review Checklist
Once you’ve reviewed the WCAG 2.0 Guidelines and have a general understanding of its important aspects, you’ll be better positioned to create a checklist for your WordPress accessibility audit.
To get started, you can explore your website on the front end, as if you were a new visitor. Use the WCAG guidelines to make a list of important elements to test and review, including images and graphics, links, videos, and navigation.
Some examples of questions you might ask (relevant to the 12 goals listed above) include:
- Do your videos have subtitles and do images have alt text?
- Do all links work properly?
- Are you able to comfortably navigate between pages?
- Can you navigate through the site using only your keyboard?
- Can the text be translated into other languages?
Now is also a good time to reference the W3C Accessibility Evaluation Tools list, to determine which will be most useful during your audit.
Step 3: Run Your Site Through the W3C Markup Validation Tool
The W3C Markup Validation Tool checks the markup validity of your site’s documents in various web languages, including HTML, XHTML, SMIL, MathML, and so on. It verifies that they follow the specific set of rules and criteria of each particular language.
This free, online tool makes it easy to validate a web page to ensure it’s of high quality. W3C validation helps to ensure better SEO rankings, site performance, readability, and consistency across various browsers. It can also tell you where there are any errors in your code.
To use it, simply copy and paste your site’s address into the text area on the main page:

Then select the Check button, and you’ll be presented with your results.
Step 4: Conduct Screen Reader Compatibility Testing
Currently, it’s estimated that over 7 million Americans have some form of visual impairment. Therefore, many web users use screen reader software applications, which convert text that’s displayed on a screen into synthesized speech.
In addition to converting text into audible formats for the visually impaired, these applications also help them navigate your site. That’s another reason why alt text on images is so important: screen reader software will read that text to the user, so they can understand the context of images and other media.
There are a handful of tools you can use to conduct screen reader compatibility testing. If you’re not sure where to start, the ChromeVox extension and The Accessibility Viewer are two quality options.
Step 5: Check Your Content’s Color Contrast
Another of the most common issues with website accessibility is the contrast (or lack thereof) between text and its background. Using color contrast analysis tools in your accessibility audit will identify any issues, in accordance with the WCAG Guidelines.
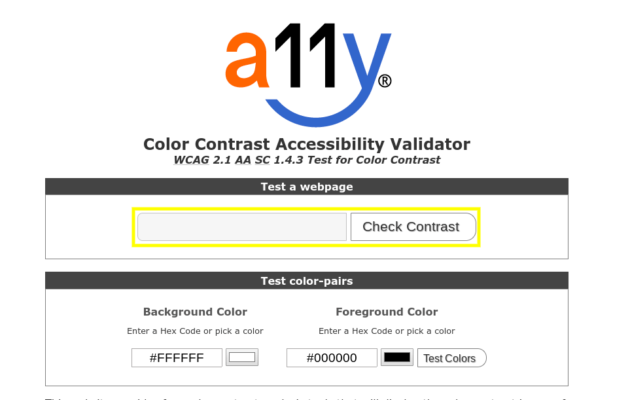
You can do this by using a handful of free online tools, such as ColorSafe and A11Y Color Tester. Let’s demonstrate how this works using the latter tool. First, you’ll copy and paste your URL into the text box, and select Check Contrast:
This will bring you to a page that lists any problems detected, as well as the current contrast ratio in comparison with what’s required:
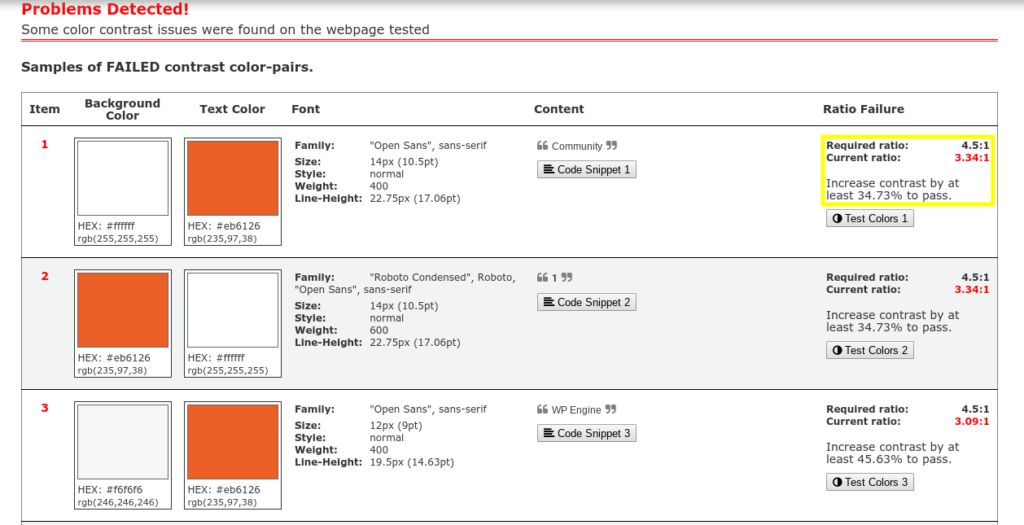
You’ll even see exactly what percentage the contrast should be adjusted by. This will help you quickly make your site’s text more readable.
Step 6: Verify That Keyboard-Only Navigation Works
When conducting an accessibility audit on your WordPress site, it’s important to make sure that any visitor would be able to navigate the site using only their keyboard. For example, you’ll want to avoid animated or drop-down buttons that can’t be used with a screen reader.
To check how well keyboard-only navigation works on your website, you can follow these steps:
- Click on the address bar of your website in a browser.
- Using only the keyboard, not the mouse, try to move about the site.
- Use the Tab button to see whether you are able to navigate to different parts of the menu, select links, and interact with key functionality.
Ideally, you should be able to tab through the site in the same order as the page layout (including any drop-down navigation menus). It’s also important that there is a keyboard cursor focus indicating which item the user is on. This isn’t something many people consider until they no longer have a mouse cursor to rely on.
To test keyboard focus, you can also try using tools like NerdeFocus. Finally, for sites with a lot of web pages or lengthy navigation menus, it may be useful to insert Skip Navigation links in key places.
Conclusion
Regularly-scheduled accessibility audits help improve the user experience and increase engagement. The more accessible you make your website to those with disabilities, the more user-friendly you make it for everyone.
As we’ve seen, there are six steps you can follow to conduct a thorough accessibility audit, including:
- Reviewing the WCAG 2.0 Guidelines to understand the basic principles of website accessibility.
- Creating a review checklist to use as a guiding framework for conducting the audit.
- Validating your code with the W3C Markup Tool, to ensure all the languages your site uses meet technical criteria.
- Conducting screen reader compatibility testing, to improve the experience for visually-impaired visitors.
- Checking the color contrast of your site with free online tools.
- Testing to make sure users can navigate your site using only a keyboard.
What are some strategies you have found to make accessibility audits more manageable? Share your thoughts in the comments section below!
Image credit: Unsplash.
Tom Rankin
Tom Rankin is a key member of WordCandy, a musician, photographer, vegan, beard owner, and (very) amateur coder. When he’s not doing any of these things, he’s likely sleeping.
The post How to Conduct an Accessibility Audit on Your WordPress Site appeared first on Torque.
