There’s a lot of content online that isn’t accessible to just anyone. In order to get to it, someone needs to give you permission, which often comes in the form of a membership. That’s called ‘gated’ content, and it can be a great way to drive signups on your website.
For gated content to fulfill that purpose, however, you’ll need to make sure you’re offering something users really want. Moreover, gaining access to those pages shouldn’t be overly difficult, so you don’t discourage potential members. If you succeed in both aspects, gated content can be a boon to your site.
In this article, we’ll go over the concept of gated content and its benefits. Then we’ll teach you how to add gated content to your WordPress website in four steps. Let’s get to work!
What Is Gated Content (And How Can It Benefit You)?
When they hear talk about gated content, people’s minds often jump directly to paid membership sites. Those would be the most straightforward examples of gated content, since they ‘hide’ content behind a paywall:

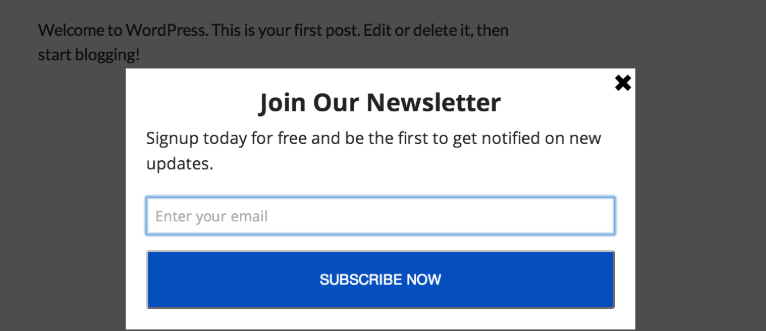
However, in practice there are a lot more variations of gated content, many of which don’t rely on paywalls. For example, a lot of websites use ebook offers to drive email signups. In that case, the ‘gate’ is the email sign-up form:

Other sites take the practice a step further and require you to fill out more forms or quizzes to let you access private content. As long there’s a real value behind the ‘gate’, you can use the content as a way to generate whatever type of leads you require. However, to do that, you’ll first need to figure out a way to restrict access to content using WordPress.
How to Add Gated Content to Your WordPress Website (In 4 Steps)
You can easily restrict access to content within WordPress by using the right tools. However, if you want to get the most return from your gated content, everything hinges on proper implementation. Let’s go over how the process works, step by step.
Step 1: Build Up Your Website’s Following
If you want to get a significant number of leads from your gated content, then you’ll want to have a sizable audience to start with. Growing a website to the point where you can say it’s popular is no easy task. However, there are a lot of ways you can go about expanding your audience, such as:
- Publishing new content often
- Being active on social media
- Using email marketing to build a list of subscribers and stay in touch with them
- Keeping Search Engine Optimization (SEO) fundamentals in mind, to increase the organic traffic you get
Building a website’s audience and cultivating a loyal following takes time – there’s no way around that. However, the rewards are well worth it in every respect. The more traffic you get, the more successful your lead generation efforts should be.
Step 2: Decide What Your Gated Content Will Include
As we mentioned earlier, in order for gated content to fulfill its purpose, you’ll need to use the proper hook. That is to say, you’ll have to find a way to entice users to cross that gate.
Here are some examples of gated content that you can use across a broad range of websites:
- Exclusive tutorials and posts
- Access to free tools and resources
- Free ebooks
- Premium services
In fact, services that require you to sign up to use them technically fall under the category of gated content, whether they’re free or paid.
What type of gated content you offer will depend largely on what your site’s focus is. Usually, ebooks tend to be an all-around safe option that works for most audiences. Your goal at this stage is to think about something valuable that you can offer to your visitors. It needs to be interesting enough to drive them to cross your ‘gate’, without alienating your more casual visitors.
Some websites take a different approach and hide all of their content behind gates. This essentially makes them private communities. That approach can work, but it usually results in a very niche site. So unless that’s what you’re aiming for, you need to continue publishing content that’s accessible to everyone.
Step 3: Use a Plugin to Restrict Access to the Gated Content
There are a lot of great plugins you can use to restrict access to specific parts of your website, for everyone but a subset of users. Let’s go over a few options, each offering a different approach when it comes to implementation.
First, Restrict User Access enables you to determine who can visit specific pages, posts, and categories, using any combination of criteria you want:

Once the plugin is active, users will have to log in to access gated content. You’ll also be able to configure different member ‘tiers’, which will control what content they can see.
If you want to implement a paid membership system that restricts access to parts of your website, you’ll need to use a different plugin. For that scenario, we recommend Paid Member Subscriptions:

With this particular plugin, you can create multiple membership plans and use shortcodes to restrict access to any parts of your website you want. Moreover, it also works with WooCommerce, which means you can use it to offer unique products for your site’s members.
We’ve also talked a lot about offering free ebooks for your email subscribers. That approach to gated content is very straightforward – all you need to do is pick an email marketing platform such as MailChimp, and generate a sign-up form that you can add to your website:

To distribute your ebook, you can set up an email welcome campaign for new subscribers. That way, you can share it automatically with anyone who signs up for your email list.
Step 4: Hide Your Gated Content from Search Engines
One common issue with gated content is that search engines will still be able to find it. That means some visitors who shouldn’t have access to it might be able to make their way to those pages.
If you used one of the plugins we covered in the last section, unregistered visitors still won’t be able to see that content. However, a much more elegant approach would be to hide the gated pages from search engines altogether.
The best way to accomplish this is to edit your robots.txt file to tell search engines which pages they shouldn’t index. You can do that manually, or you can use an SEO plugin such as Yoast to simplify the process.
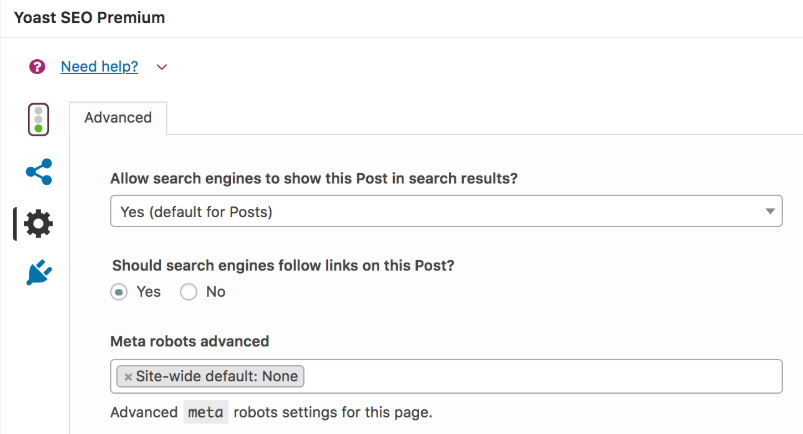
Yoast SEO adds a widget under each of your pages and posts, which you can use to modify their meta descriptions and review their SEO and readability scores. That same widget also includes an Advanced tab, which contains configuration settings for your robots.txt file:

As you can see, there’s a drop-down menu within that section, which you can use to tell search engines not to index the specific post or page.
Depending on how much gated content you have on your site, this step may take a while. However, it’s something you only have to do once for existing content and then repeat for all the gated pages you add moving forward.
Conclusion
Gated content comes in a lot of shapes and sizes. You can create members-only sections of your website, hide ebooks behind email sign-ups, and more. As long as the content you’re hiding is valuable enough, this approach should help you collect more leads.
Adding gated content to WordPress is simple, and you can do it in four steps:
- Build up your website’s following.
- Decide what your gated content will include.
- Use a plugin such as Simple Membership to restrict access to the gated content.
- Hide your gated content from search engines.
Do you have any questions about how to implement gated content on your WordPress website? Ask away in the comments section below!
Image credit: Pixabay.
The post How to Add Gated Content to Your WordPress Site appeared first on Torque.
