No one likes a slow website. In fact, many users would rather leave your site rather than wait more than two seconds for its pages to load. That’s why it’s crucial that your site is optimized for performance.
Fortunately, there are many ways you can start tackling slow loading times and get your site in shape. Some are related to your content, others to your server, and still more to your site’s JavaScript and CSS code.
In this article, we’ll explore why website performance optimization is so important. Then we’ll explain how to optimize JavaScript and CSS for your website. Let’s jump in!
Why Optimizing JavaScript and CSS Is Crucial for a Successful Website
As we already mentioned, your website’s performance is closely tied to its success. Slow loading times lead to a worse User Experience (UX) and higher bounce rates. Naturally, it’s difficult for your site to take off if you keep losing visitors.
Studies have also shown that improving site performance can increase conversion rates. That means more sales for e-commerce sites, more revenue for monetized blogs, and more subscribers for membership-based sites.
Additionally, site performance is one of many factors that contribute to Search Engine Optimization (SEO). How fast your site loads plays a role in its placement on Search Engine Results Pages (SERPs), and therefore the amount of organic traffic your site gets.
With 51 percent of organic traffic coming from online searches, missing out on high SERP rankings could hold your site back quite a bit. Plus, on average over 40 percent of revenue comes from organic searches, and 91.5 percent of searchers end up on one of the first-page results.
In other words, improving your site’s performance is key to helping it attract visitors. Therefore, optimizing your site’s JavaScript and CSS is a huge step in the right direction.
How to Optimize JavaScript and CSS and Improve Website Performance (3 Techniques)
There are many ways to optimize site speed. Here, we’ll be focusing on a few ways you can optimize your site’s code for faster loading.
1. Minify JavaScript and CSS to Remove Unnecessary Characters
Minification is the process of removing spaces and other characters that aren’t strictly necessary for your website’s code to work. These elements are usually included in JavaScript, CSS, and HTML files to make them more readable for humans.
However, computers don’t need these extra characters to be able to read code files. Instead, the additional content just makes the files bigger, and therefore more time-consuming to process and load.
It is possible to manually minify JavaScript and CSS files by combing through them and removing spaces, comments, and new line characters. However, if you have a large site with many long files, this is a draining and inefficient process.
Fortunately for WordPress users, there are plugins that can help. Fast Velocity Minify can quickly clean up your JavaScript, CSS and HTML files to improve performance:

Autoptimize is another powerful plugin that minifies JavaScript and CSS. It can also handle several other performance-related tasks, such as aggregating and caching files, and injecting CSS into page headers:

Using a plugin will significantly improve the minification process by taking it off your hands. By quickly removing unnecessary characters from your site’s code, you may start to see a difference in its performance.
2. Use Inline Small JavaScript and CSS to Consolidate Code
‘Inlining’ JavaScript and CSS refers to the practice of adding JavaScript and CSS to your site’s HTML files. This helps to improve page speed, by reducing the number of files your site has to load in order to display its pages.
However, you’ll want to be careful when using this technique, as it has a few potential drawbacks. First, if you add too much JavaScript and CSS to your HTML files, you could increase its size too much. If that happens, you could end up losing all the speed you’ve gained, since you’ll just be replacing several files with one extremely large one.
Additionally, and perhaps more importantly, inline JavaScript and CSS cannot be cached. Caching is another extremely useful method of improving site performance, and it’s possible that the benefits of inline styles and scripts would not outweigh the cost of losing the caching ability.
With these two things in mind, you’ll want to carefully consider whether inline JavaScript and/or CSS are right for your site. You can also look into using external JavaScript and CSS as an alternative.
Inlining With the Autoptimize Plugin
If you do choose to inline your JavaScript and/or CSS, you’ll have to manually add your JavaScript code to your HTML files. However, you can use Autoptimize to inline your CSS more quickly.
In order to access the settings that enable you to do this, you’ll need to navigate to Settings > Autoptimize and click on the Show advanced settings button:
Here you can see two options for adding inline CSS. You can either inline only ‘above the fold’ CSS, or inline all of your CSS (which is not recommended, since this will likely add too much additional code to your HTML files):
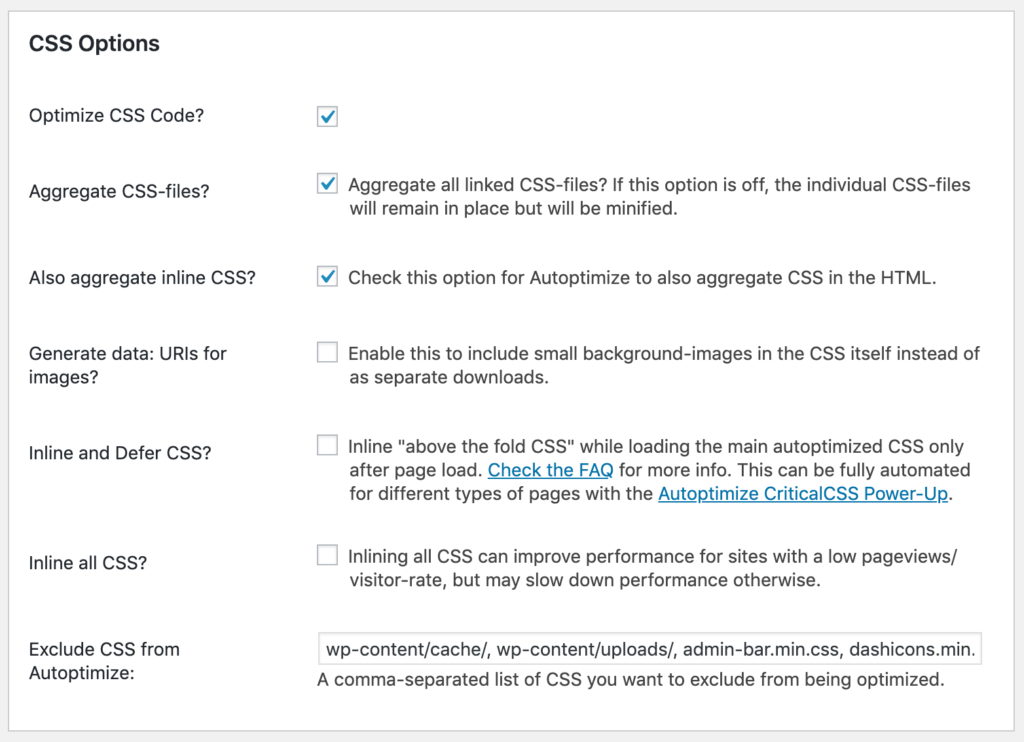
If you choose the first option, you’ll need to specify which CSS Autoptimize should add to your HTML files. Be sure to save your changes at the bottom of the settings screen when you’re done.
3. Order Your Styles and Scripts for More Efficient Loading
The order in which JavaScript and CSS snippets appear in your HTML files determines how browsers load your website’s information. When JavaScript and CSS are placed in non-optimal positions, they can stall the loading of the rest of the page.
In short, your CSS should always be placed in the tag. On the other hand, JavaScript should be positioned at the very bottom of the tag. This is because browsers cannot display any web page content without accessing the page’s CSS first, so loading that code early helps the page display faster.
JavaScript, on the other hand, can continue loading in the background even after the CSS has been loaded. Moving it to the bottom lets the browser load and display everything else, before loading the JavaScript code in the background.
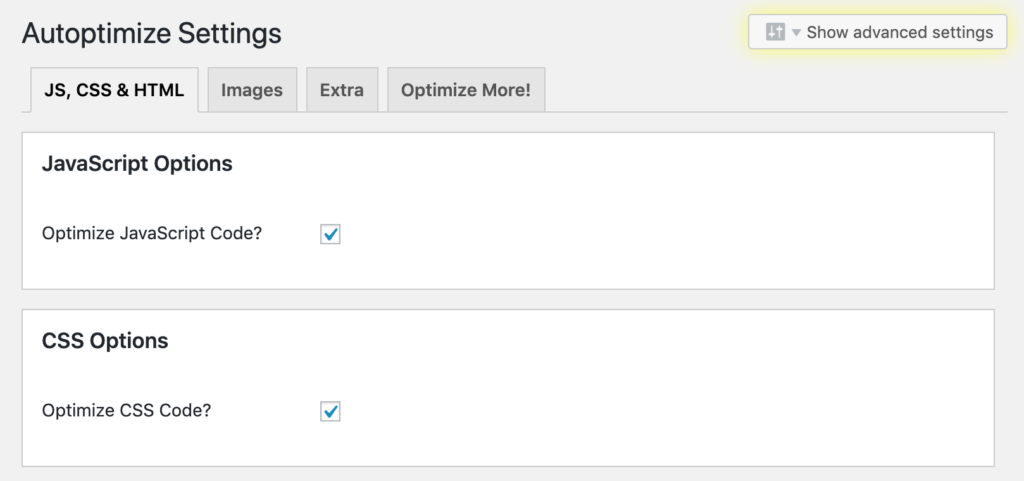
You can order your CSS and JavaScript code manually, or let Autoptimize do it for you. Simply check the Optimize JavaScript Code? and Optimize CSS Code? boxes in the plugin’s settings:

This will enable Autoptimize to automatically place your CSS in the header, and push the JavaScript code to the bottom. Using a plugin helps you avoid having to edit your site’s files manually, which is always a plus as it prevents mistakes that could break your site.
Conclusion
These days, fast loading times are expected by most website users. Failing to optimize your site’s speed can have a negative impact on its bounce rate, revenue, and visibility.
Fortunately, there are three ways you can improve website performance by optimizing JavaScript and CSS:
- Minify JavaScript and CSS to remove unnecessary characters.
- Use inline JavaScript and CSS to consolidate code.
- Order your styles and scripts for more efficient loading.
Do you have any questions about optimizing your site’s performance? Leave them in the comments section below!
Image credit: Wikimedia Commons.
Tom Rankin
Tom Rankin is a key member of WordCandy, a musician, photographer, vegan, beard owner, and (very) amateur coder. When he’s not doing any of these things, he’s likely sleeping.
The post How to Optimize JavaScript and CSS and Improve Website Performance appeared first on Torque.
