Blogging is only getting more popular which means more and more people are starting blogs in the hopes of turning it into a full-time career. But it can be difficult making money online with blogging and the income is unpredictable as well. So, how can you make more money blogging?
One solution for a blog that’s not generating much income is to turn it into a membership site. A membership site is a type of subscription service that offers premium content, products, or services in exchange for a monthly or yearly fee.
If you’re interested in making a more reliable income from your blog, keep reading. We’ll share with you the benefits of a membership site and how to turn your blog into a membership site with WordPress.
Why You Should Turn Your Blog Into a Membership Site
Turning your blog into a membership site will allow you to turn your hobby into an actual money-making business. Sure, you can display ads on your site, create a product to sell, or try hosting paid webinars, but by turning your blog into a membership site, you’ll be able to generate monthly recurring revenue. This means you can rely on this steady and consistent income to turn your blog into a full-time business.
Plus, it’s easy. Instead of creating a course or eBook from scratch, you can create premium content for your blog that your audience can access for a price. No need to add an online store to your website or deal with shipping, your premium content is created and hosted right on your WordPress blog.
Transforming your blog into a membership site will also increase the value of your content as well. When you’re next to a ton of other bloggers who are offering up all their advice for free, your premium content looks that much more valuable.
Convinced? OK, now let’s get started on how to turn your blog into a membership site with WordPress.
Choose a WordPress Membership Plugin
First, you don’t need to hire a designer or completely overhaul your website in order to turn it into a membership site, all you need is a WordPress plugin. If you just want to allow user registration on your site, then all you need is a plugin like WPForms. WPForms is a form builder plugin that you can use to easily create user login and registration forms. But if you want to create a membership site to sell subscriptions or paid content then you’ll need a plugin like MemberPress.

MemberPress is a powerful and easy to use membership plugin that allows you to accept payments, create membership levels, restrict access based on levels, generate coupons, create pricing pages, analytics reporting, and more.
MemberPress will make turning your blog into a membership site super easy and it’s our top pick for membership plugins for WordPress.
Configure the MemberPress Plugin
After you’ve installed and activated the MemberPress WordPress plugin, you have to configure the MemberPress plugin. In the WordPress menu select MemberPress > Options. This is where you pick the settings based on the needs of your membership website.
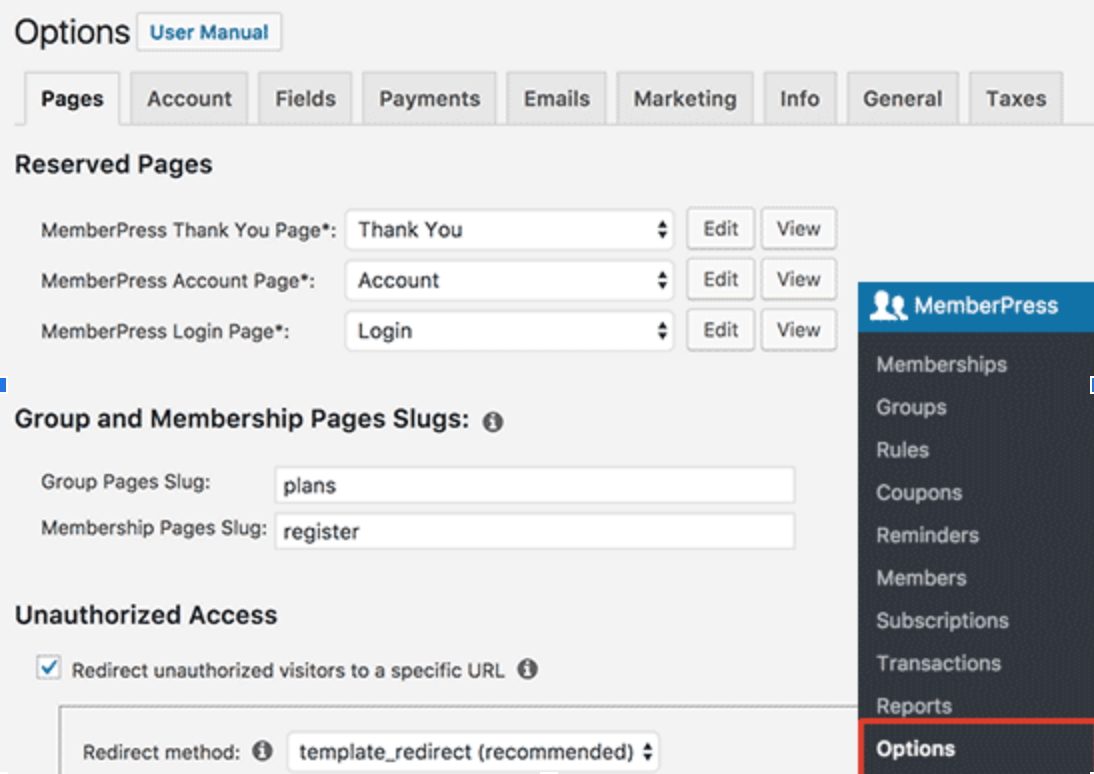
In this area, you can customize your MemberPress “Reserved” pages such as the thank you page, account page, and login page. You can design your own WordPress pages for this or select the “Auto Create New Page” option if you want WordPress to automatically create the page for you.
After you’ve finished configuring the MemberPress plugin, the next step is to set up payment.
Set up Payment
Still, in the Options section, click on Payments. This is where you’ll set up payment so that you can accept payments on your membership site.
MemberPress integrates with a number of payment gateways including PayPal, Stripe, and Authorize.net. Click the option you’d like and fill in the required credentials to complete the setup.
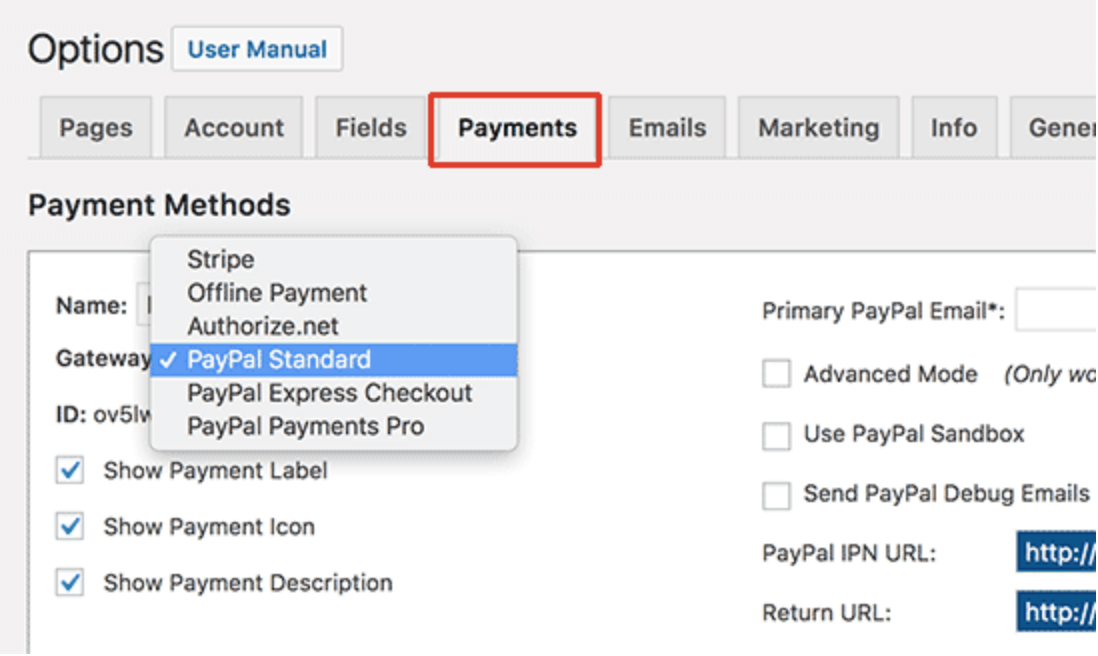
If you want to accept both credit card payments through Stripe and PayPal payments, you can click the Add button to add another payment method.
Define Membership Levels
Next, you need to define your membership levels. For instance, you might offer a Bronze Membership Plan for $5/month, a Silver Membership Plan for $15/month, and a Gold Membership Plan for $25/month, all with different levels of access and perks. Alternatively, you could create just 1 membership level, depending on your needs.
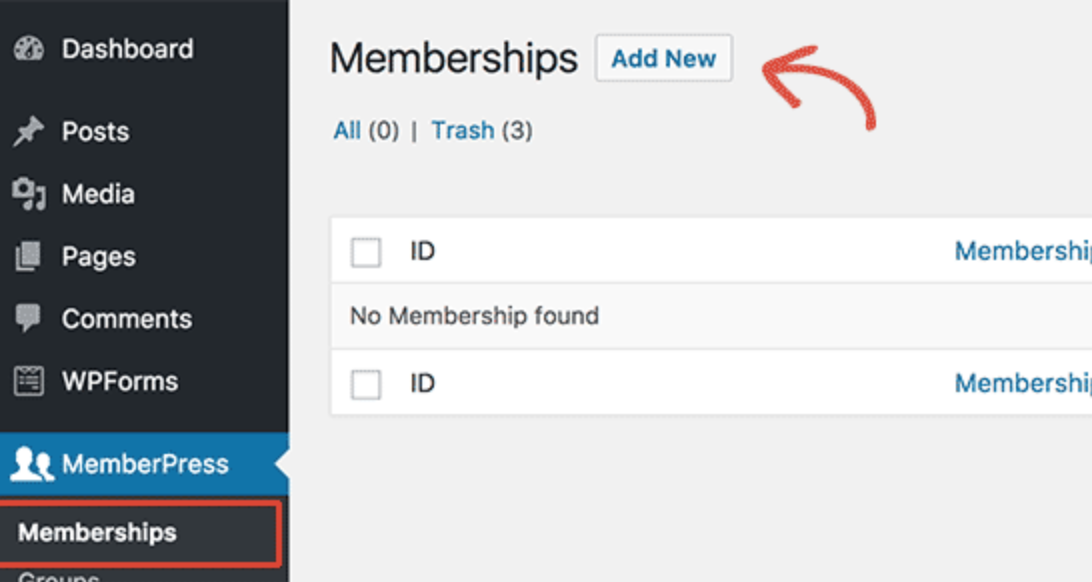
To add a membership level, go to MemberPress > Memberships and click on Add New at the top of the Memberships page.
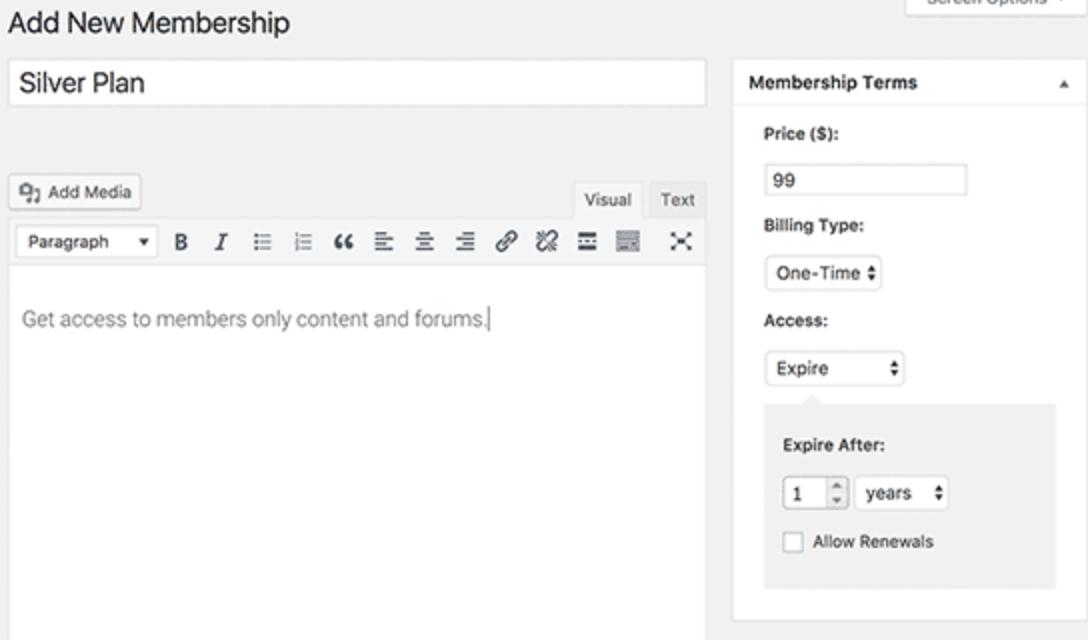
Here you can name your membership level and describe in detail what comes with it in the post editor.
Then in the Membership Terms section, you can set the price, the billing type, and the expiration terms for the membership plan.
Further down the page, there’s a Membership Options section where you can edit the text for the registration button, customize permissions, create a custom thank you message, and more.
When you’re happy with the settings for the membership levels you’ve defined, click the Publish button to make it available to your website visitors. Repeat this step for as many membership levels as you wish.
Create Rules for Membership Plans
Now you need to create rules for your membership plans. Creating rules will allow you to hide your premium content from non-paying site visitors and choose which premium content can be seen by which membership level.
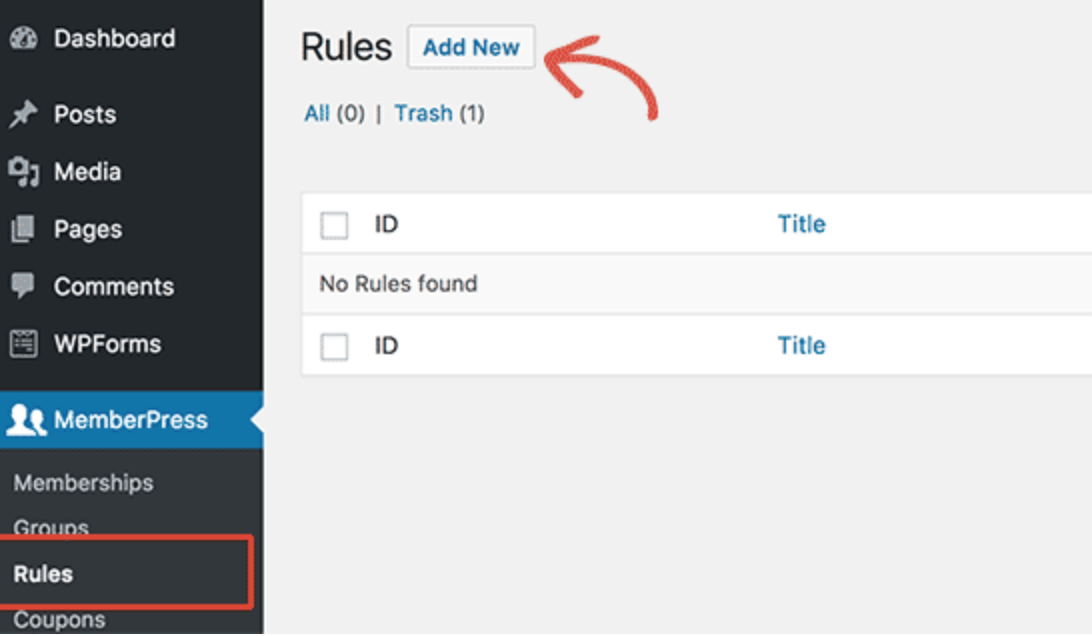
Go to MemberPress > Rules, then click the Add New button at the top of the Rules page.
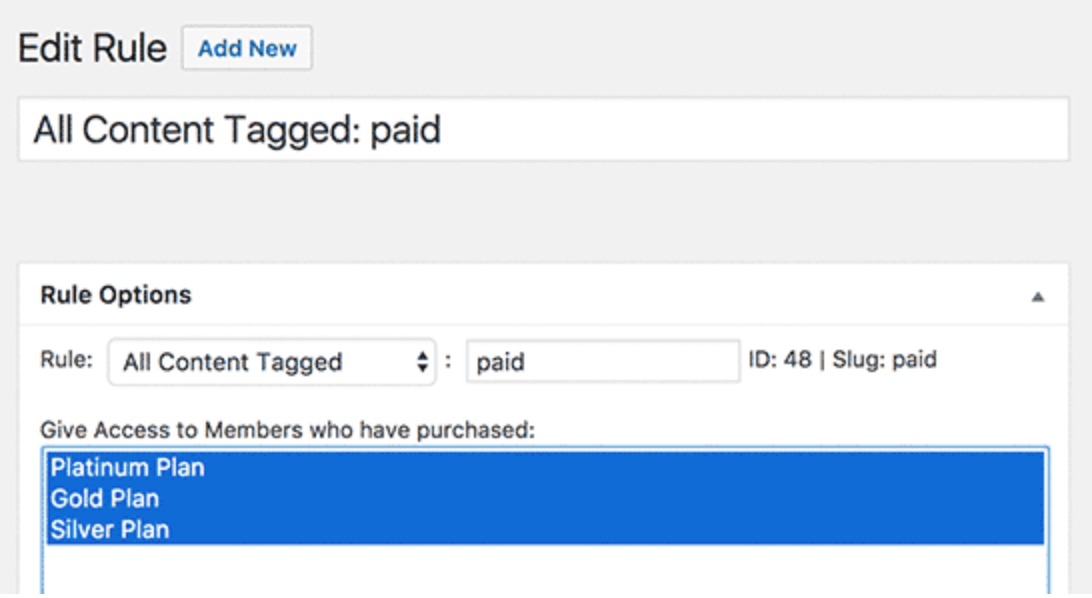
Under Rule Options, you can choose what content you want to protect from non-paying members. For instance, you can set up a rule that all posts that have the tag “paid” is hidden from non-paying members and is available to each membership level.
So, going forward, whenever you create a new post that’s for paying members only, simply add the “paid” tag to it.
You can also create more specific rules for different posts, pages, content categories, child pages, or a specific URL.
There’s also an option for content drip and expiration. Content drip allows you to gradually release content to your members instead of allowing them access to everything at once. And the expiration option can be set up to display premium content for only a certain amount of time before it’s no longer available. If you don’t need these features, leave them unchecked.
Once you’re happy with the rule you’ve created, click Save Rule and repeat the process for as many rules as your membership site needs.
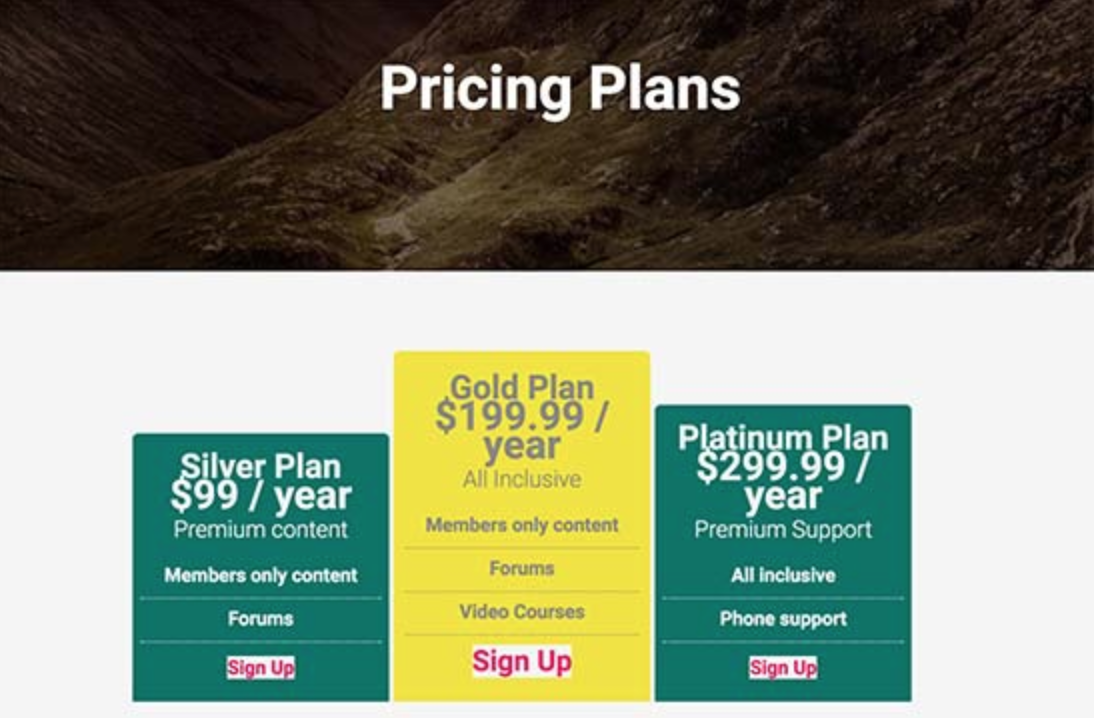
Create an Appealing Pricing Page
Next, you need to create a page on your blog to promote your membership levels and list your prices. Your website visitors will be able to see what they get with each plan on this page, choose the plan they want to subscribe to, and be directed to the payment page. Users who try to access paid content can also be redirected to the page in order to turn more visitors into paying members.
Go to MemberPress > Add Groups, once on the Add Groups page, click Add New. Enter a title for the pricing page and then scroll down to the Group Options metabox and add the membership levels you want to display on the pricing page.

You can also choose a pricing page theme from MemberPress to automatically create a great-looking pricing page.
When you’re satisfied with the settings for your pricing page, click the Publish button to make the page live on your website.
Add Sign up and Login Forms
Finally, you need to add a signup form and a login form to your website. That way your website visitors can easily navigate your site to sign up for your membership site and returning members can log in to their accounts to access your premium content.
To add a login form, go to Appearance > Widgets and add the “MemberPress Login” widget to a sidebar.
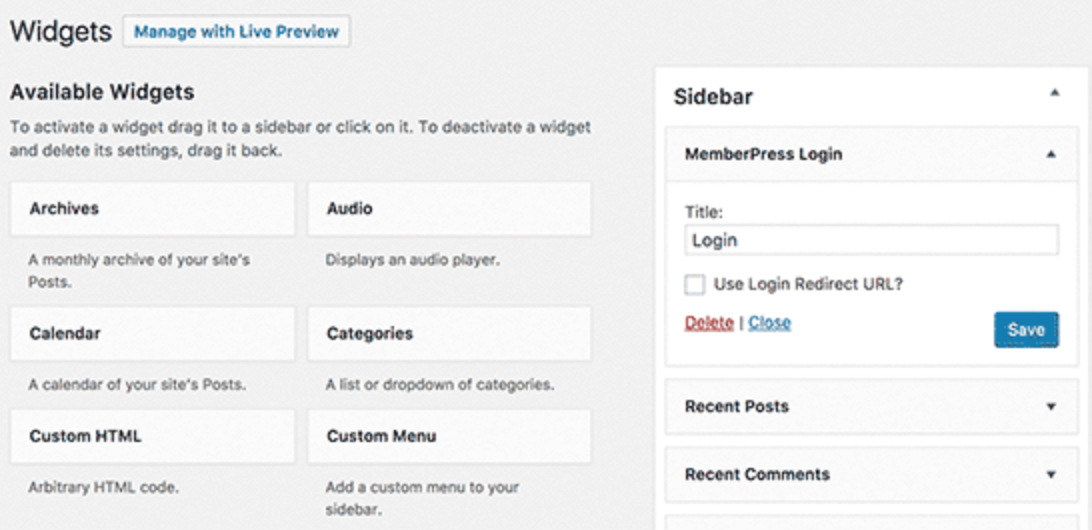
Now your members can sign in to their accounts easily.
To add a signup form to your site we’re going to add a link to the pricing page you created to your navigation menu. To do this, go to Appearance > Menus in your WordPress admin. Click on the Groups tab to expand it, now you should see the pricing plan group you created earlier.
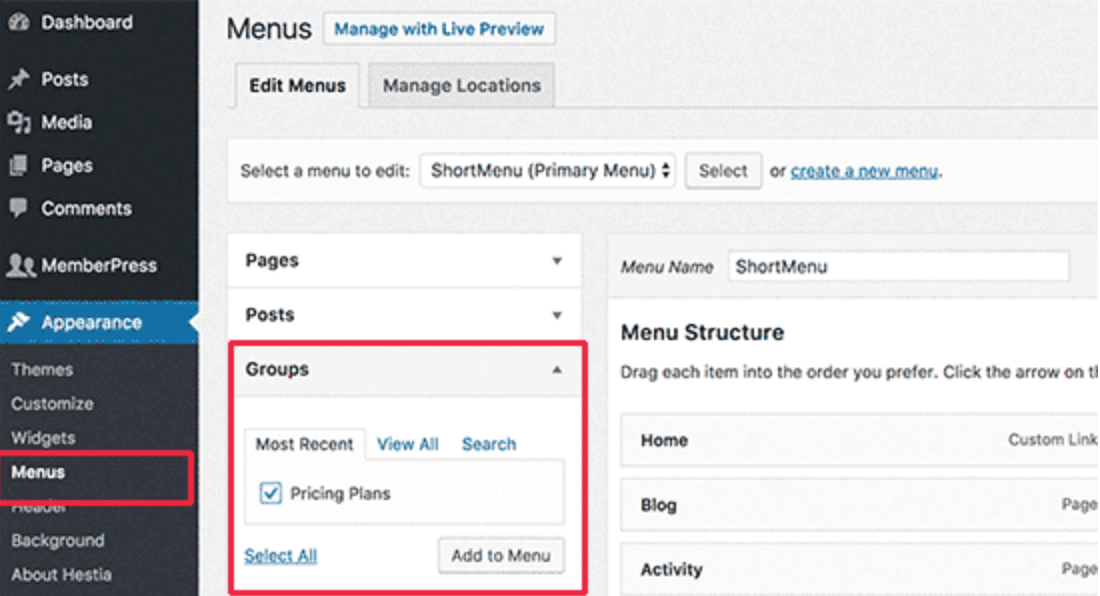
Check the box next to your membership pricing plan and then click Add to Menu. The pricing plan page will now appear on the right along with the other page links that already appear in your navigation menu. You can rearrange the order by dragging and dropping and you can also edit the link text if you wish.
Be sure to log out of the WordPress admin area to make sure each element is now working on your website.
Now your membership site is ready to go. Your website visitors and blog readers can sign up to become a member and you’ll be one step closer to making money from your blog.
Syed Balkhi
Syed Balkhi is an award-winning entrepreneur and online marketing expert. He is the co-founder of WPBeginner, OptinMonster, WPForms, andMonsterInsights.
The post How to Turn Your Blog into a Membership Site with WordPress appeared first on Torque.
