A very common task WordPress site owners ever have to do is to move their site from one server to another.
Reasons to do this include:
- You hate your web host and need a new service.
- You’d like a copy of your site so you can work on it either locally or from a remote server.
There are many plugins to help you do this but all of them require an investment in time to learn the process. Invariably, there are two very different things which will occur.
- You will be exporting your database from your existing installation and importing it into a new WordPress installation.
- You will be copying and moving all of your files from the existing site to the new one. These files include WordPress itself, your plugins, media files, and your theme.
While the latter can be easily done with an FTP (or SFTP) application like Filezilla, Transmit, Cyberduck, and so many others, the same can’t be said about exporting and importing a database. The database is not a file. Therein lies the tripwire for most people, especially those who rarely need to move a WordPress site.
If you fall into that category, here’s the easy way out. It has its drawbacks though which I’ll explain in Step 3.
Step 1: Exporting Your Site
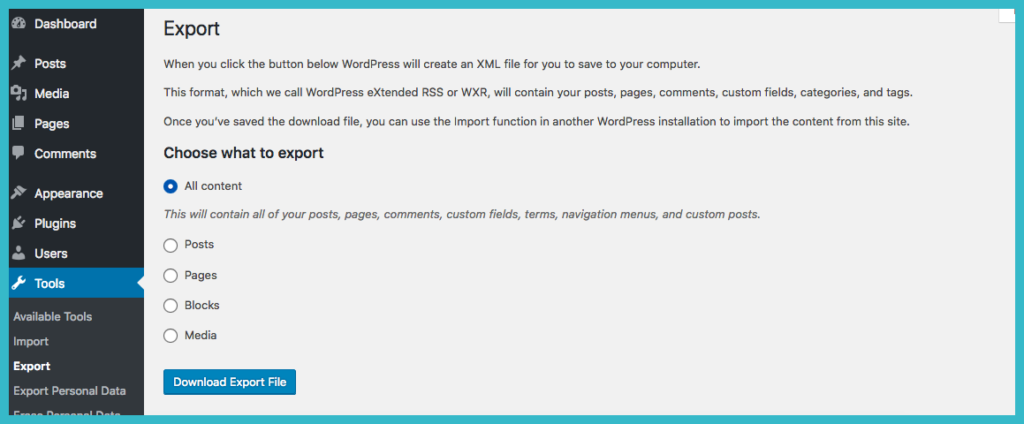
Log into your WP Admin to the site you want to move or from which you want to make a copy. Go to Tools > Export and select All Content.
It will look like this:

If you’re moving from a wordpress.com site, the process is the same but here’s what you’ll see:
WordPress will generate an .xml file. Just remember where you save it in your computer. You’ll re-edit in Step 2.
Step 2: Importing Your Site
After you’ve installed the new WP site (this could be locally or with a web host), log into WP Admin. This time we’ll do the opposite – we will use the .xml file to import your site.
Proceed to Tools > Import and install the WordPress Installer which will be listed at the bottom of the page.
This is a plugin that you’ll only need for this process and can be removed once the migration is finished. Make sure to select the Install link, followed by the Run Importer link.
Here is what you’ll see:
Once that is done, you’ll be re-directed to the Import WordPress page. You’ll be prompted to browse your computer for the .xml file. Click the “Upload file and import button.”
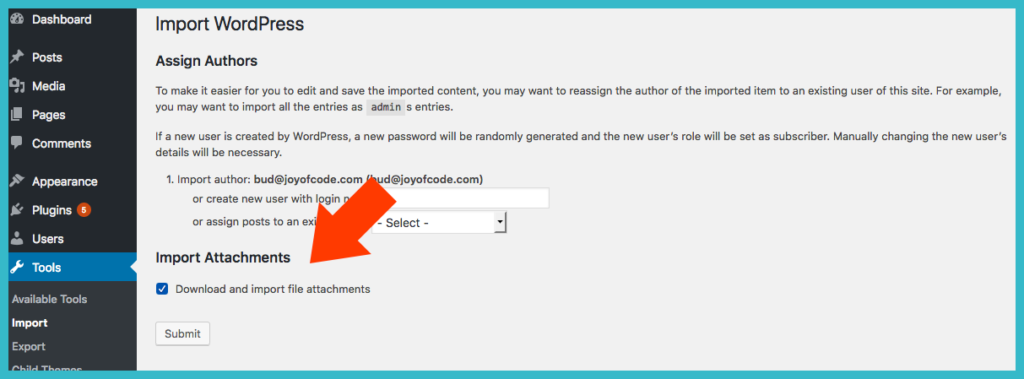
Next, you’ll see a page like this:
The most important thing to do is make sure that the Import Attachment checkbox is selected. If you don’t do that, your media files will not be imported.
Click Submit and, in all likelihood, you’ll see the happy words, “Have fun.” Go ahead and delete the .xml file from your computer as its work is done.
Step 3: Setting Up Your Site
But your work isn’t. Here’s where you will need to do the following:
- Install and activate all the plugins used by the original site.
- Install and activate your theme.
- Remove the standard Hello World blog post and Sample Page.
- Set up your menu.
- Set up your widgets.
You’ll need to make any other changes to your settings as you had them in your original site. For example, you’ll probably need to:
- Go to Settings > General and make sure your WordPress and site URLs are correct.
- Go to Settings > Permalinks and see that your site’s URLs are set up the way you want.
You Can Do It!
This technique of using WordPress’s built-in export/import feature works well for small sites. It’s also the workaround if you don’t want to learn how to migrate your site as an exact copy where no (or very few) changes.
The post The Down And Dirty Way To Migrate A WordPress Website appeared first on Torque.


