Post relationships are connections between different posts on a website. Using them means it is easier than ever to build advanced websites. That is because you can link different custom post types with each other, eliminating data duplication and ensuring you only need to edit each piece of information just once.
Given how time is one of the most precious commodities for both web developers and content creators, any features such as post relationships will be invaluable and could save you days of development by removing some mundane tasks. Those deadlines got a little less tight.
Within this article, I will show you the different types of post relationships, how they can benefit you and an example of how you can implement a many-to-many relationship to make it even easier to build and add content on advanced websites.
What are the three types of post relationships
Each of the three post relationships will make building and running websites with large amounts of data much simpler. First, it is important to identify how each one differs and what it can add to your site.
What are one-to-one relationships:
A one-to-one relationship is a simple post hierarchy between a parent and child post. For instance, on a college website, each student will be assigned their own unique student ID. As no other student will have that number, it means the two custom post types (student and student ID) will have an exclusive relationship.
As an example, Laura might have the ID number 1234567 – Laura will not be connected to any other number while 1234567 will not be associated with any other student.
However, one-to-one relationships have their limitations. If your custom post type needs to be linked to multiple others of the same type then we will need to use another relationship.
What are one-to-many relationships:
In a one-to-many relationship, one element of a custom post type can be associated with multiple elements of another custom post type but not the other way around. Essentially, a child post can belong to only one parent but a parent can have many children.
Let’s imagine there are 30 students who take the Spanish written exam. Each of the results from those 30 students will be connected with that particular exam and nothing else. Of course, the Spanish written exam will have 30 elements (the exam results) linked with it.
Thanks to one-to-many relationships, you can click on the exam page and immediately see all of the results by each student. In addition, when you access a student’s profile you can see their score for the exam. Without this relationship, you would have to add the result twice – to the student and exam pages – and would have to modify it twice if there was an error.
Many-to-many relationships:
Many-to-many relationships occur when multiple elements of one custom post type are associated with a number of elements of another post type.
These relationships give the developer and content creator of the website complete flexibility when it comes to building and updating their content. A site with related posts allows you to separate your information into individual elements which can be combined in multiple ways. Therefore, you can eliminate data duplication as each element only needs to be edited once and it will be changed across your website.
Continuing with our college example, a many-to-many relationship can be illustrated by student and course custom post types. Each student will enroll in a number of different courses while each course will have many different students. Observe the specific example below.
How to create a many-to-many relationship (four steps):
Students and courses example:
- Laura will be enrolled in Spanish and English
- Tom will be enrolled in Spanish and Italian
- Students attending Spanish classes: Laura, Tom, James, Kate and Anna
As you can see from above, our Spanish course has a number of students attending while Laura has enrolled in multiple courses. We can easily create a connection between the student and course custom post types in four steps using Toolset’s relationship wizard.
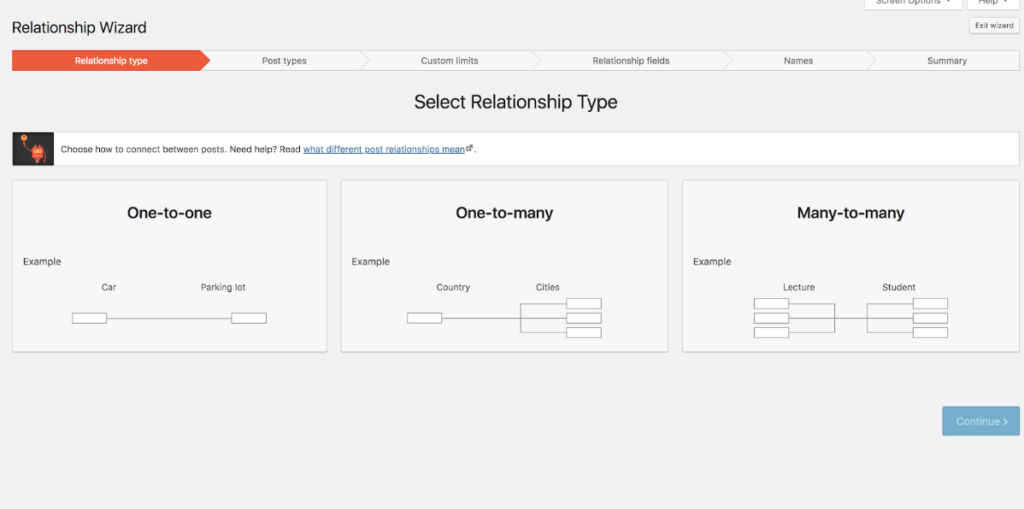
- From the screen below on the relationship wizard, we can select the “Many-to-many” option.
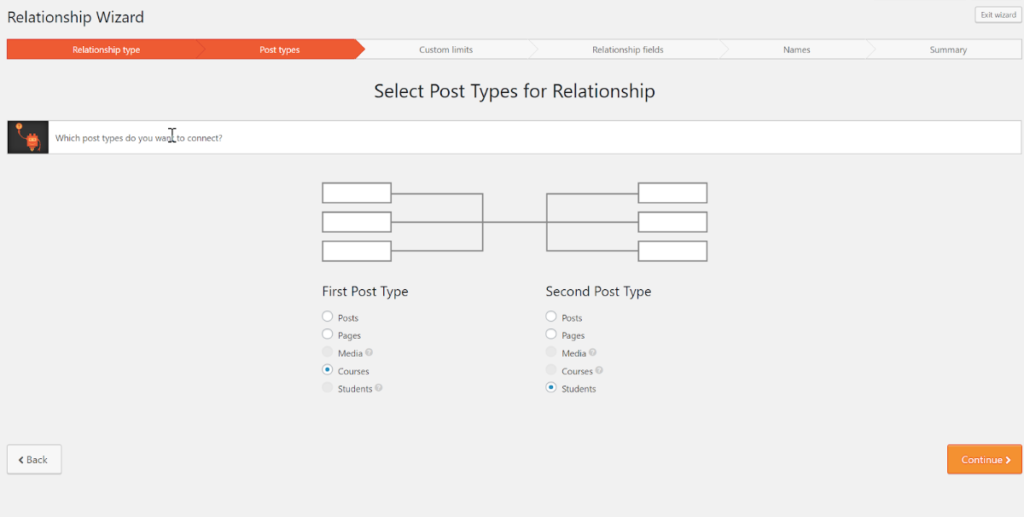
- On the next page, we need to select which custom post types we want to connect. In this instance, we want to link the courses and students post types.
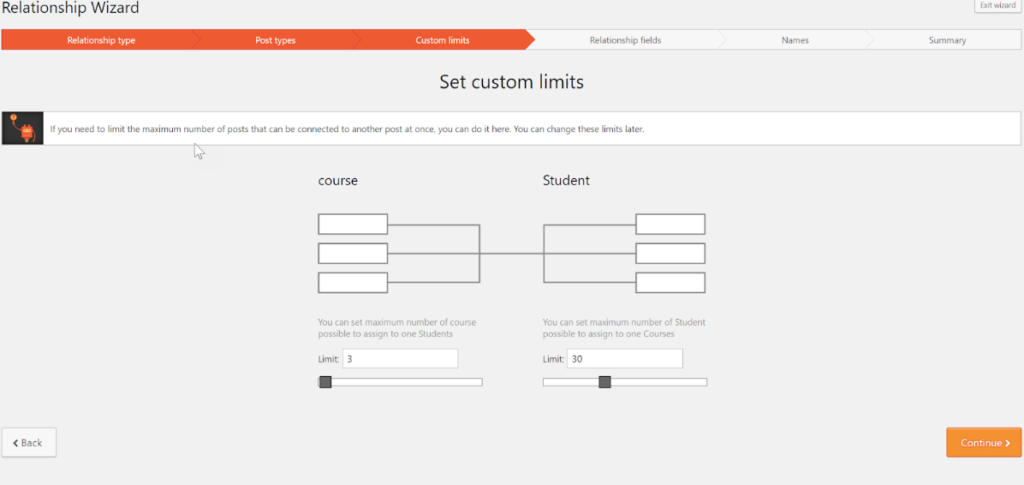
- Using the relationships wizard, we are able to limit the number of post types we can link with each other. For example, imagine if your Spanish course only has 30 spaces and each student can only enroll in three courses. We can easily set these restrictions here.
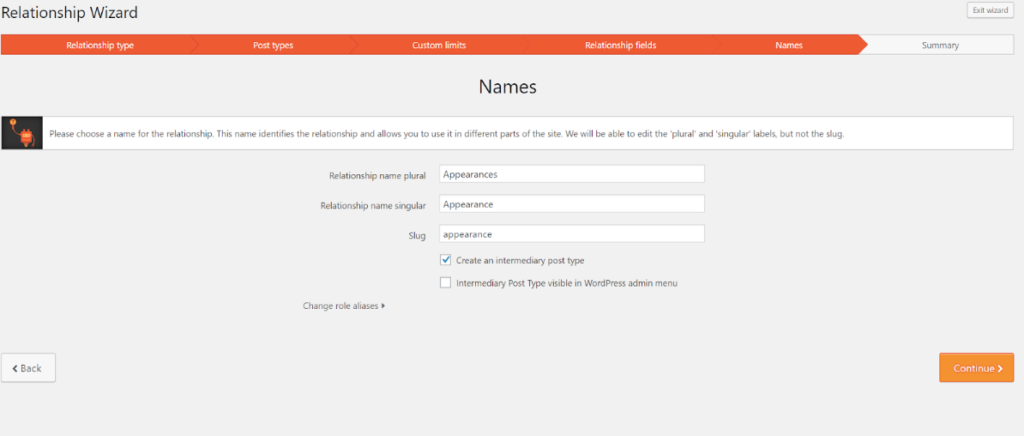
- In the next stage, it is possible to add relationship fields to your many-to-many relationship such as the number of credits each course is worth. But for this purpose, we will leave it. All that is left is to give it a name, we will call the relationship “Appearances.”
We are now ready to start connecting our courses and students post types.
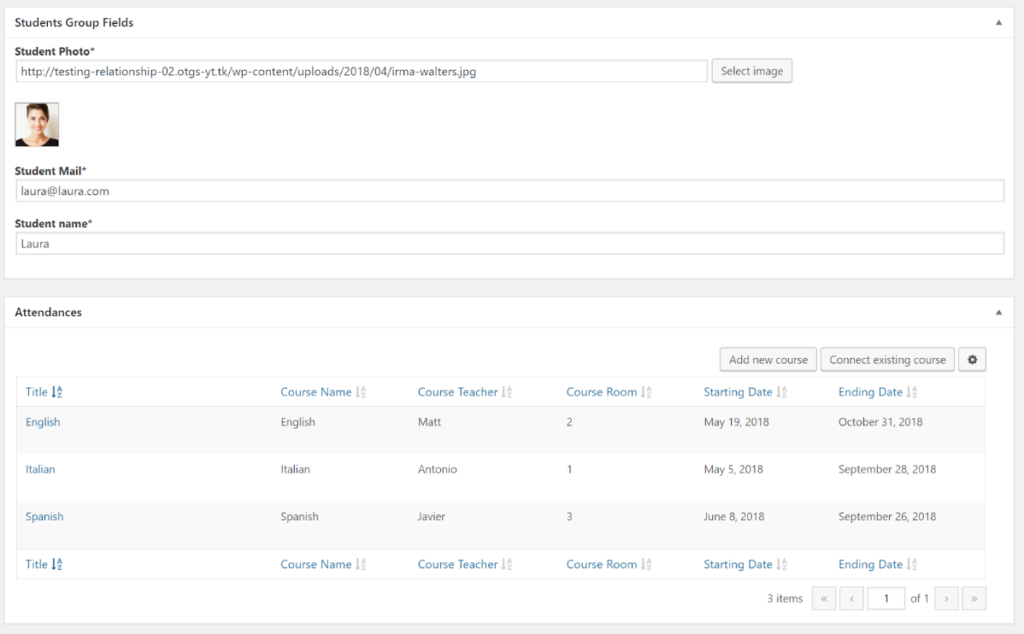
If we look at Laura’s student page on the back-end we can see that she is enrolled in Spanish and English lessons. However, it is easy to add additional courses if required. All we would have to do is either create a brand new one by selecting “Add new course” or we can select “Connect existing course” to add another of the available courses. We can try the latter option and add Laura to the Italian course.
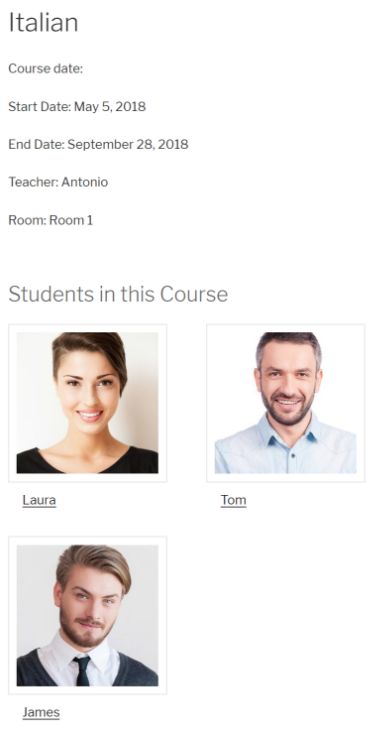
Instead of manually adding her name to the Italian course page and vice versa, we can simply create a new connection with just one click. Here is how it looks on the front-end.
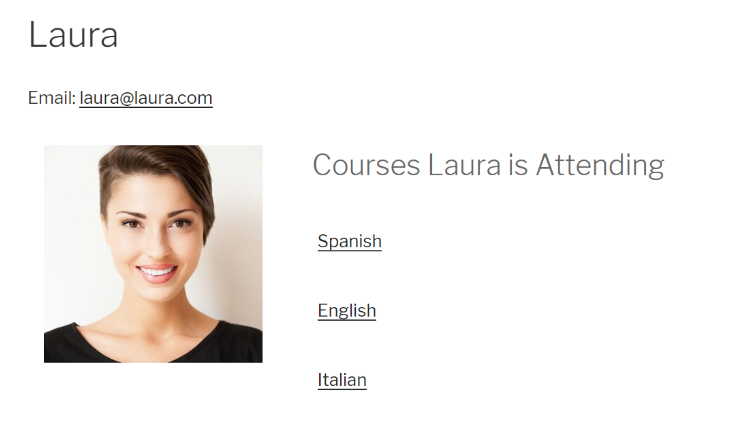
And notice how we managed to create this many-to-many relationship without any coding whatsoever.
It is not only on the back-end that we can add students to courses. We can also create a form so that users can easily manage it on the front-end.
Create a form to connect additional custom post type elements
With many-to-many relationships, it is simple to add further connections to your custom post types. Instead of manually updating each custom post type, we can add them with a couple of clicks on the front-end.
Assign a course to a student from the front-end
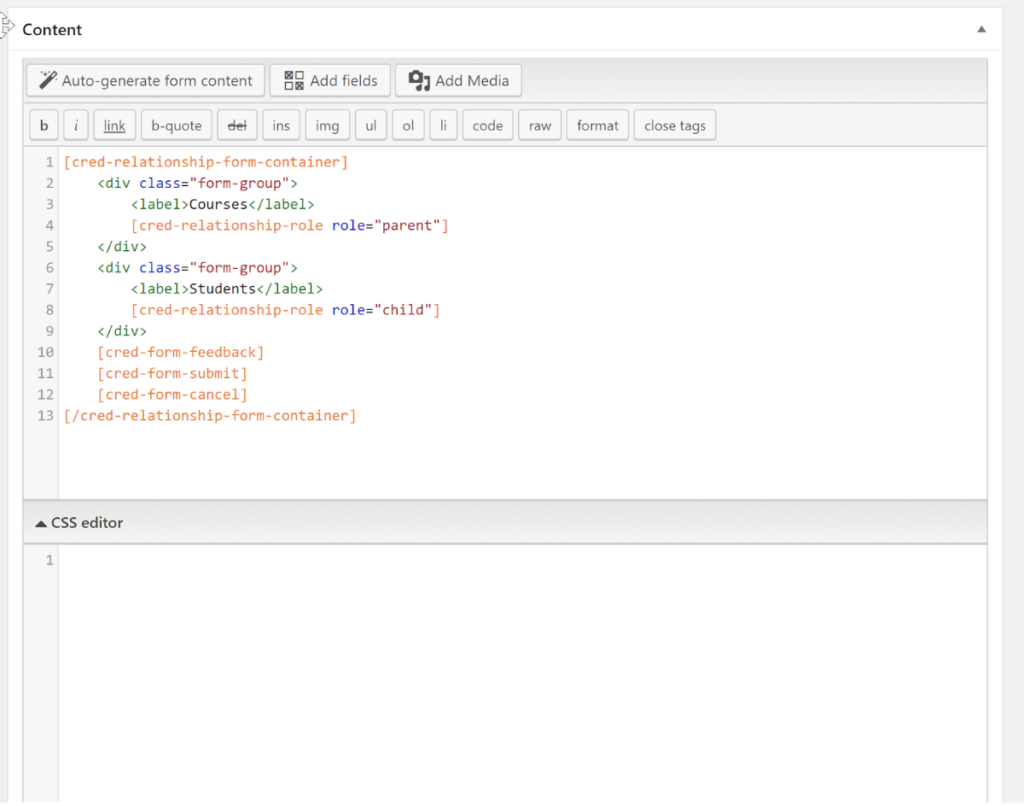
We can create a form on the front-end using Toolset’s post relationship forms feature.
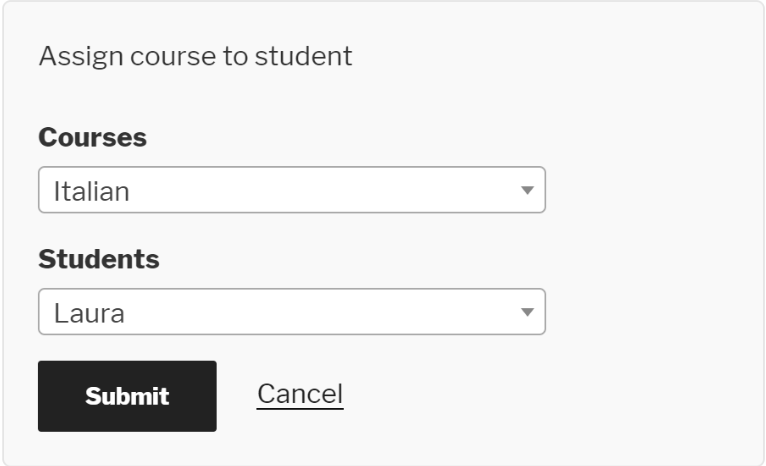
Once we have created our form, here is how it will look on the front-end:
This time instead of enrolling Laura on the Italian course through the back-end, we can do it using the form. Once we submit the change we can now head to either the Italian course post or Laura’s own student profile to see that it has been immediately updated. Here is how the Italian course post looks.
If you clicked on each of the courses which Laura is attending, you will see a list of all the other students who are taking each one. You will also notice that we have added a number of other fields which will be of use to users who want to find out more about the course.
Designing reusable templates for your content
Each course will need to use the same fields to provide further information to their students. Using Toolset, we can save time by creating reusable templates which will make it easier to add this data.
Instead of manually typing the information into each subject and potentially missing out on one field, reusable templates ensure each subject will have the exact same set of custom fields.
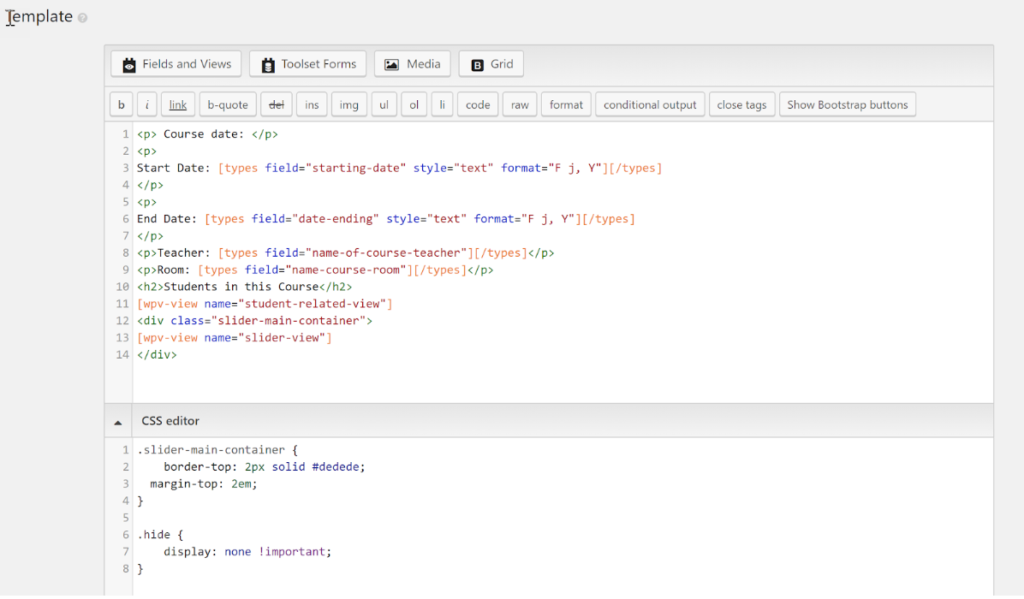
Here’s how the reusable template looks on the backend.
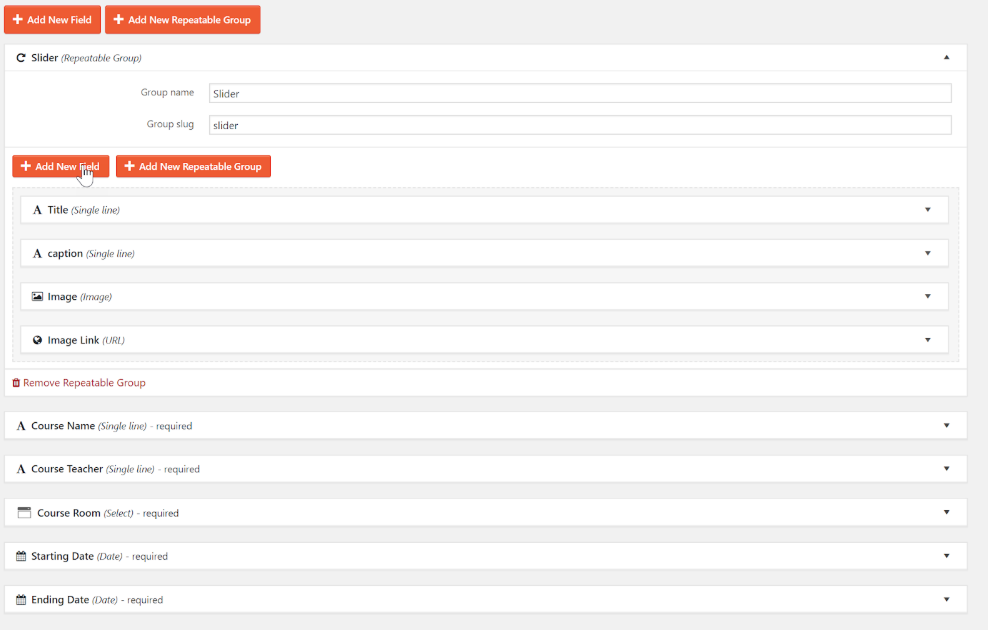
As well as basic information about the course such as the teacher, location of lessons and course length, we also want to give students an insight into the course itself. Each language syllabus might include lessons on grammar, reading, writing and speaking. Within each skill, we will want to provide the same fields outlining what you will be tested on during the course. Rather than creating the list of custom fields for each part of the syllabus four times, we can make one set and repeat them – saving us a significant amount of time.
To do this, we can use repeatable field groups. Observe below how we can create a slideshow of each skill which will contain the same fields, making it easier to add content to your website.
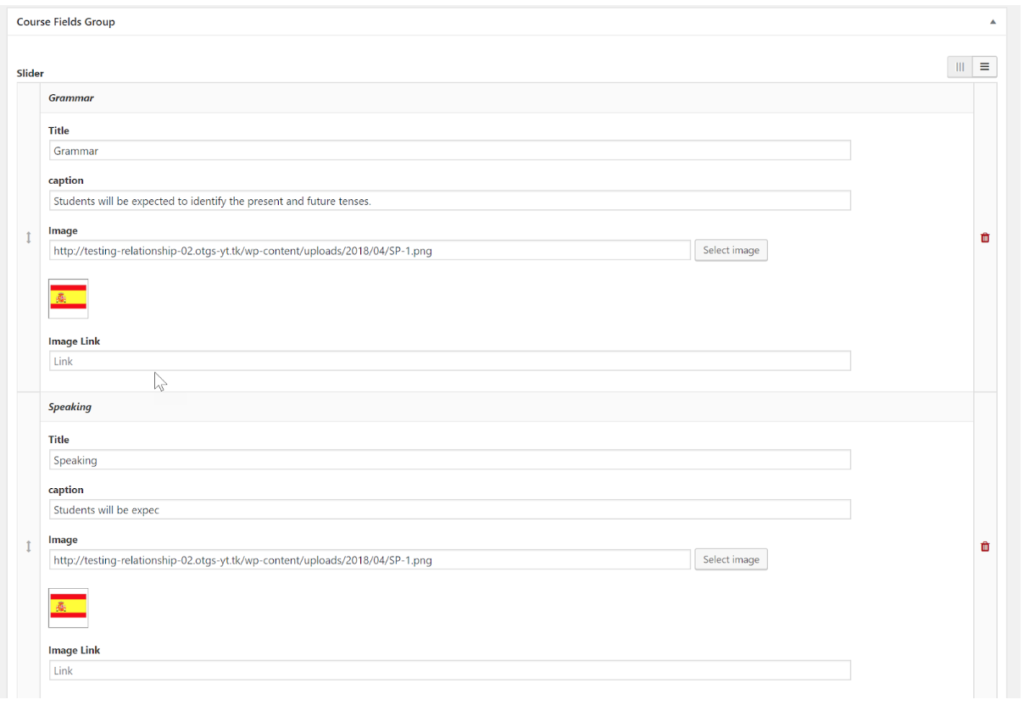
From here, we are able to add the information to the “Slide” repeatable field group as we are creating our courses post types.
As you can see, it is straightforward for content creators to add the required information for each skill.
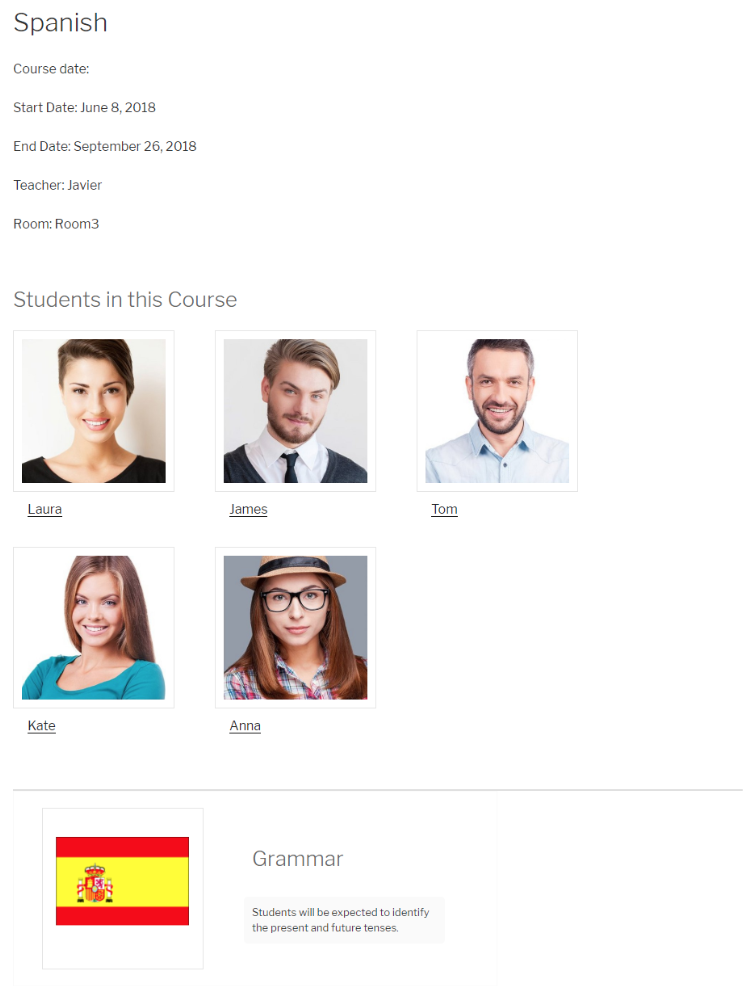
Now that we have added our reusable template, complete with repeatable field groups, here is how it looks on the front-end.
Conclusion
With post relationships, you will be able to connect your data more easily than ever before and also display it on the front end. When you have potentially thousands of different custom post type elements to deal with, it could save you days in building and adding content to your advanced website.
The post How Post Relationships Make it Easier to Build Advanced Websites appeared first on Torque.
