If your client serves a non-English speaking audience, you may need to produce a website that works in multiple languages. Given that implementing multiple languages means a potential wealth of new custom, don’t let the fear of tackling a multilingual website stop you from working with these types of clients.
While handling multiple languages increases your project scope, the technical aspect can be made manageable with the help of plugins. Polylang is one such open-source plugin, enabling you to quickly build multilingual WordPress websites. You’ll need to bring in your own translations, but being able to add multilingual sites to your repertoire enables you to take on a wider variety of clients and charge more.
In this article, we’ll explore the benefits and implications of taking on a site featuring more than one language. Then, we’ll offer you exact steps you can take to execute it with Polylang. Let’s dive in!
Why You Should Be Building Multilingual Websites

While English is certainly the dominant language online, it only represents a quarter of all internet users. That’s 75 percent of the internet you’re missing out on serving if you don’t work with any other languages!
Meanwhile, WordPress is currently translated into 169 languages. This means users from any of these languages can access the WordPress admin in their native tongue, which makes it much easier for them to use the platform.
This is a huge market opportunity for any web developer looking to take on new global clients. Whether you recommend to your current clients that they expand their market by translating their website or seek out new multilingual clients, the world gets a lot bigger when you go beyond English.
In other words, by offering services for multilingual WordPress websites, you can tap into lower-competition markets (niche content for specific languages) and serve more clients. This is particularly important because over 50 percent of international buyers will only purchase from a site available in their native language. Naturally, multilingual websites open up new opportunities for local Search Engine Optimization (SEO) as well.
By now, you’re probably pretty excited to get started! Let’s take a look at what you’ll need first.
What You’ll Need to Build a Multilingual Website

The technical elements are made relatively simple with plugins. However, before getting into those, it’s a good idea to put your ducks in a row before launching into a new project. Here are a few things you’ll need to be prepared with:
- Translations of each page you plan to offer in multiple languages.
- Have your ‘language codes’ handy. These are simply designators related to a country that are used in the translation process. You can find these in the WP Locals column of the page for WordPress’ translation teams.
- Know which translations will need the Right-to-Left (RTL) languages, and ensure your theme supports these if so.
Getting translations can be a little extra work if your client isn’t offering them. You can hire your own translators on sites like Upwork, or use translation software like Babylon.
Armed with these three things, you’re ready to start translating your client’s website!
How to Translate a WordPress Website With Polylang (In 4 Steps)
WordPress plugins like Polylang make it relatively simple to support multilingual websites. Once you have your translations in hand, the hardest part is practically over. You’ll just need to keep it all organized long enough to insert each version into WordPress. Without further ado, let’s jump into doing just that.
Step 1: Install Polylang
There are quite a number of plugins for translating posts in WordPress. Our recommended solution is Polylang. It’s a well-established tool with over 300,000 active users at current writing, and plenty of benefits:
- Frequent updates keep the plugin running smoothly as WordPress advances.
- There are no limits on the number of languages you can translate.
- You can translate posts, pages, media, categories, post tags, menus, and widgets – even custom post types and RSS feeds are included!
- Best of all, the most important features of the plugin are free. You can upgrade to advanced use cases, but most situations will be covered by the free version.
Once you get Polylang installed, activated, and running on your WordPress site, it’s time to start configuring for your target languages. This is where those language codes will come in!
Step 2: Configure Polylang for Your Required Languages
Now you’re ready to configure Polylang so it supports your desired languages. Knowing your language codes will help you ensure you’re selecting the right options in Polylang.
To get started, visit the Languages screen on your WordPress dashboard. From here, you’ll find a drop-down with a huge selection, so choose your primary language from the list:
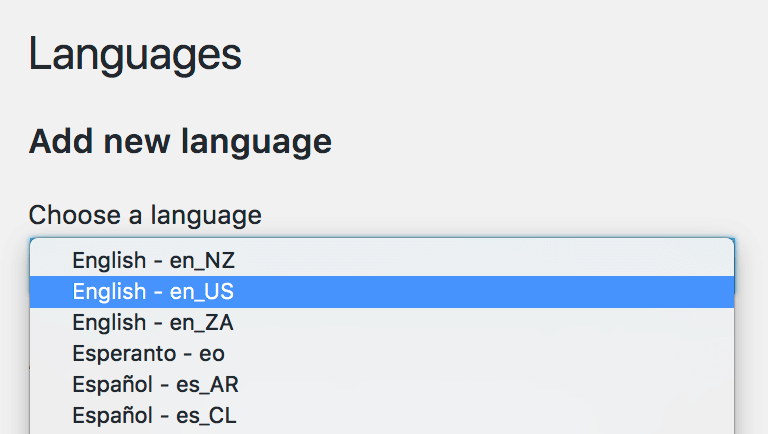
If it’s a language spoken in multiple countries, be sure to select the correct version. This is where having your unique language code comes in handy. Continue by creating a label for your language, selecting whether it is RTL, and finally choosing the correct flag:
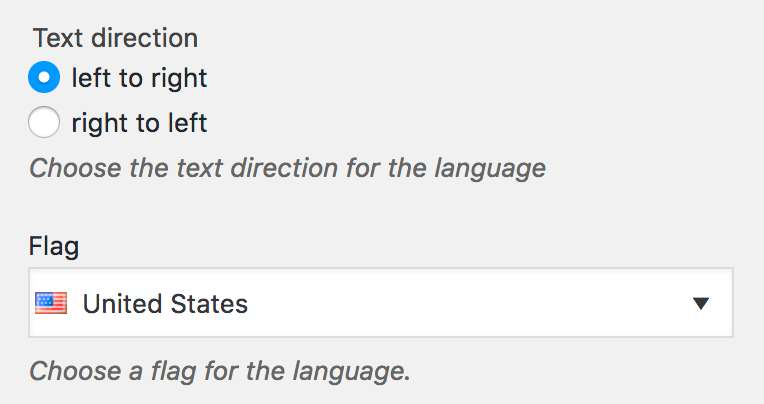
Click Add new language once you’ve finished customizing the language information, then rinse and repeat for each secondary language you’ll be adding to the website. You’ll likely see a warning at the top of the page saying There are posts, pages, categories or tags without language.

To fix this, simply click the provided link for setting all site content to the default language.
Step 3: Insert Your Multilingual Content
Once Polylang is ready to accept your incoming multilingual content, it’s time to actually add it. This process can be a little confusing at first, but after a few pages, it’ll feel like second nature. First, visit the Posts > All Posts page. Here, you’ll see a visual representation of which pages have translated versions or not. Checkmarks represent completed posts, and a Plus (+) sign means you need to add a translation for that post:

Simply click the + sign for the post you’d like to add a translation for. You’ll be presented with the New Post interface, but with a new option for selecting languages on the right-hand side. Go ahead and insert your translated content, then save your changes:
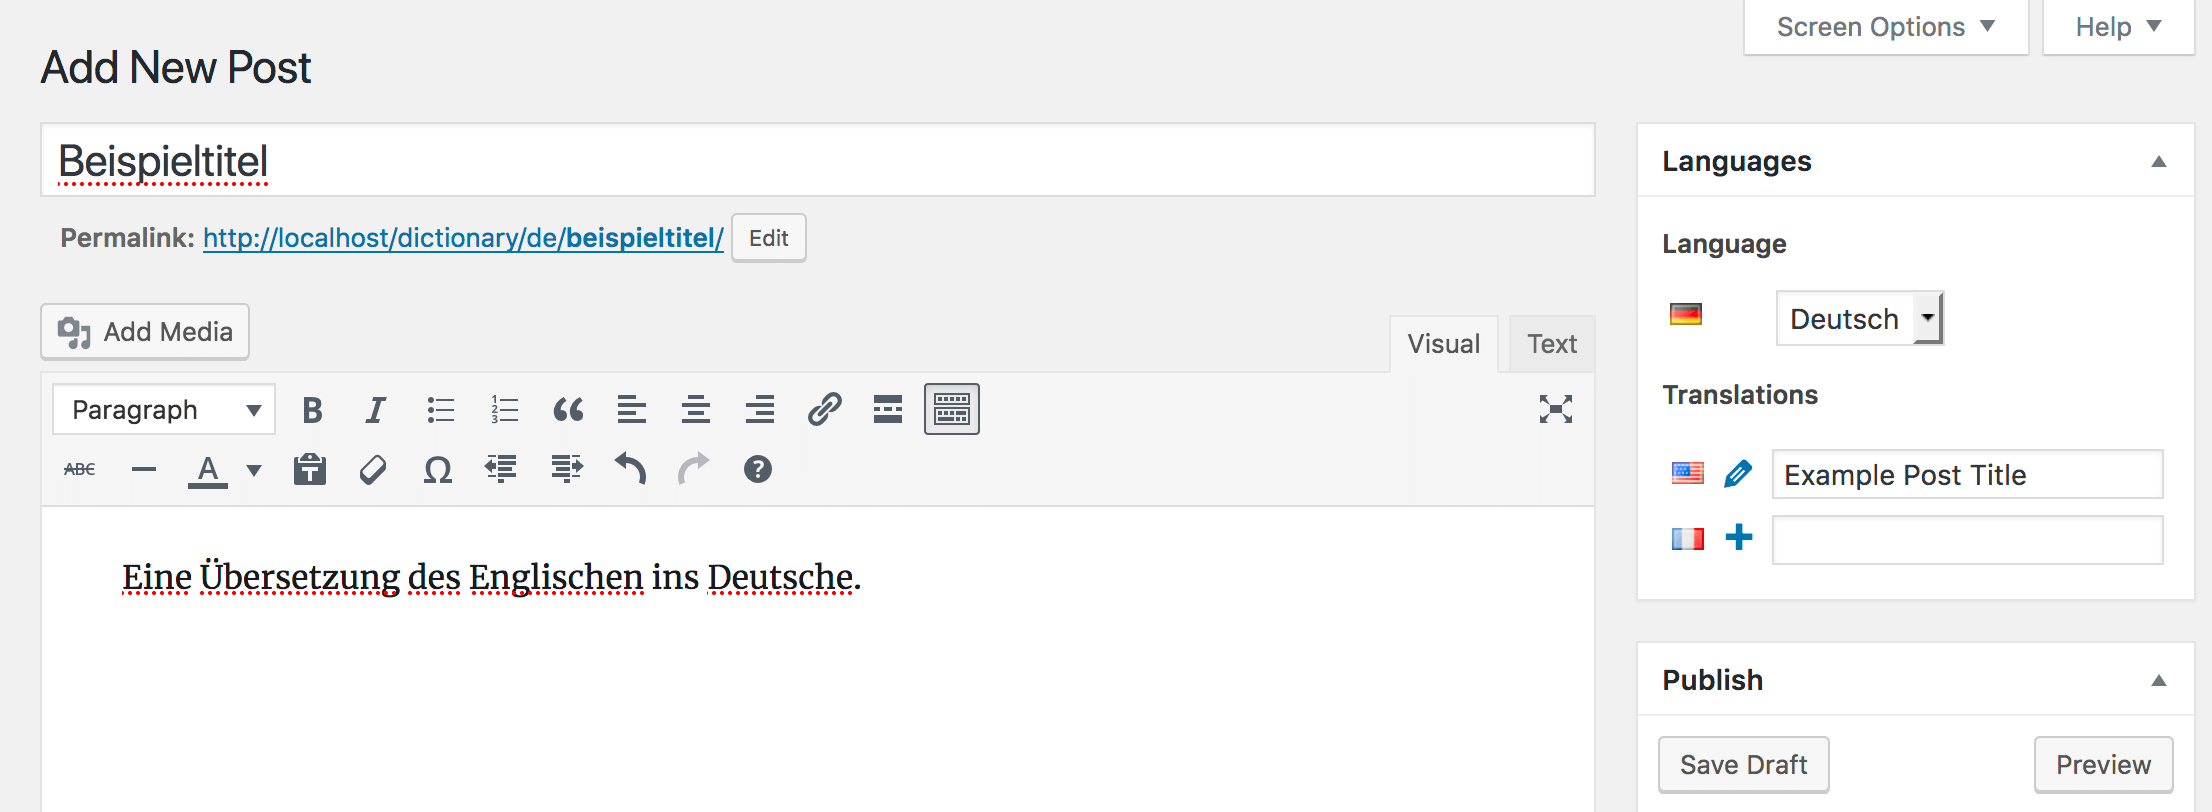
You can follow this procedure for all of your pages and posts. You’ll be able to tell whether every page is covered by looking for the + signs in each language column.
Step 4: Add a Language Selector to the Design
You’re almost finished. All that’s left is to give your visitors access to the various multilingual versions of your website. First, go to Appearance > Menus within WordPress, and select your theme’s primary menu from the list for editing:
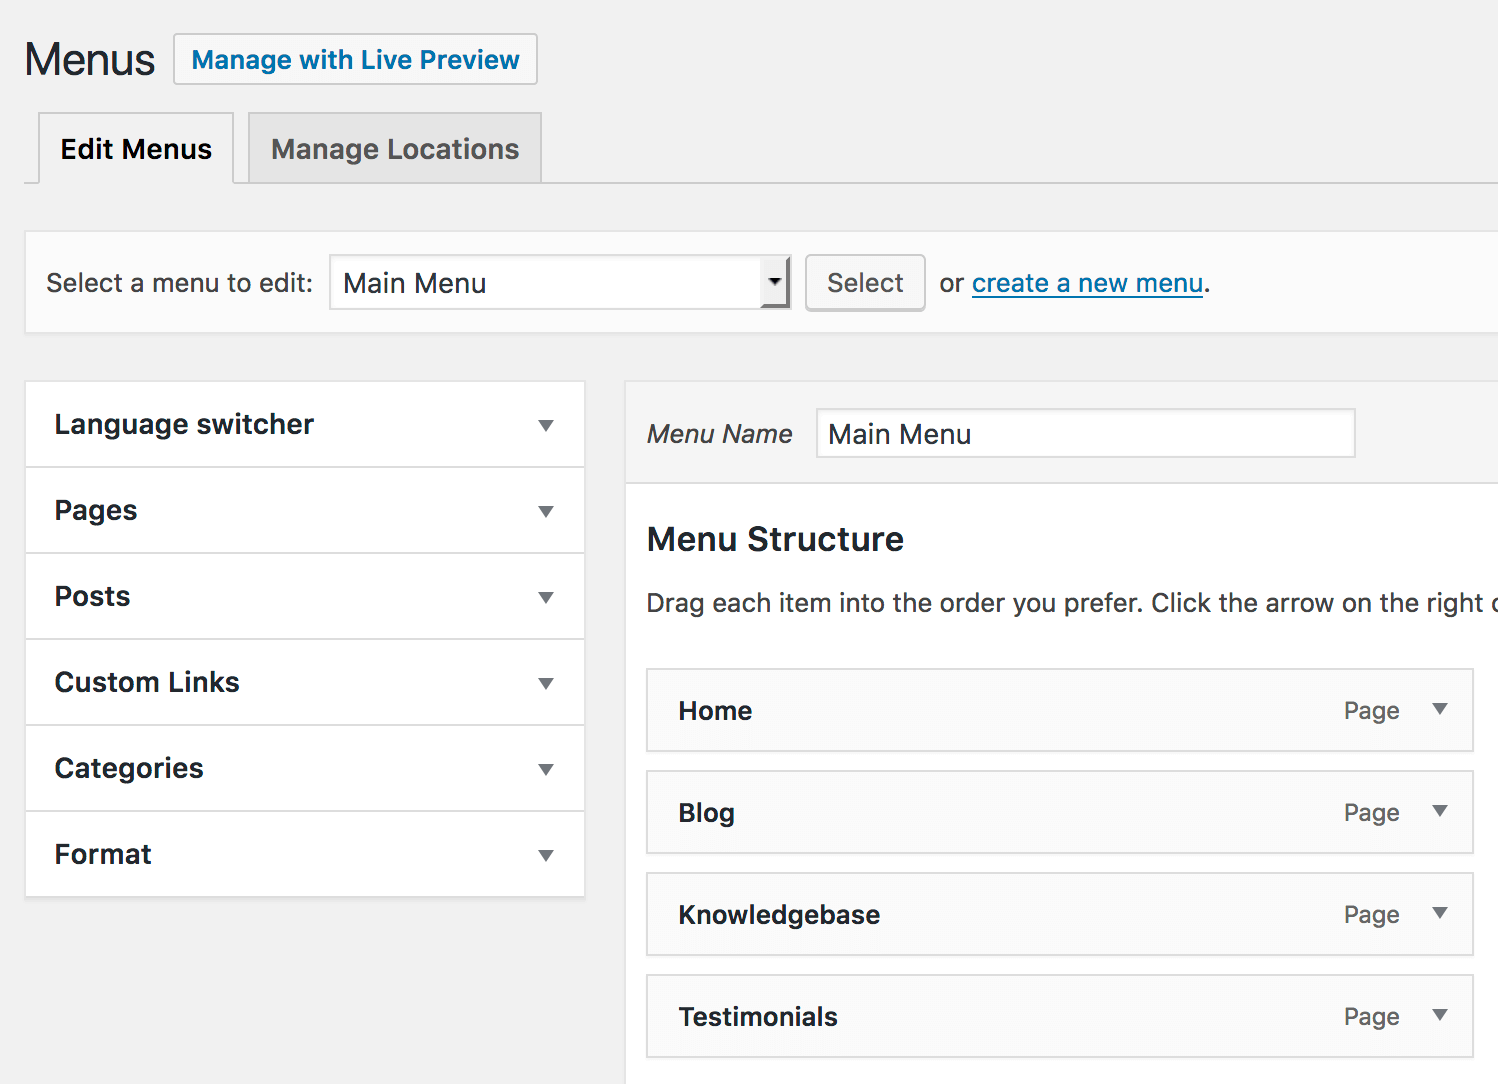
Next, find the new Language Switcher option, and add it to the menu. This simply offers a way to change languages from your menu. Once you’re finished, save your changes:
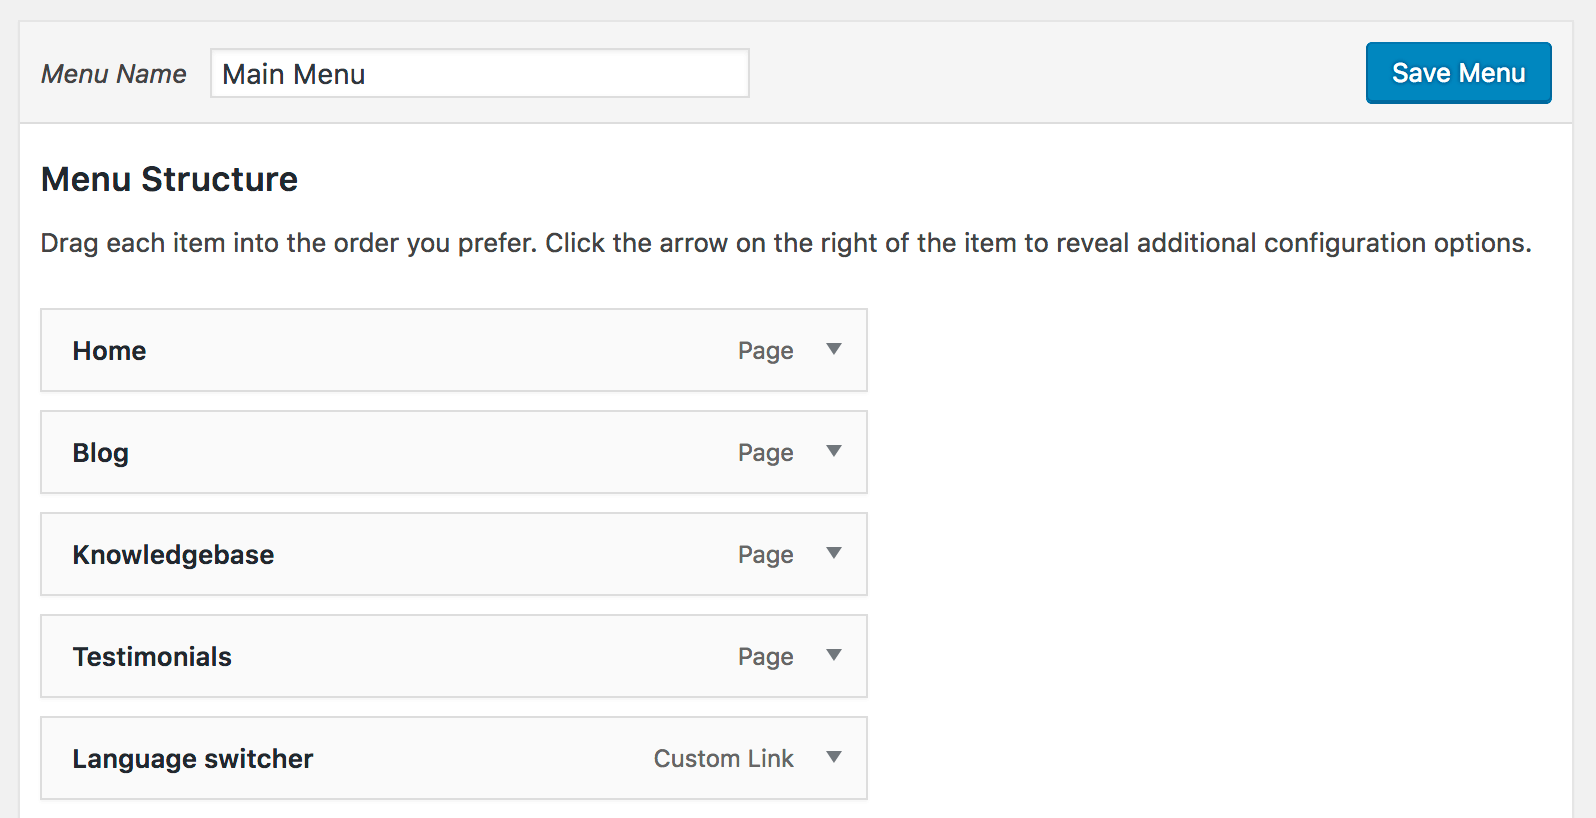
On the front end of your website, you’ll now see the option to switch between each language.

If you’re not a fan of the default settings, you can go back to the menu editor and expand the Language switcher drop-down. By checking the options you desire, you can create a unique method for selecting languages. In our example, we’ve decided to offer the languages in a drop-down menu, along with their respective flags:

Again, check your handiwork on the front end, and continue to make changes until you’re happy:

Congratulations – you now have a fully functional website that supports multiple languages! If you need any help or are interested in setting up anything more custom, the documentation should be your first port of call.
Conclusion
The internet enables you to connect with clients and audiences all over the world, but to do so means you may need to offer a website in multiple languages. WordPress makes this relatively simple to do through plugins such as Polylang, helping you to earn your full potential as a globally-accessible developer.
To review, we explained the benefits and requirements of a multilingual website. Then, we showed you how to get started with Polylang:
- Get familiar with the capabilities of the plugin.
- Configure the plugin to include your required languages.
- Insert all of your multilingual content.
- Add the language selector to your website’s design.
What questions do you have about translating a WordPress website using Polylang? Ask away in the comments section below!
Image credit: Deanna Ritchie.
The post The Beginner’s Guide to Translating a WordPress Website With Polylang appeared first on Torque.
